Tag Archives: vintage trailer

Catch up on our vintage trailer.

Alright. Alright. Alright ( in my best Matthew McConaughey voice)

Its been a while, I know, and I have a lot to catch up on. My computer died on me and until recently didn’t have a computer to keep update on our trailer. So much has happened since last summer and we are SO close to getting it finished. IT WILL BE ON THE ROAD THIS SUMMER.


OK. lets rewind back to the end of last summer….


IMG_2567 IMG_2568

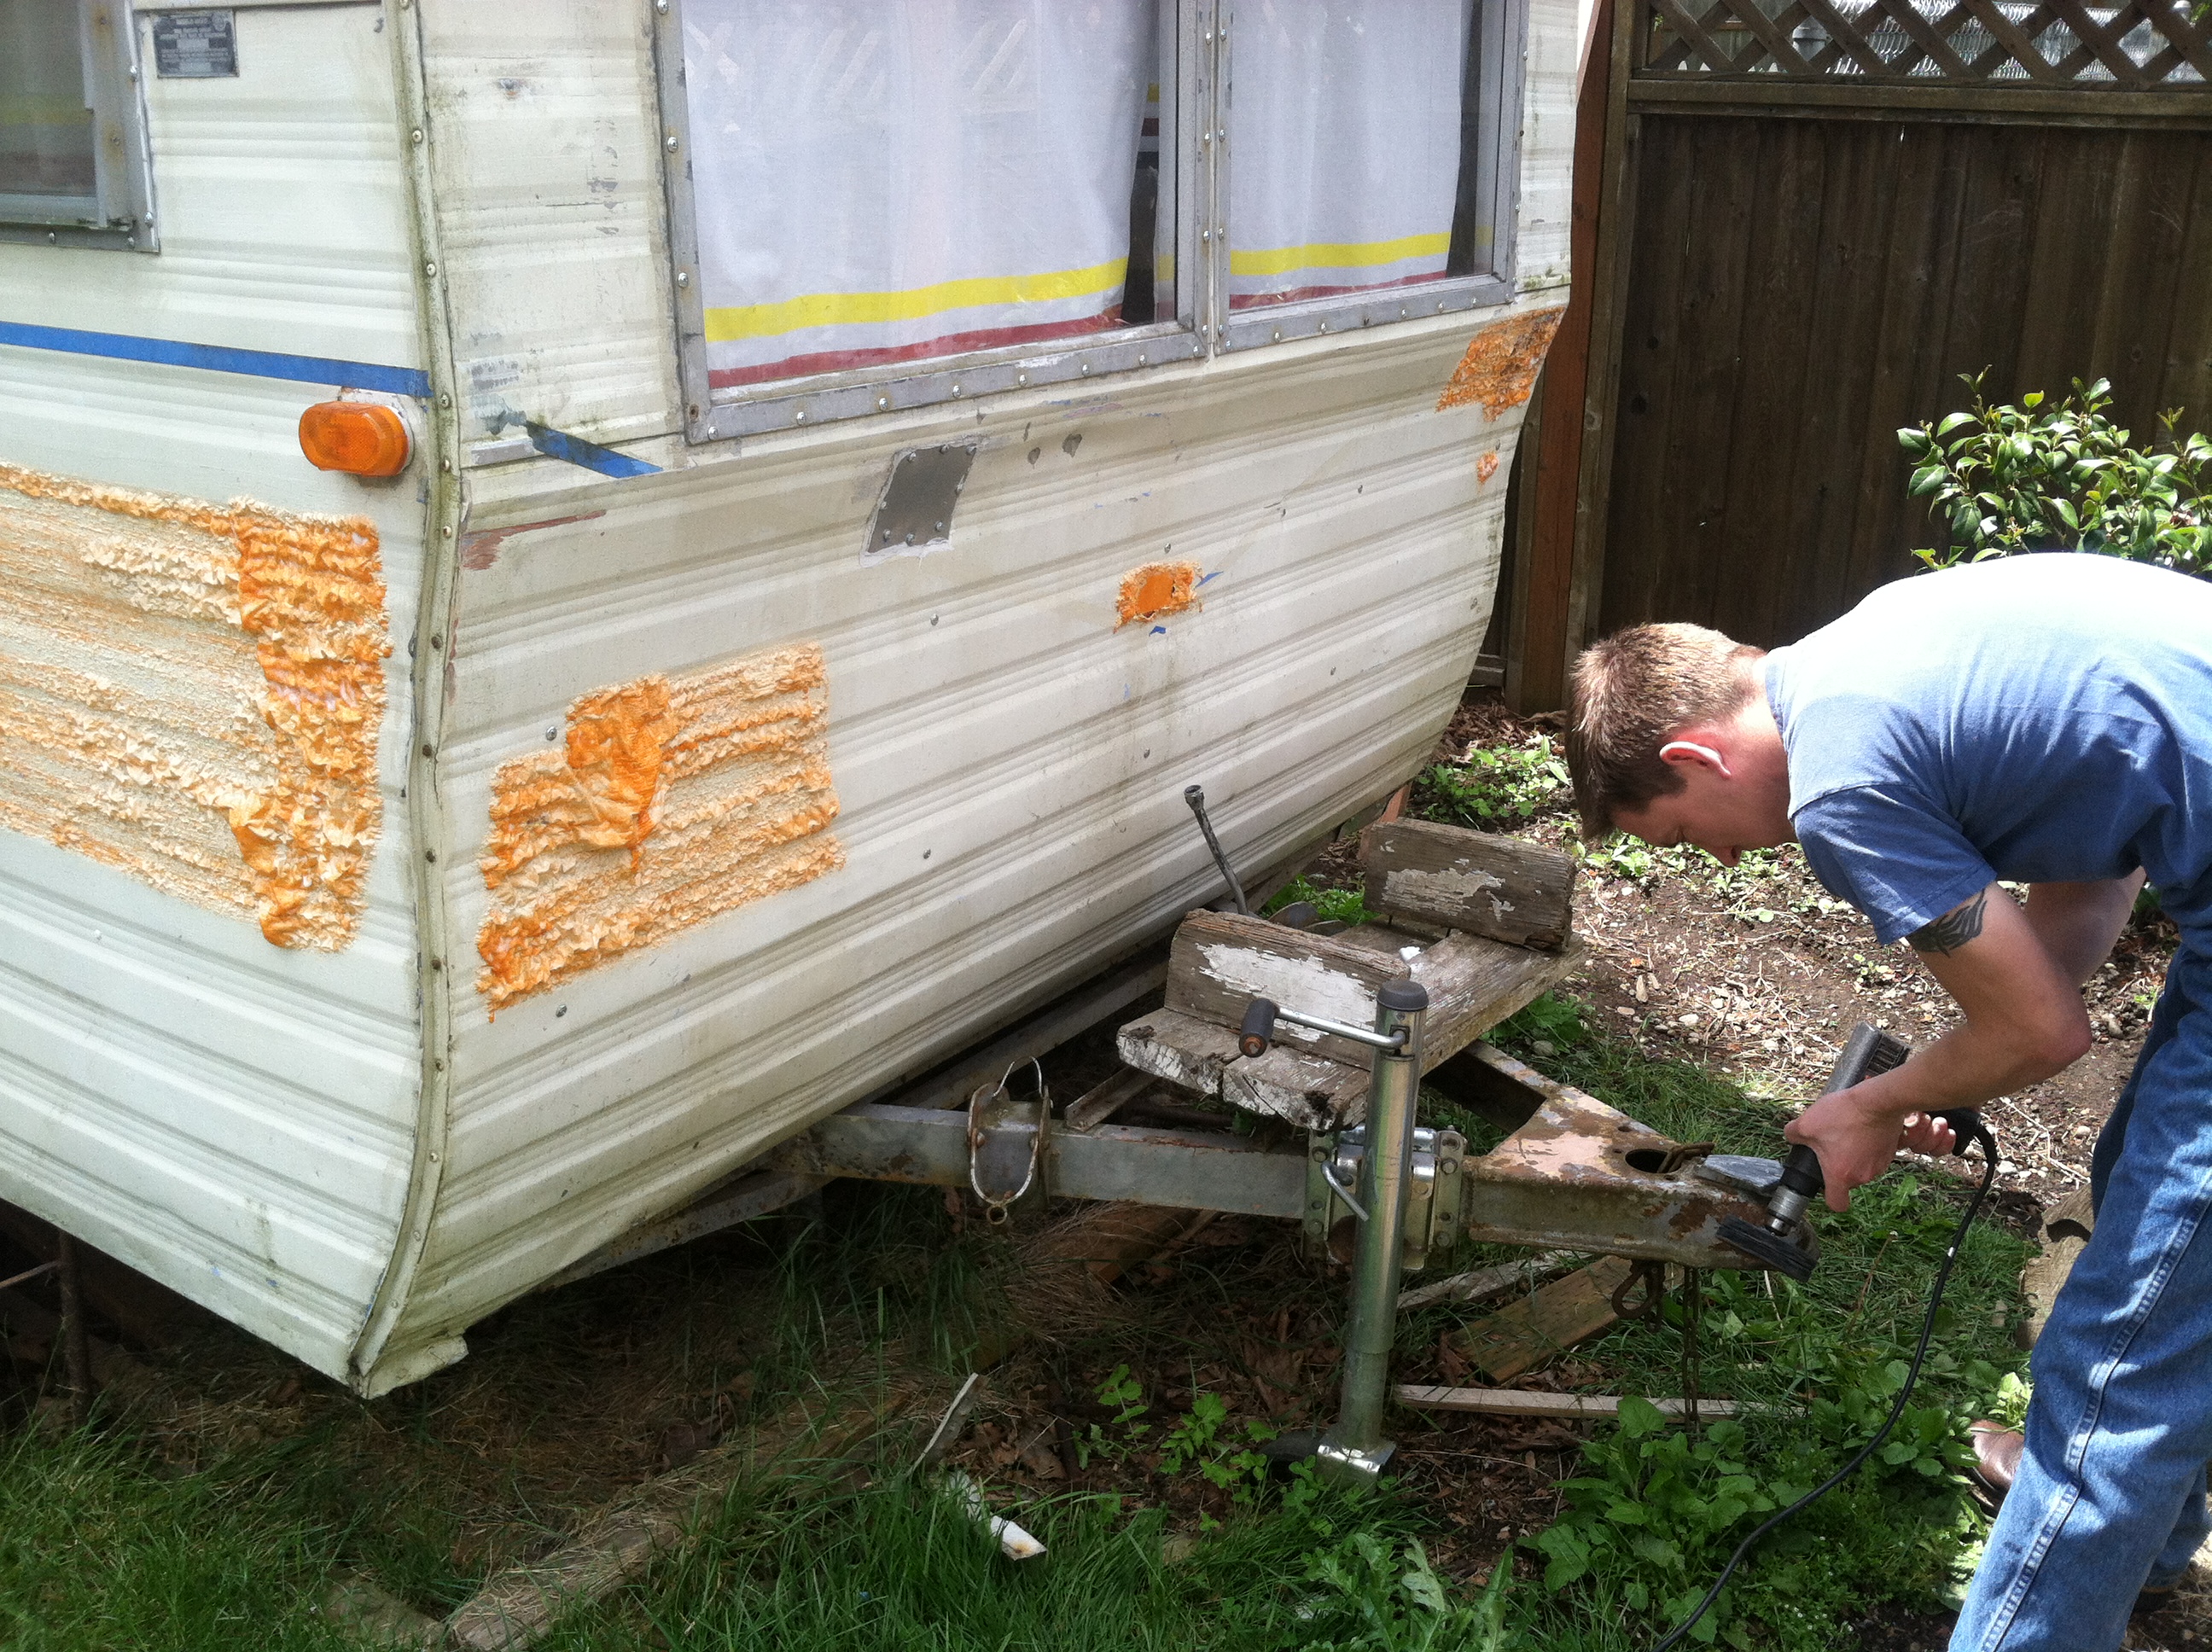
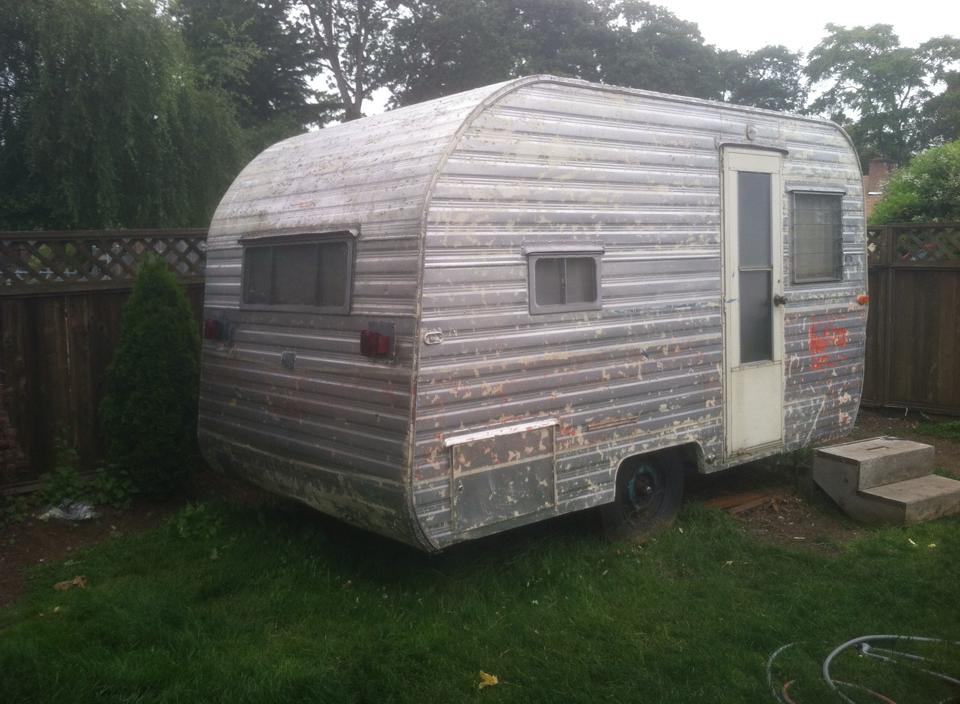
Most of summer of 2014 was spent getting all the paint off the trailer to get it ready for a new coat of paint. MAN! What a job! It took F.O.R.E.V.E.R

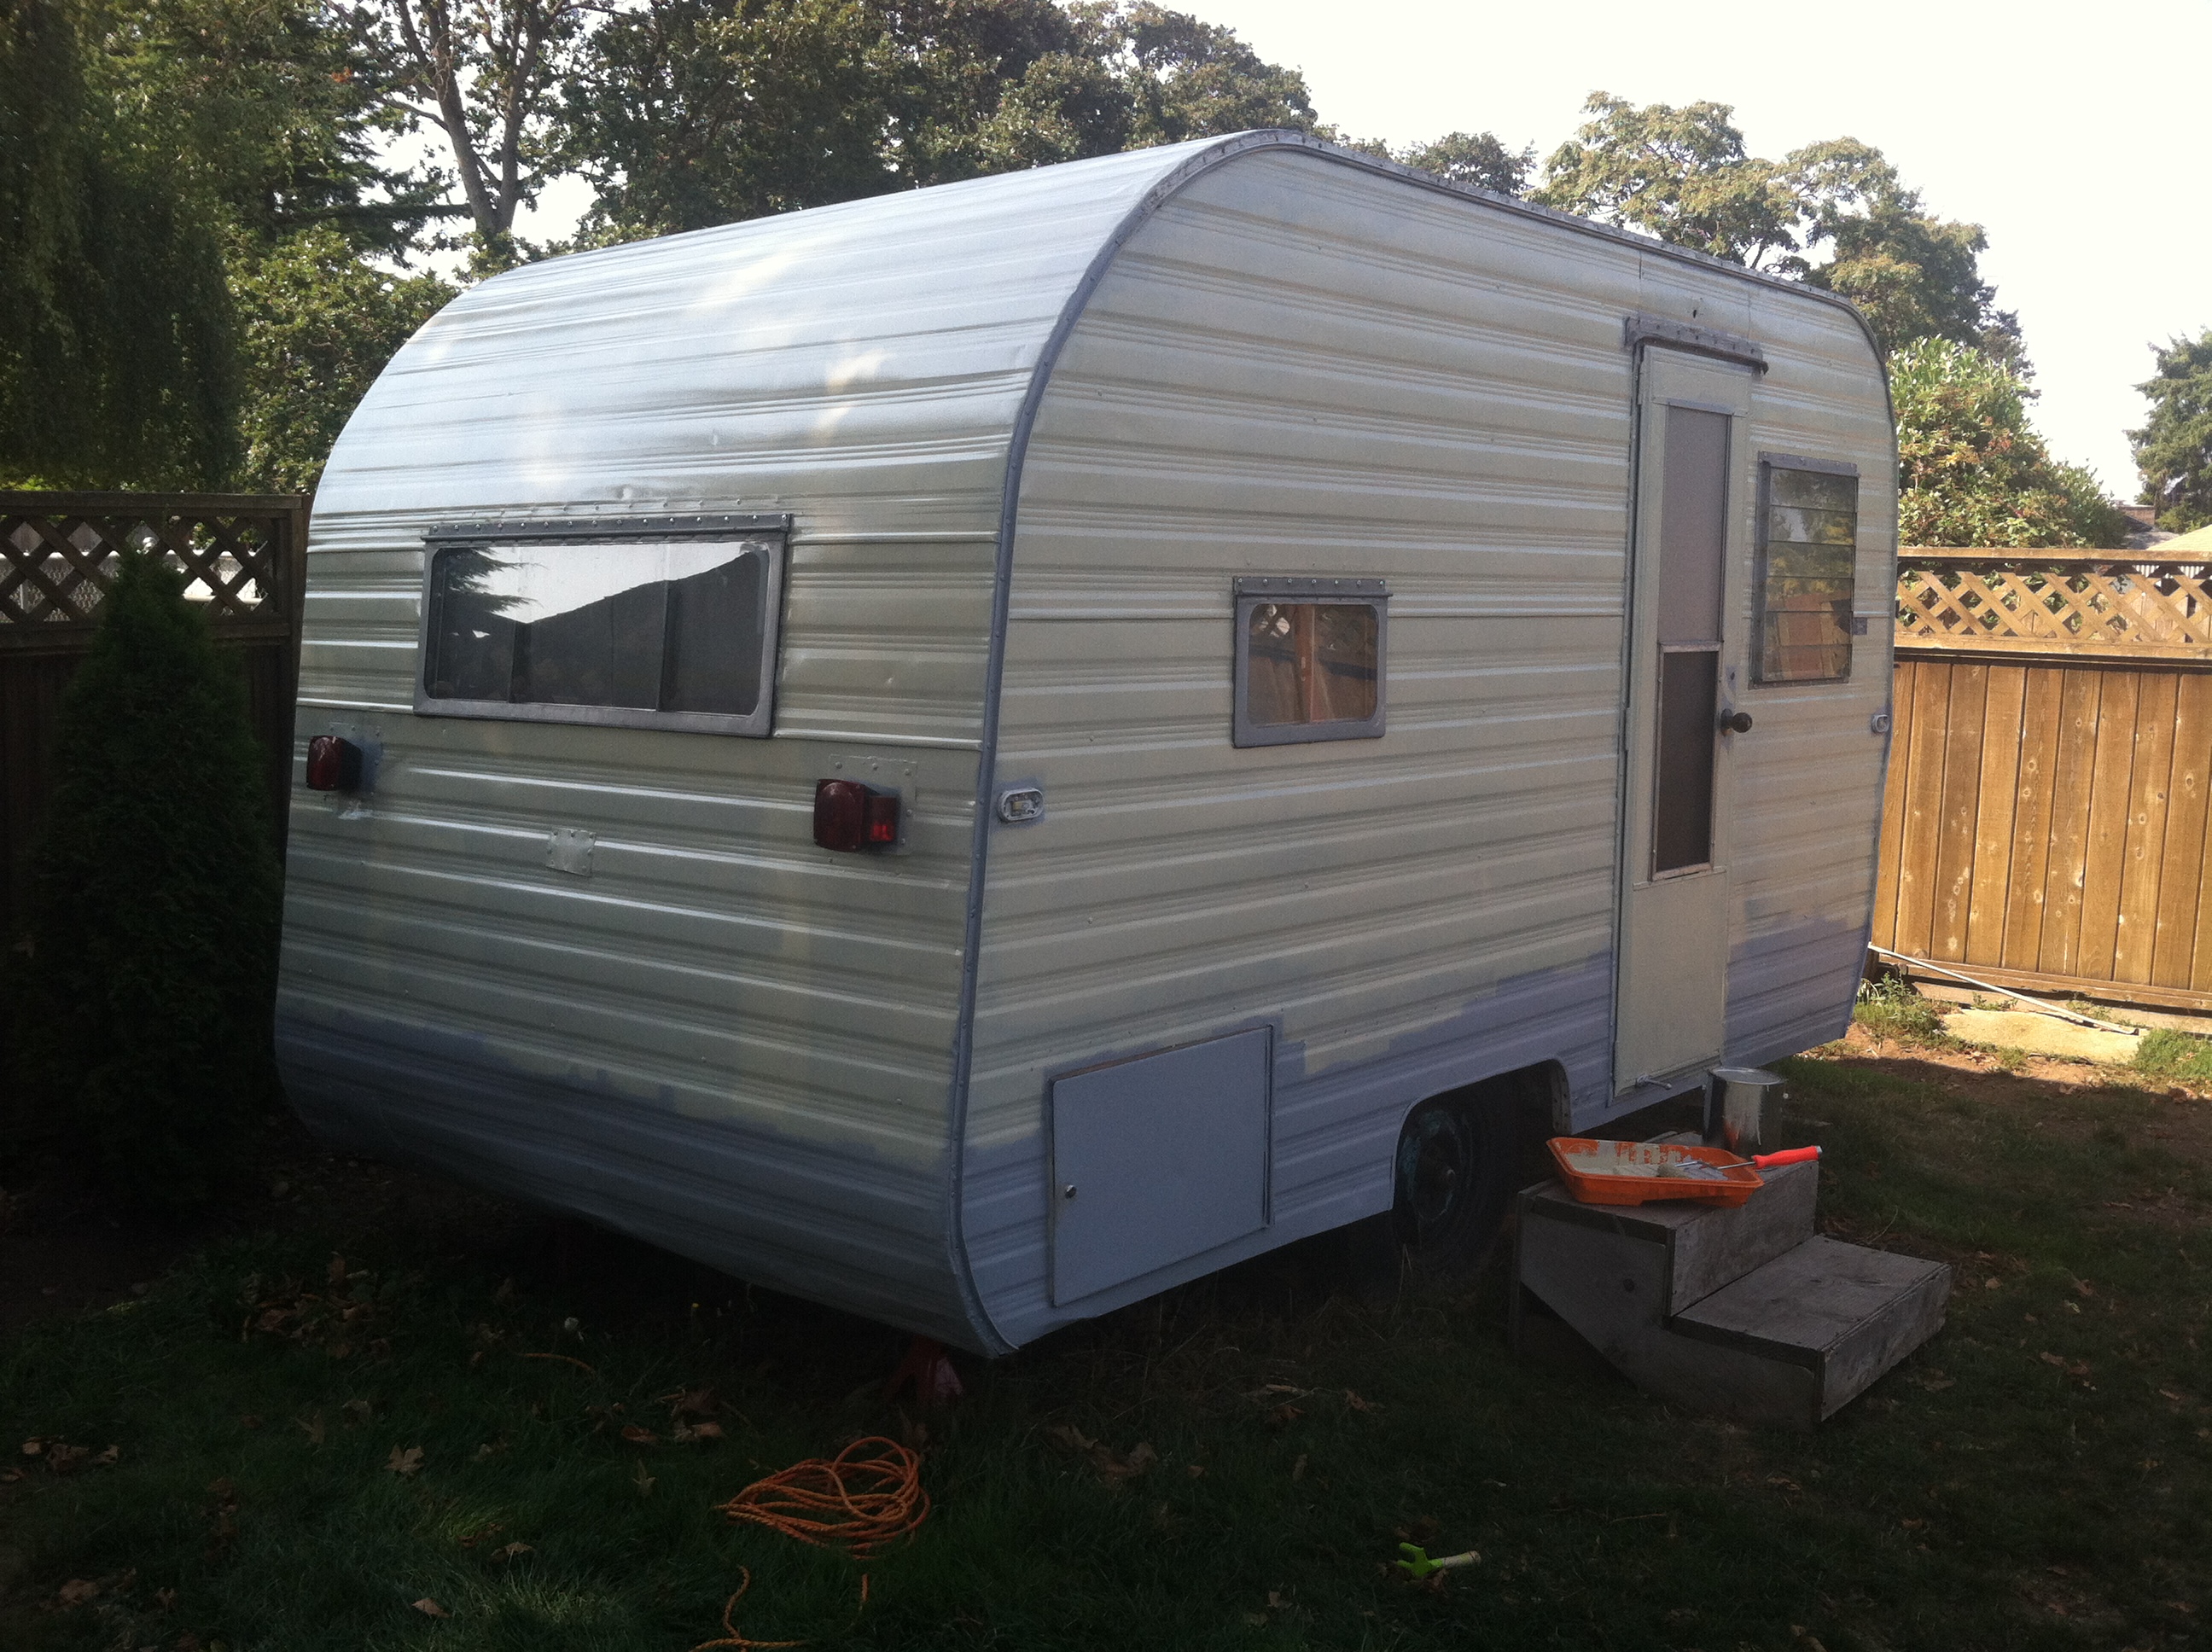
We ended getting off about 90% of the paint, which I call an accomplishment. Sanded and washed it down. Then, began with the primer.

IMG_2588

One side without primer. The other side with. You can see the huge difference even just the primer made. Looks a million times better.

IMG_2579 IMG_2580 IMG_2581

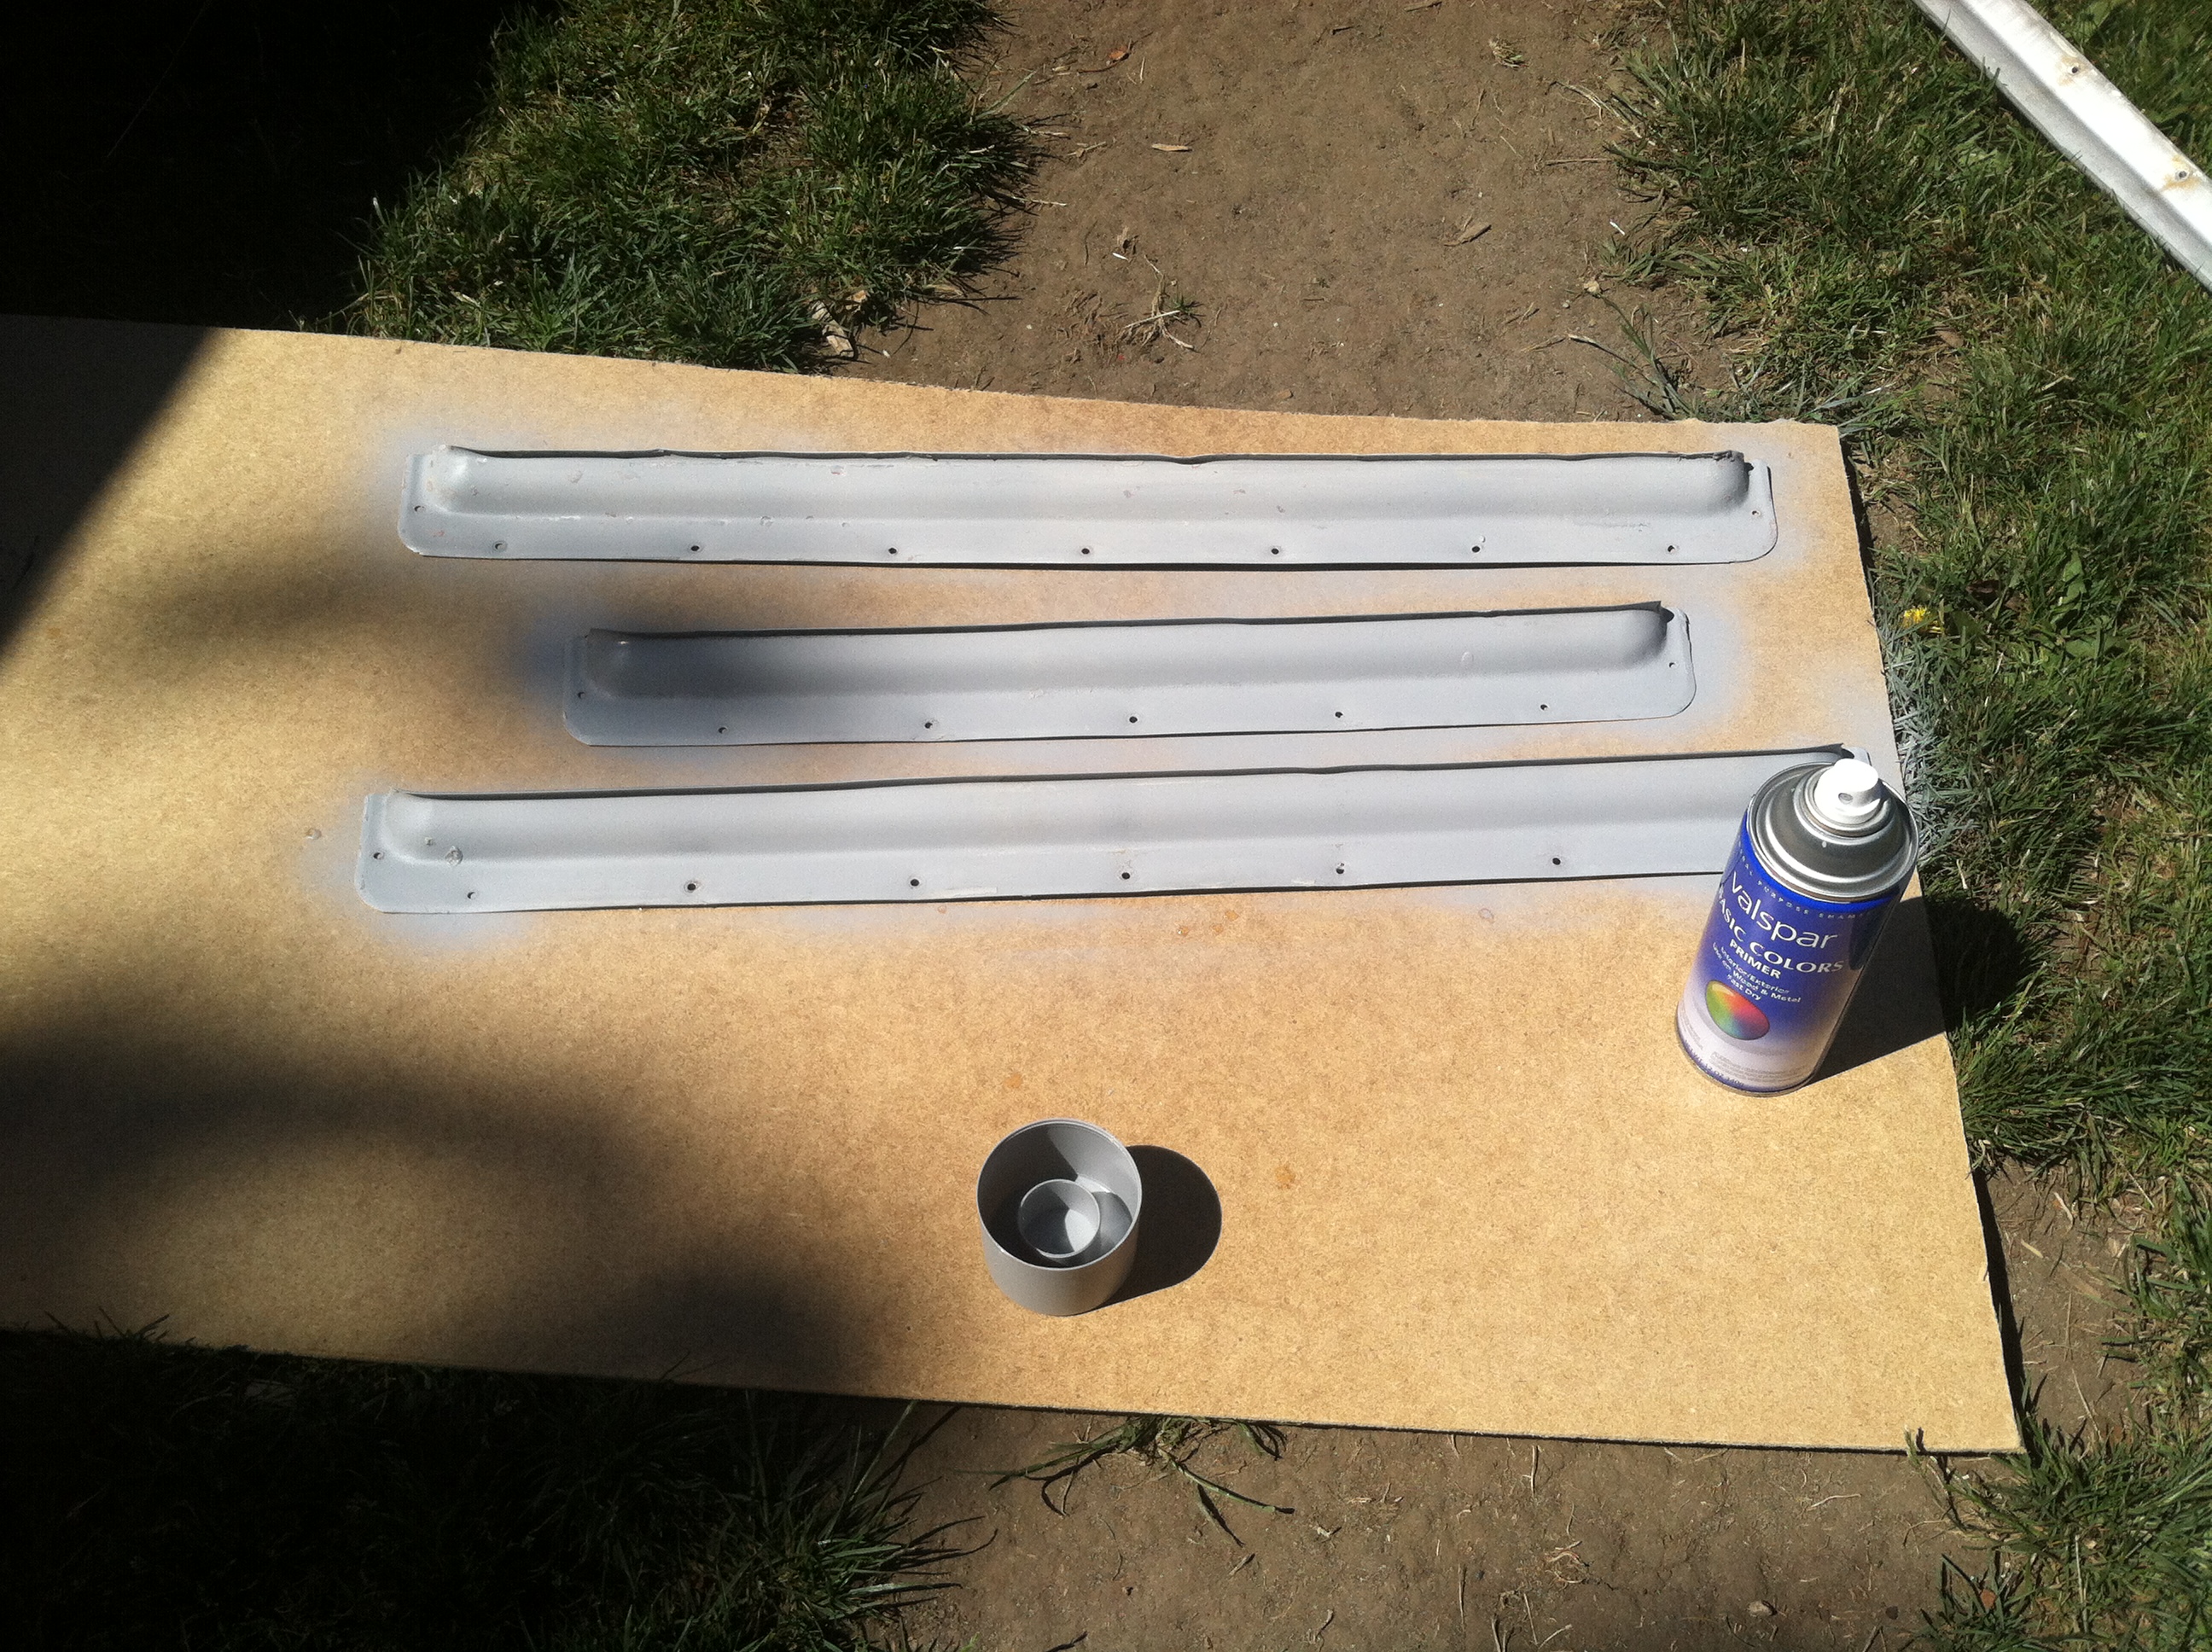
While we were in the process of getting the paint off and prime the camper, I pulled off the gutters above all the windows and door. Some needed to be straightened out and cleaned. To make them all match and give them a little bit of shine, I primed and painted them as well with a metallic spray paint.


IMG_2747

We made a summer trip back east to Indiana and Michigan to visit some family. My sisters’ sister in law does some metal work and made this really sweet sign for our camper. We plan to post at our campsite when we go camping, if you see us, swing over and say “hi” . šŸ™‚ Oh, and if you want one made for yourself, I am sure I could get you connected with the right person. Now I just need to get the handsome husband to weld a post onto the sign. Just one more thing to add to his ” honey do” list.


IMG_2772

Ok, so the camper is all primed and has received its new coat of off white paint, which is to be the main color. I believe we used rust-oleum in glossy almond. I did thin down the paint at the recommendation of others with vintage camper blogs to get a smoother finish. I thinned my paint to about 1/3 cup of mineral spirits per quart of paint.


IMG_2818 IMG_2822

Now our little camper is starting to look like the one in our dreams! Once we got most of the almond color on, I started taping off for the bottom half. As far as chosing the color for the bottom half, we( by ” we” , I mean ” I”)Ā went back and forth. What can I say, we are an indecisive couple. Heck! we are still trying to make up our minds on the backsplash for the kitchenette. First it was RED. Like a dark retro red. Then I thought, maybe that would be too much, so I turned my sights on hunter green. While I thought that would be a good choice and look nice, I got to thinking about my favorite color in all the world – navy blue. Finding the RIGHT navy blue was a bit of a hunt, because a lot of oil based enamel colors come pre mixed and not a HUGE selection of color. sigh. I soon prevailed at my local Ace Hardware store. YAY for Ace! The blue of my dreams is called ” international blue”.


IMG_2851 IMG_2852

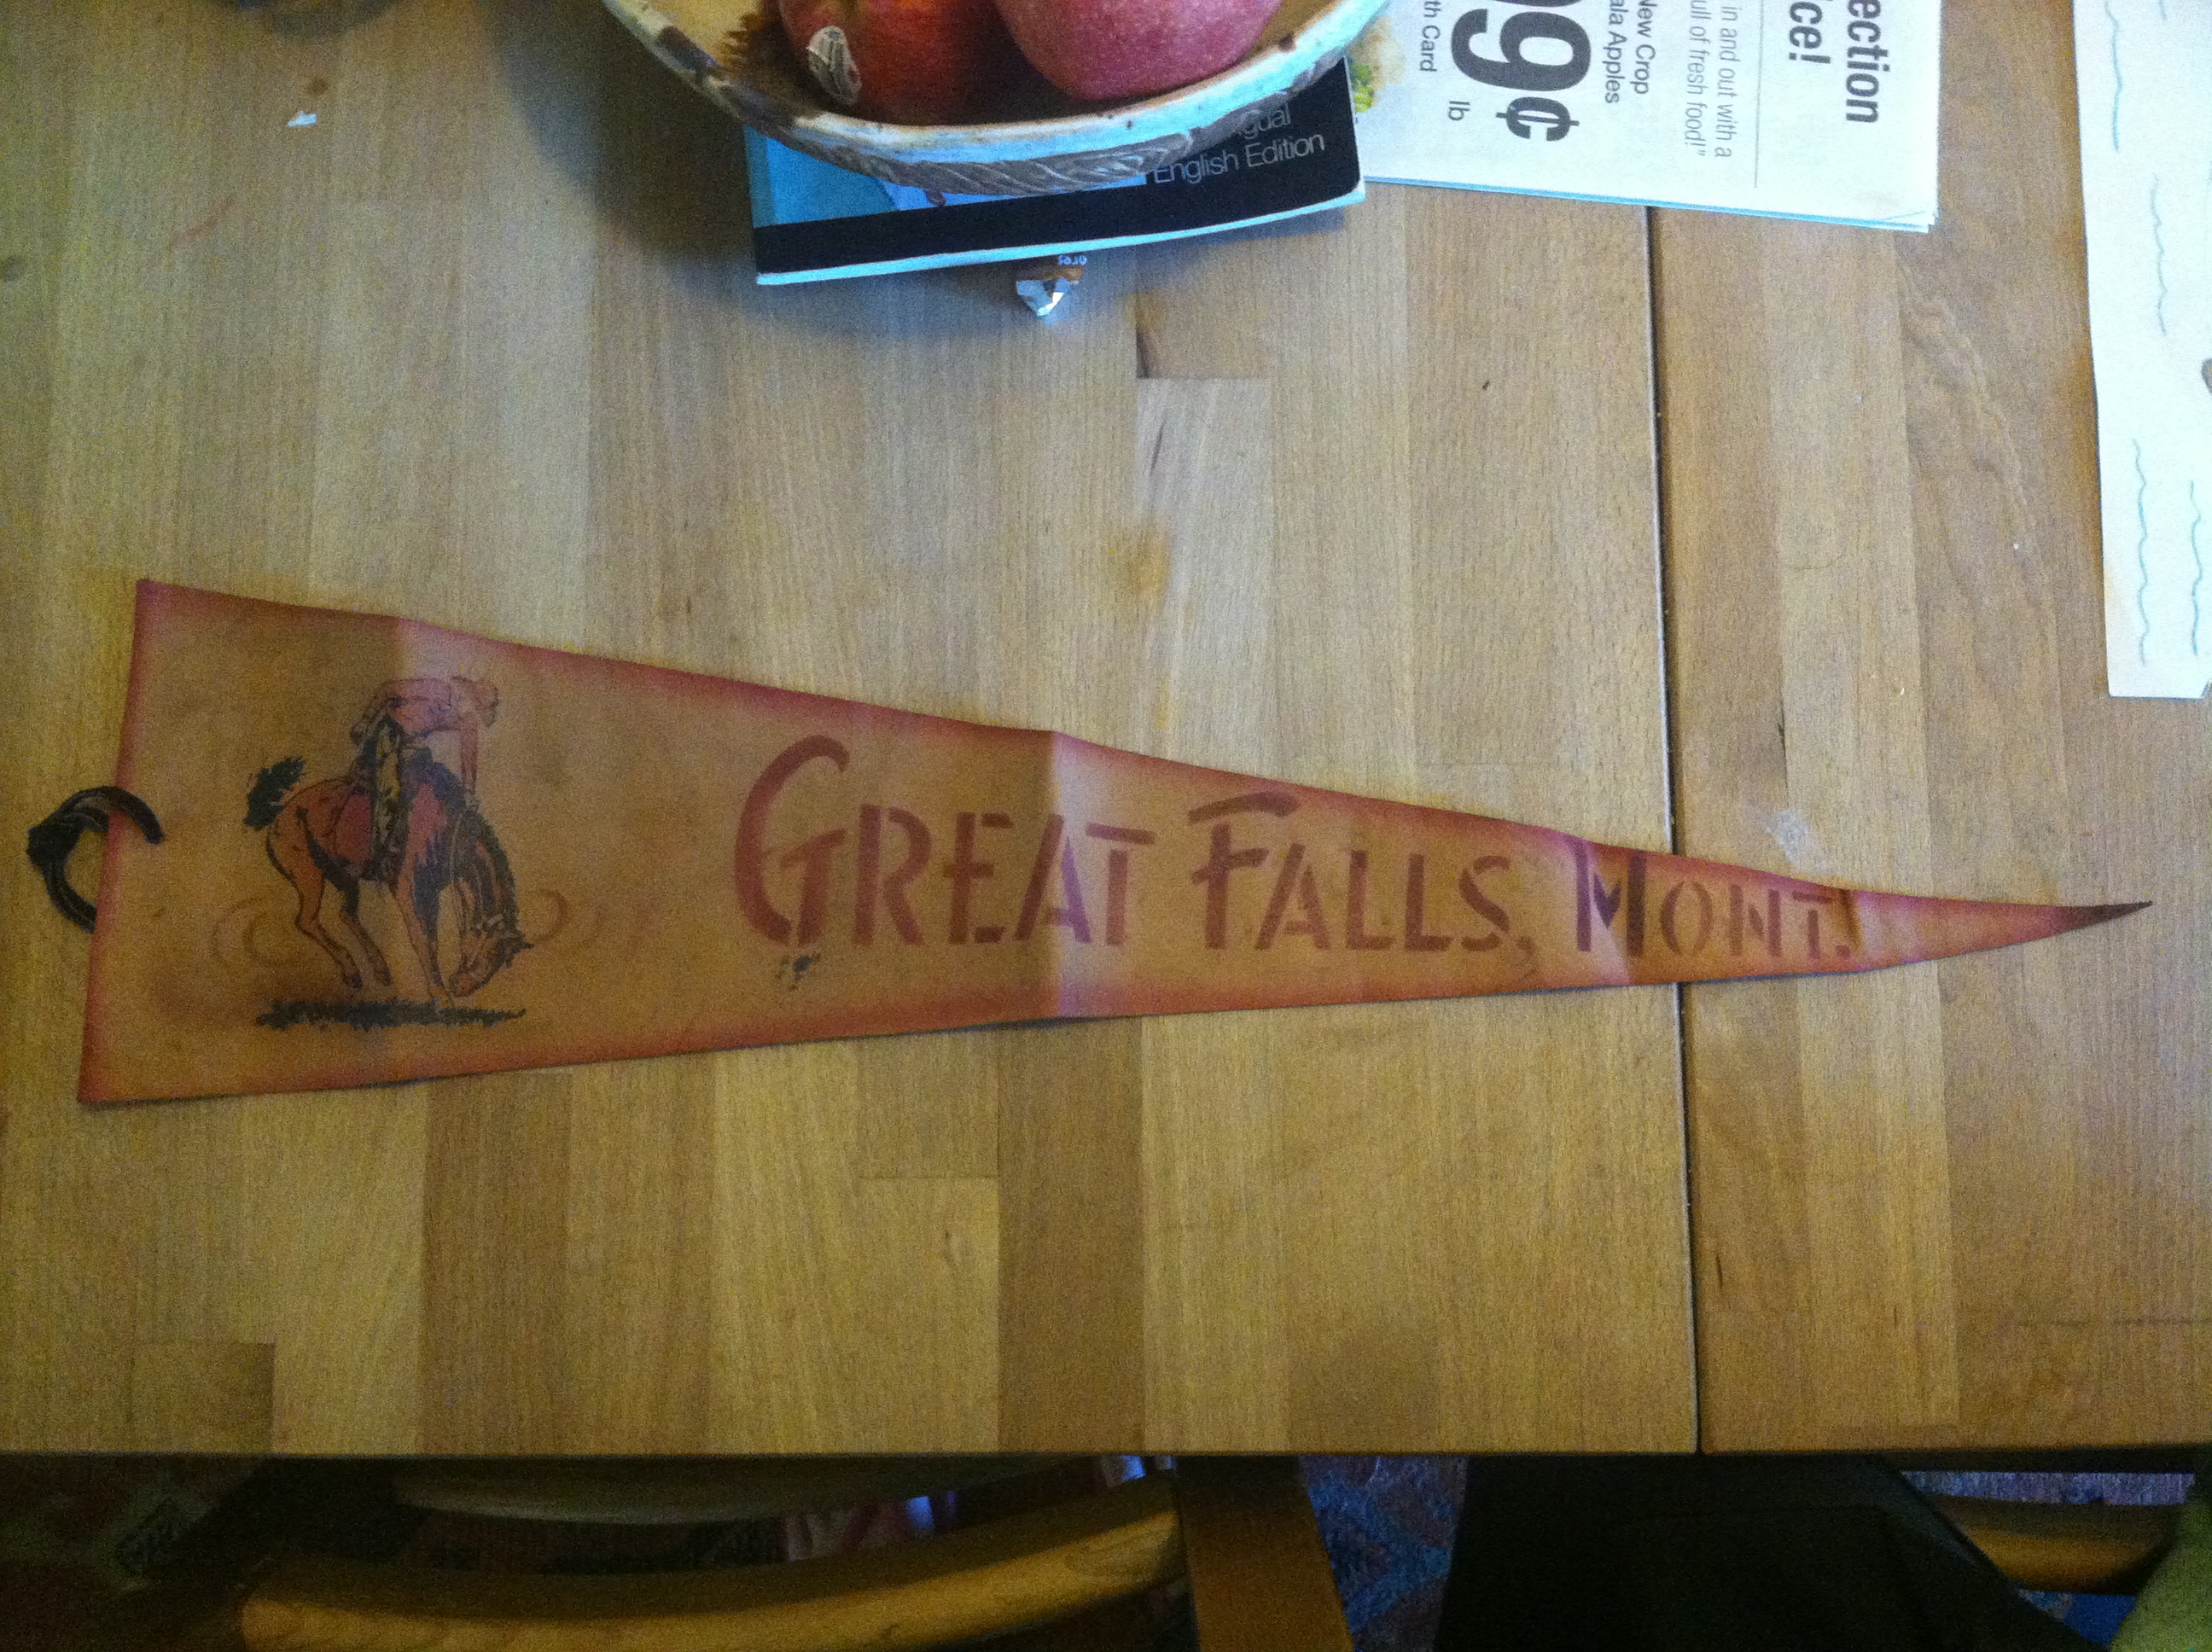
Upon buying the trailer, we found an old Livingston MT felt pendent in the camper and displayed it proudly in the trailer ( far left cabinet door). The handsome husband found a Seattle’s Worlds Fair one at an antique store and scooped it up ( far right cabinet) and then…….he found a Great Falls MT pendent for me to find a spotĀ forĀ in our trailer! Keep them coming, honey! šŸ™‚


IMG_2853 IMG_2854

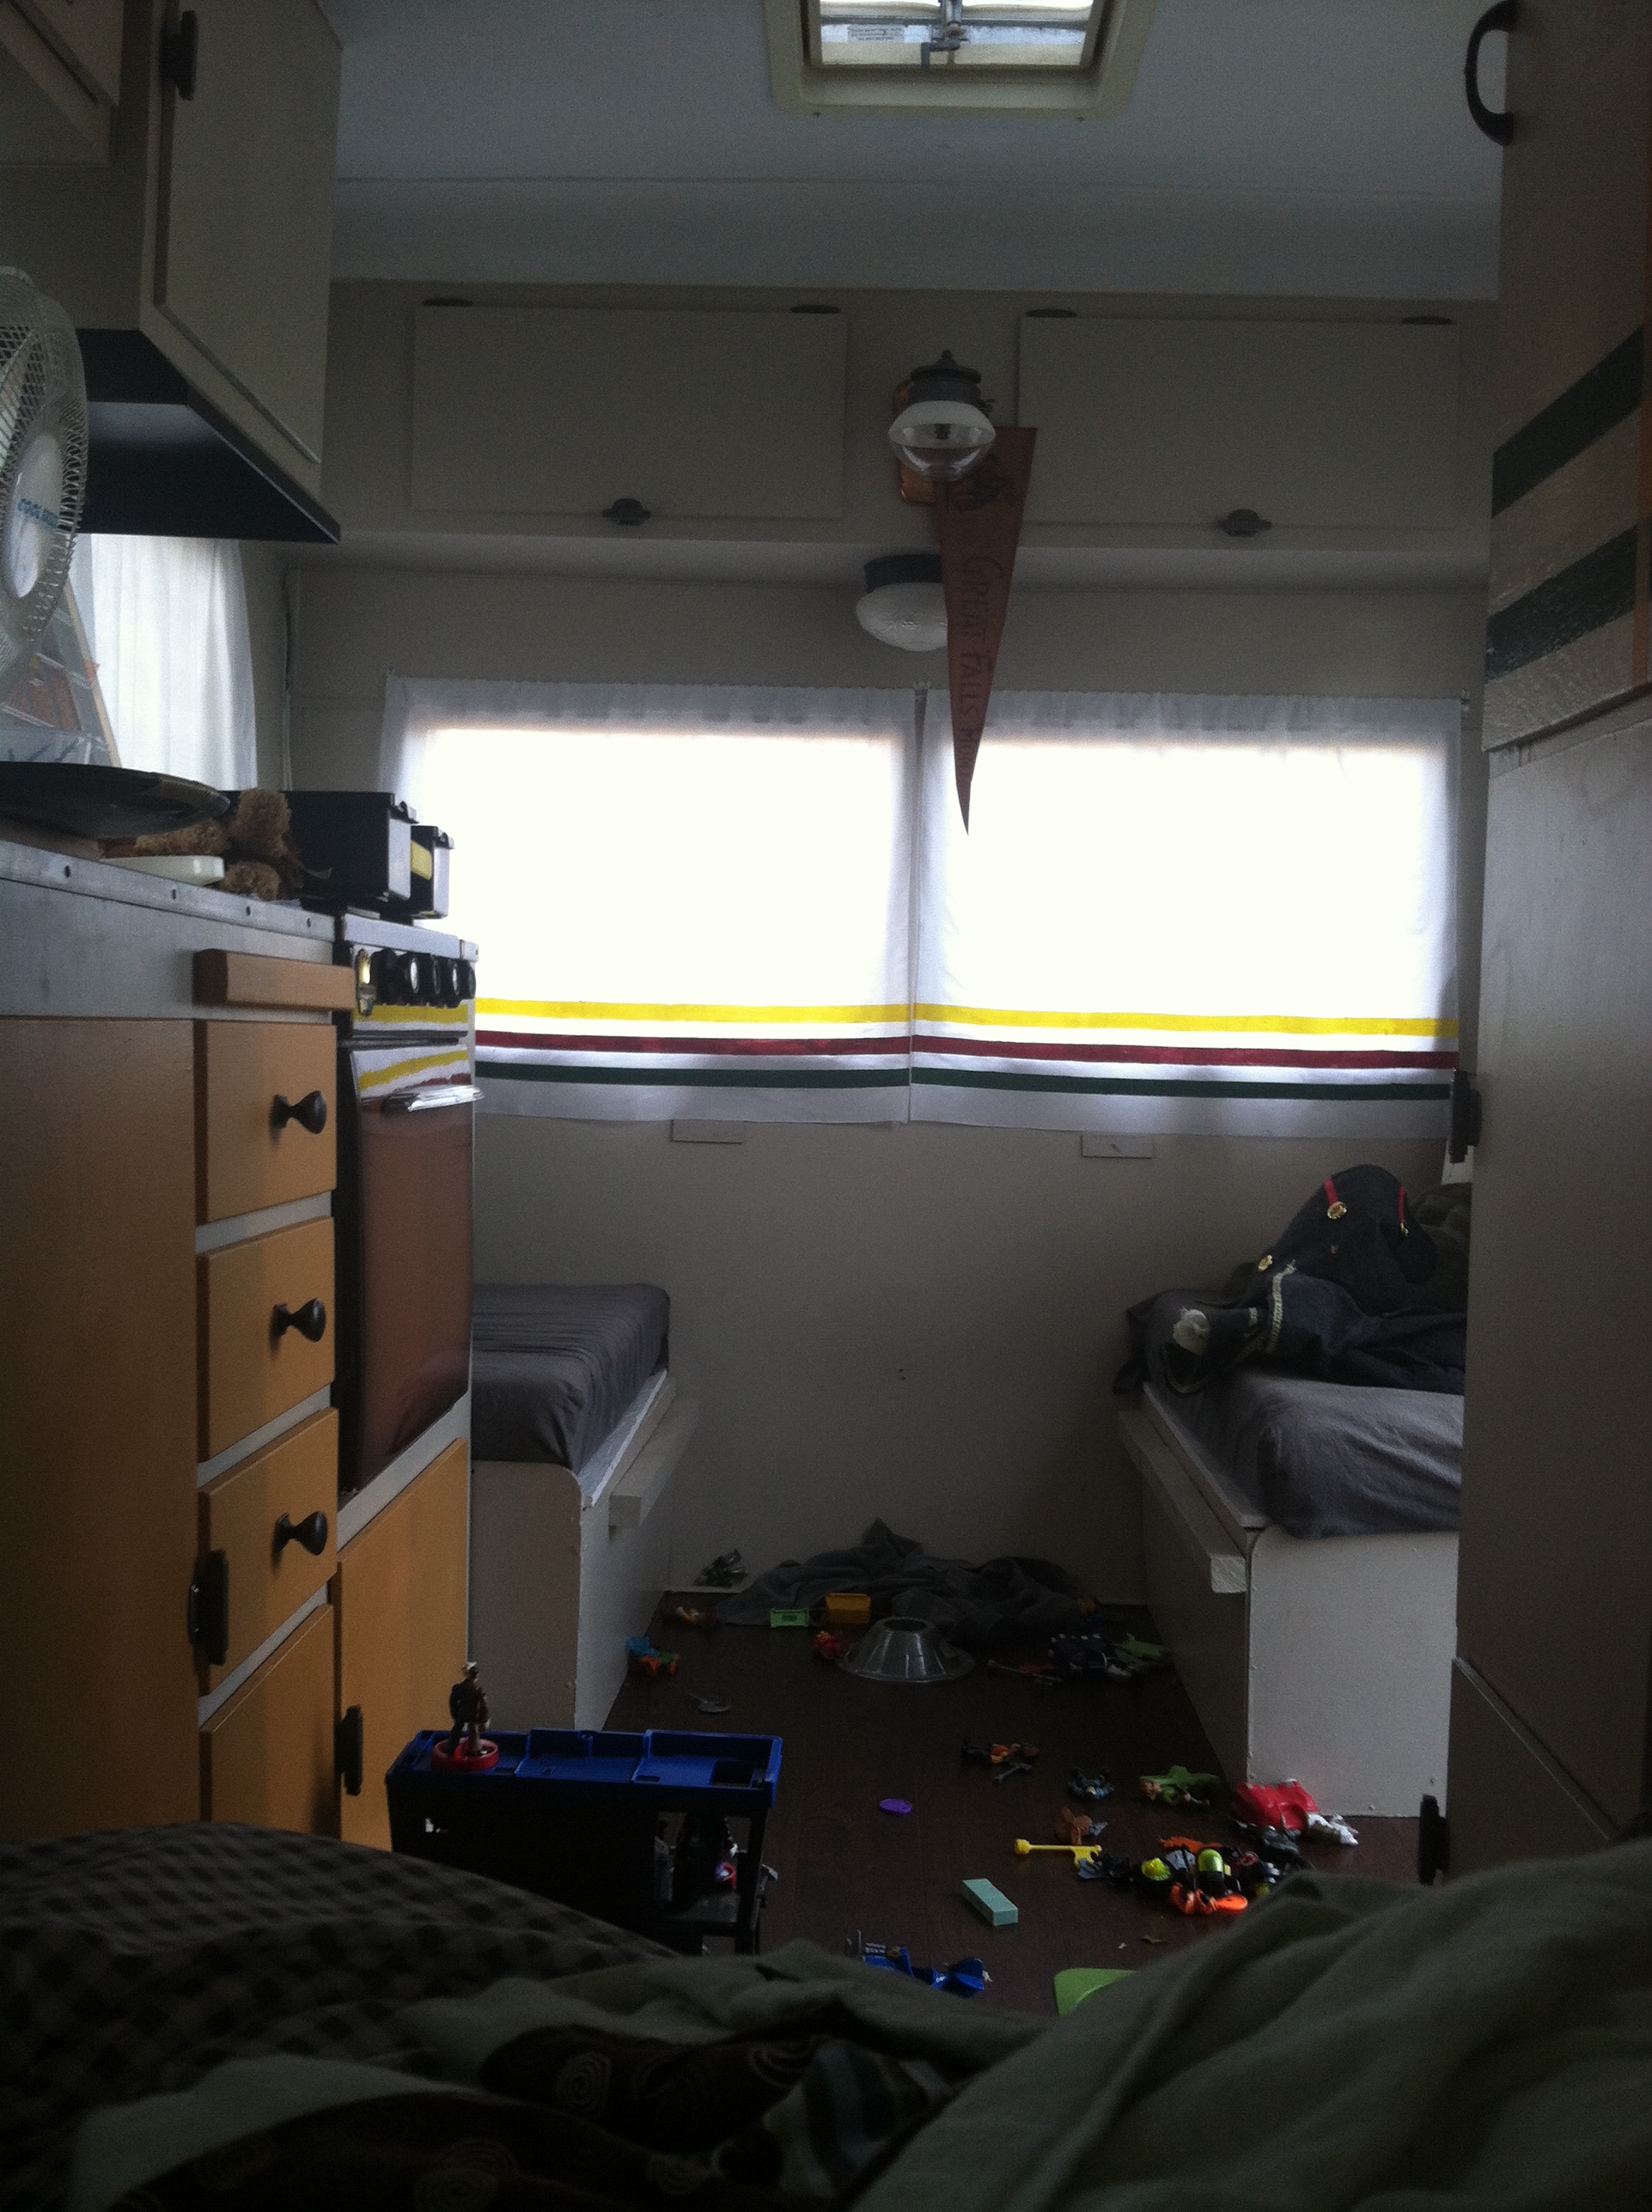
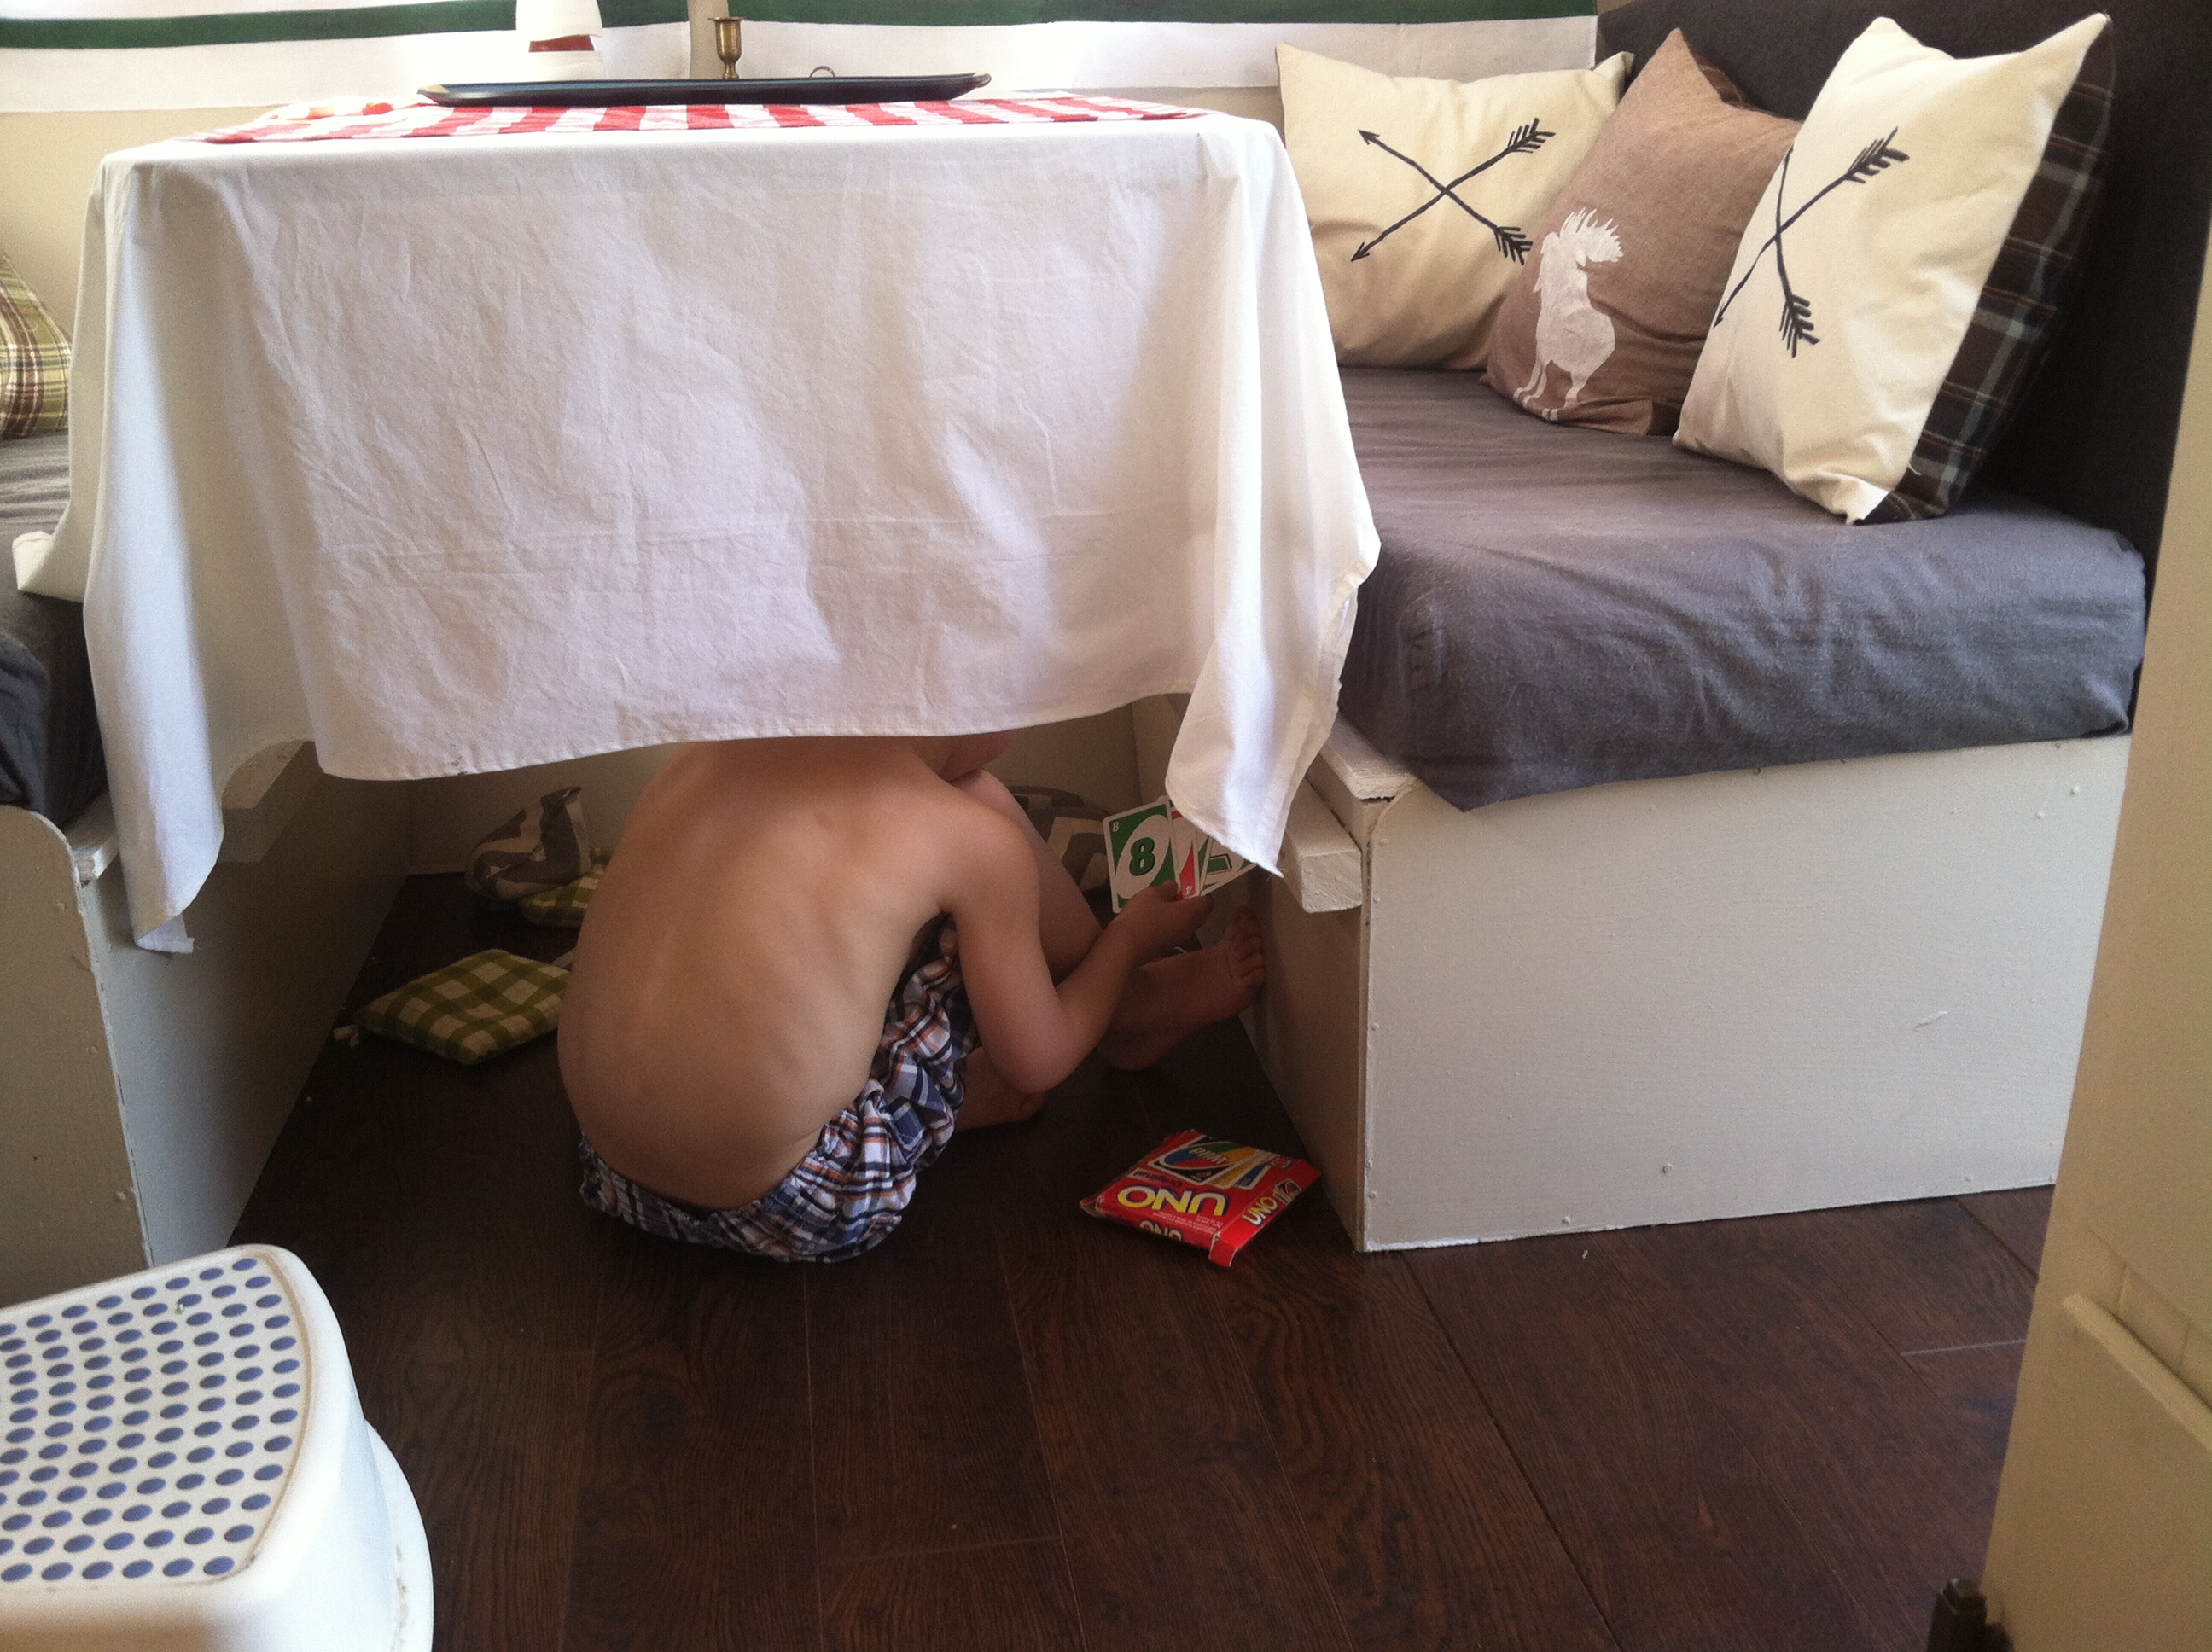
Lately, my children have been using the camper as their own personal play house. I keep saying, ” its not a camper, its just an expensive playhouse for the kids.”

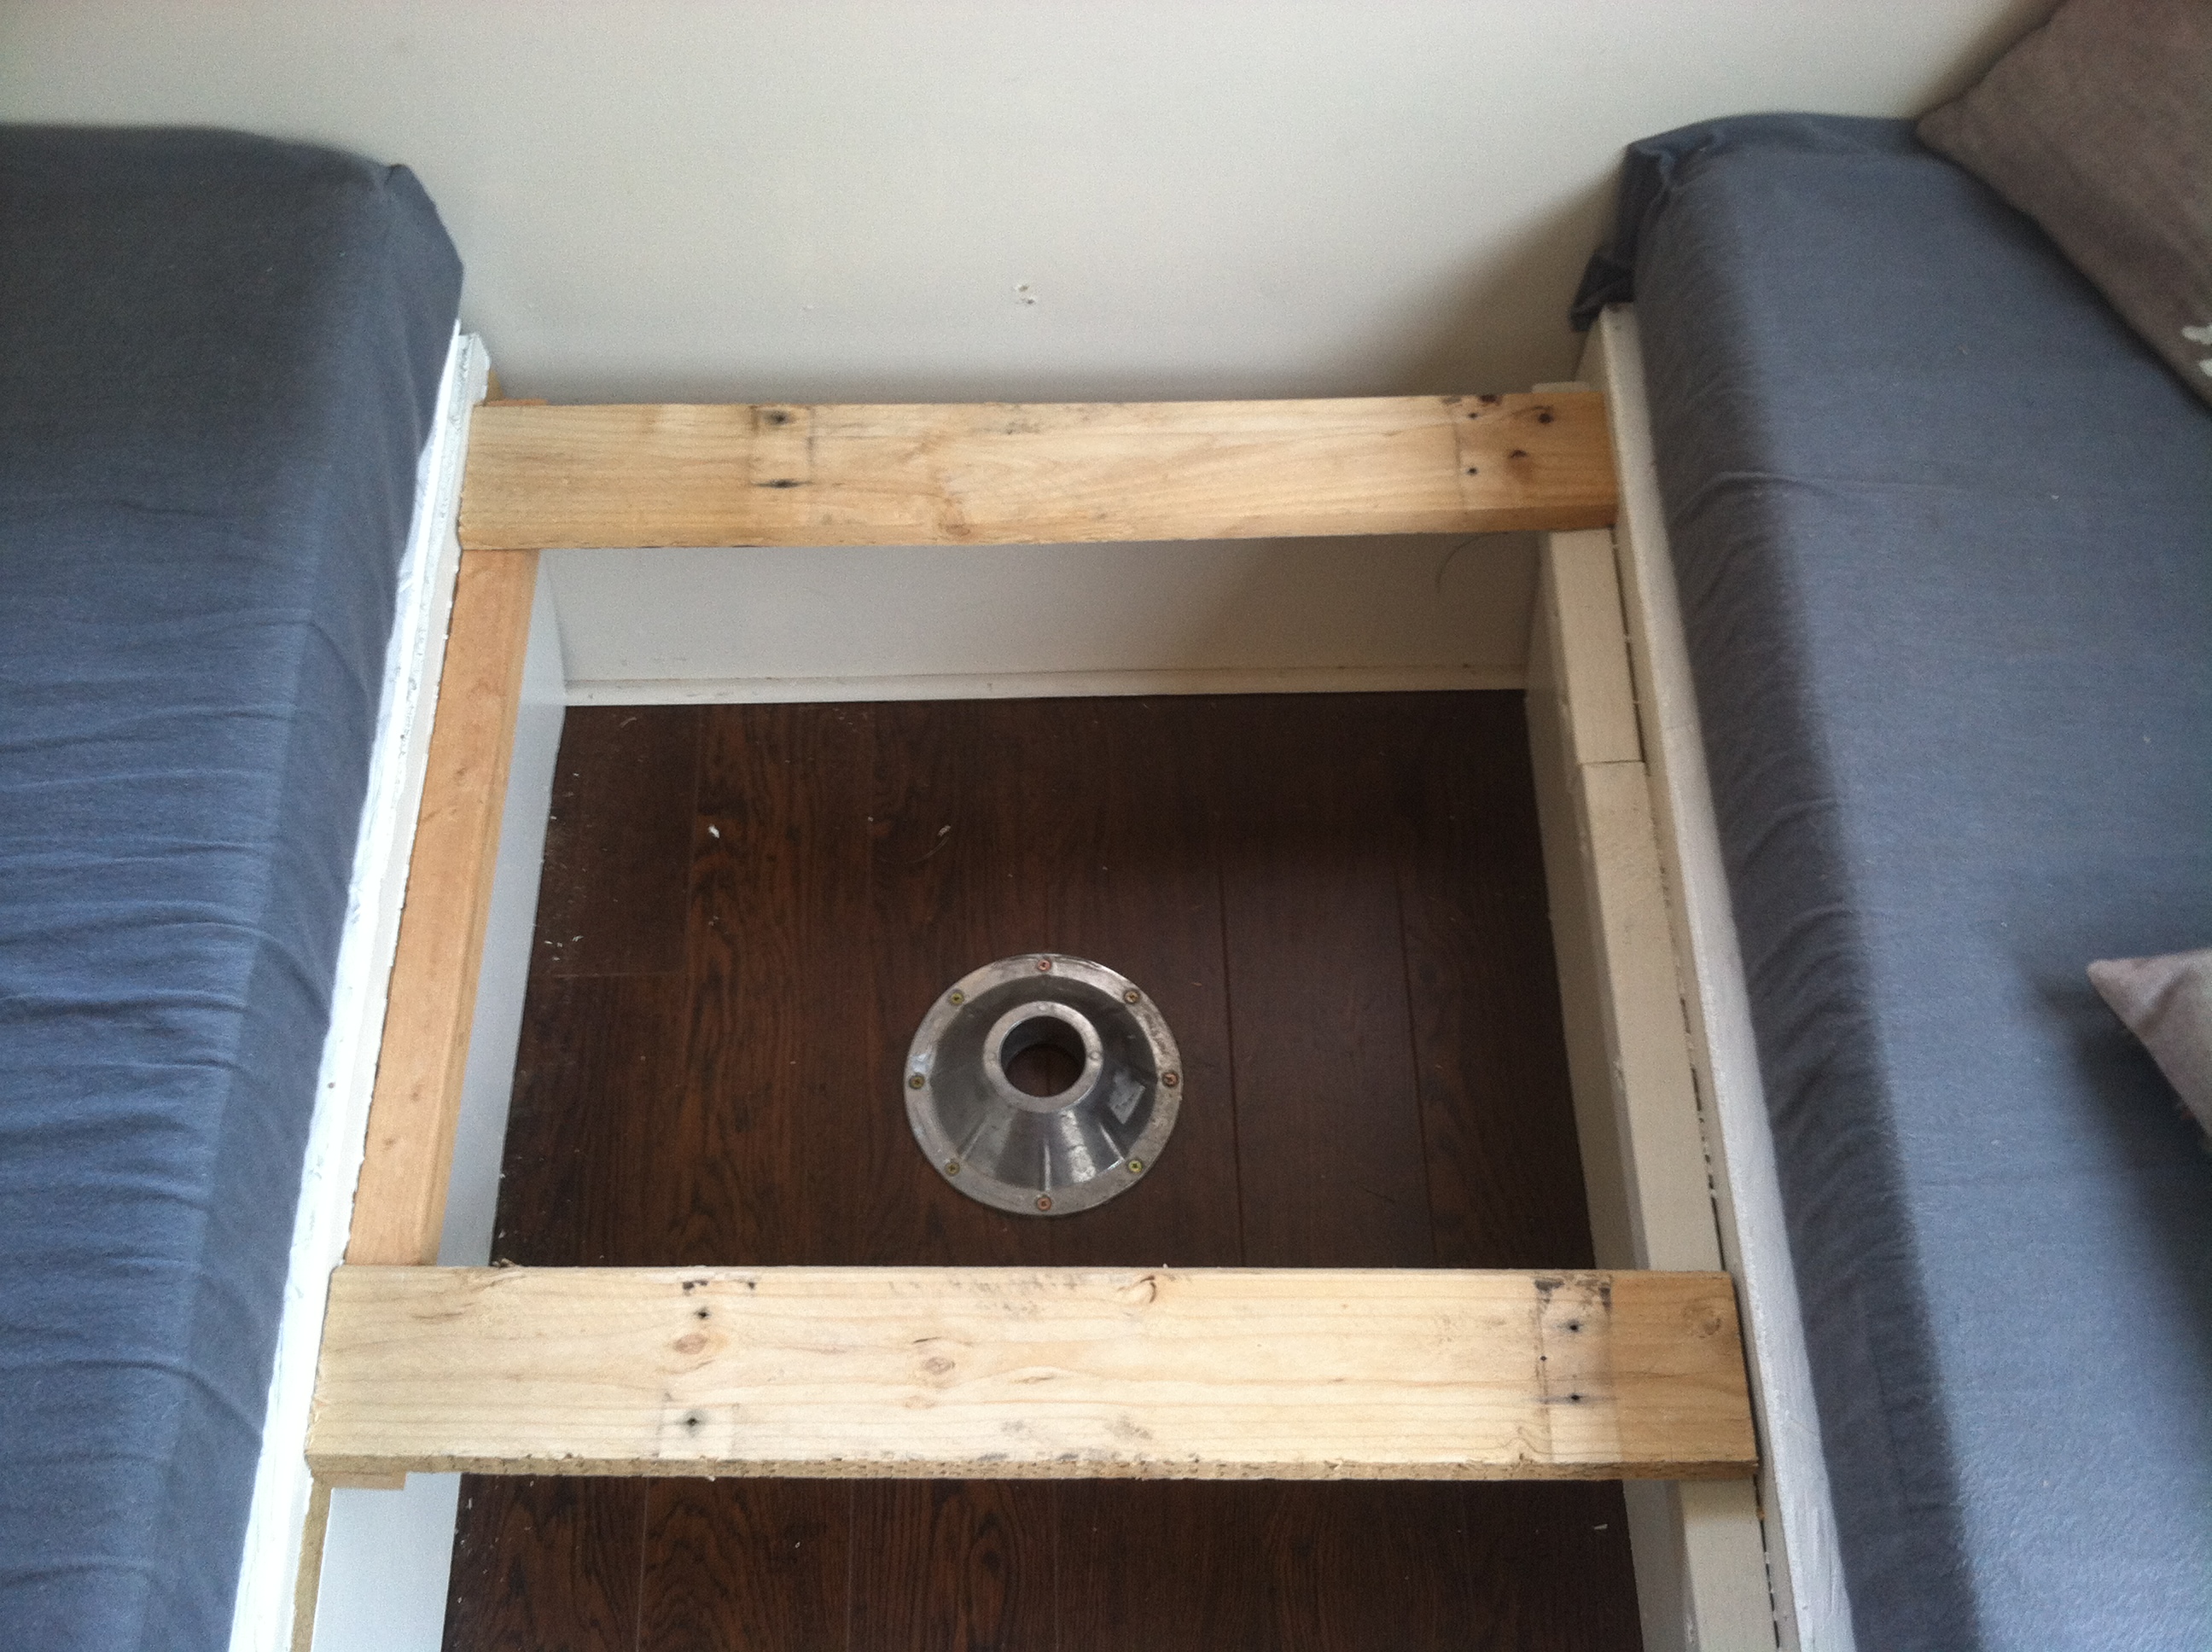
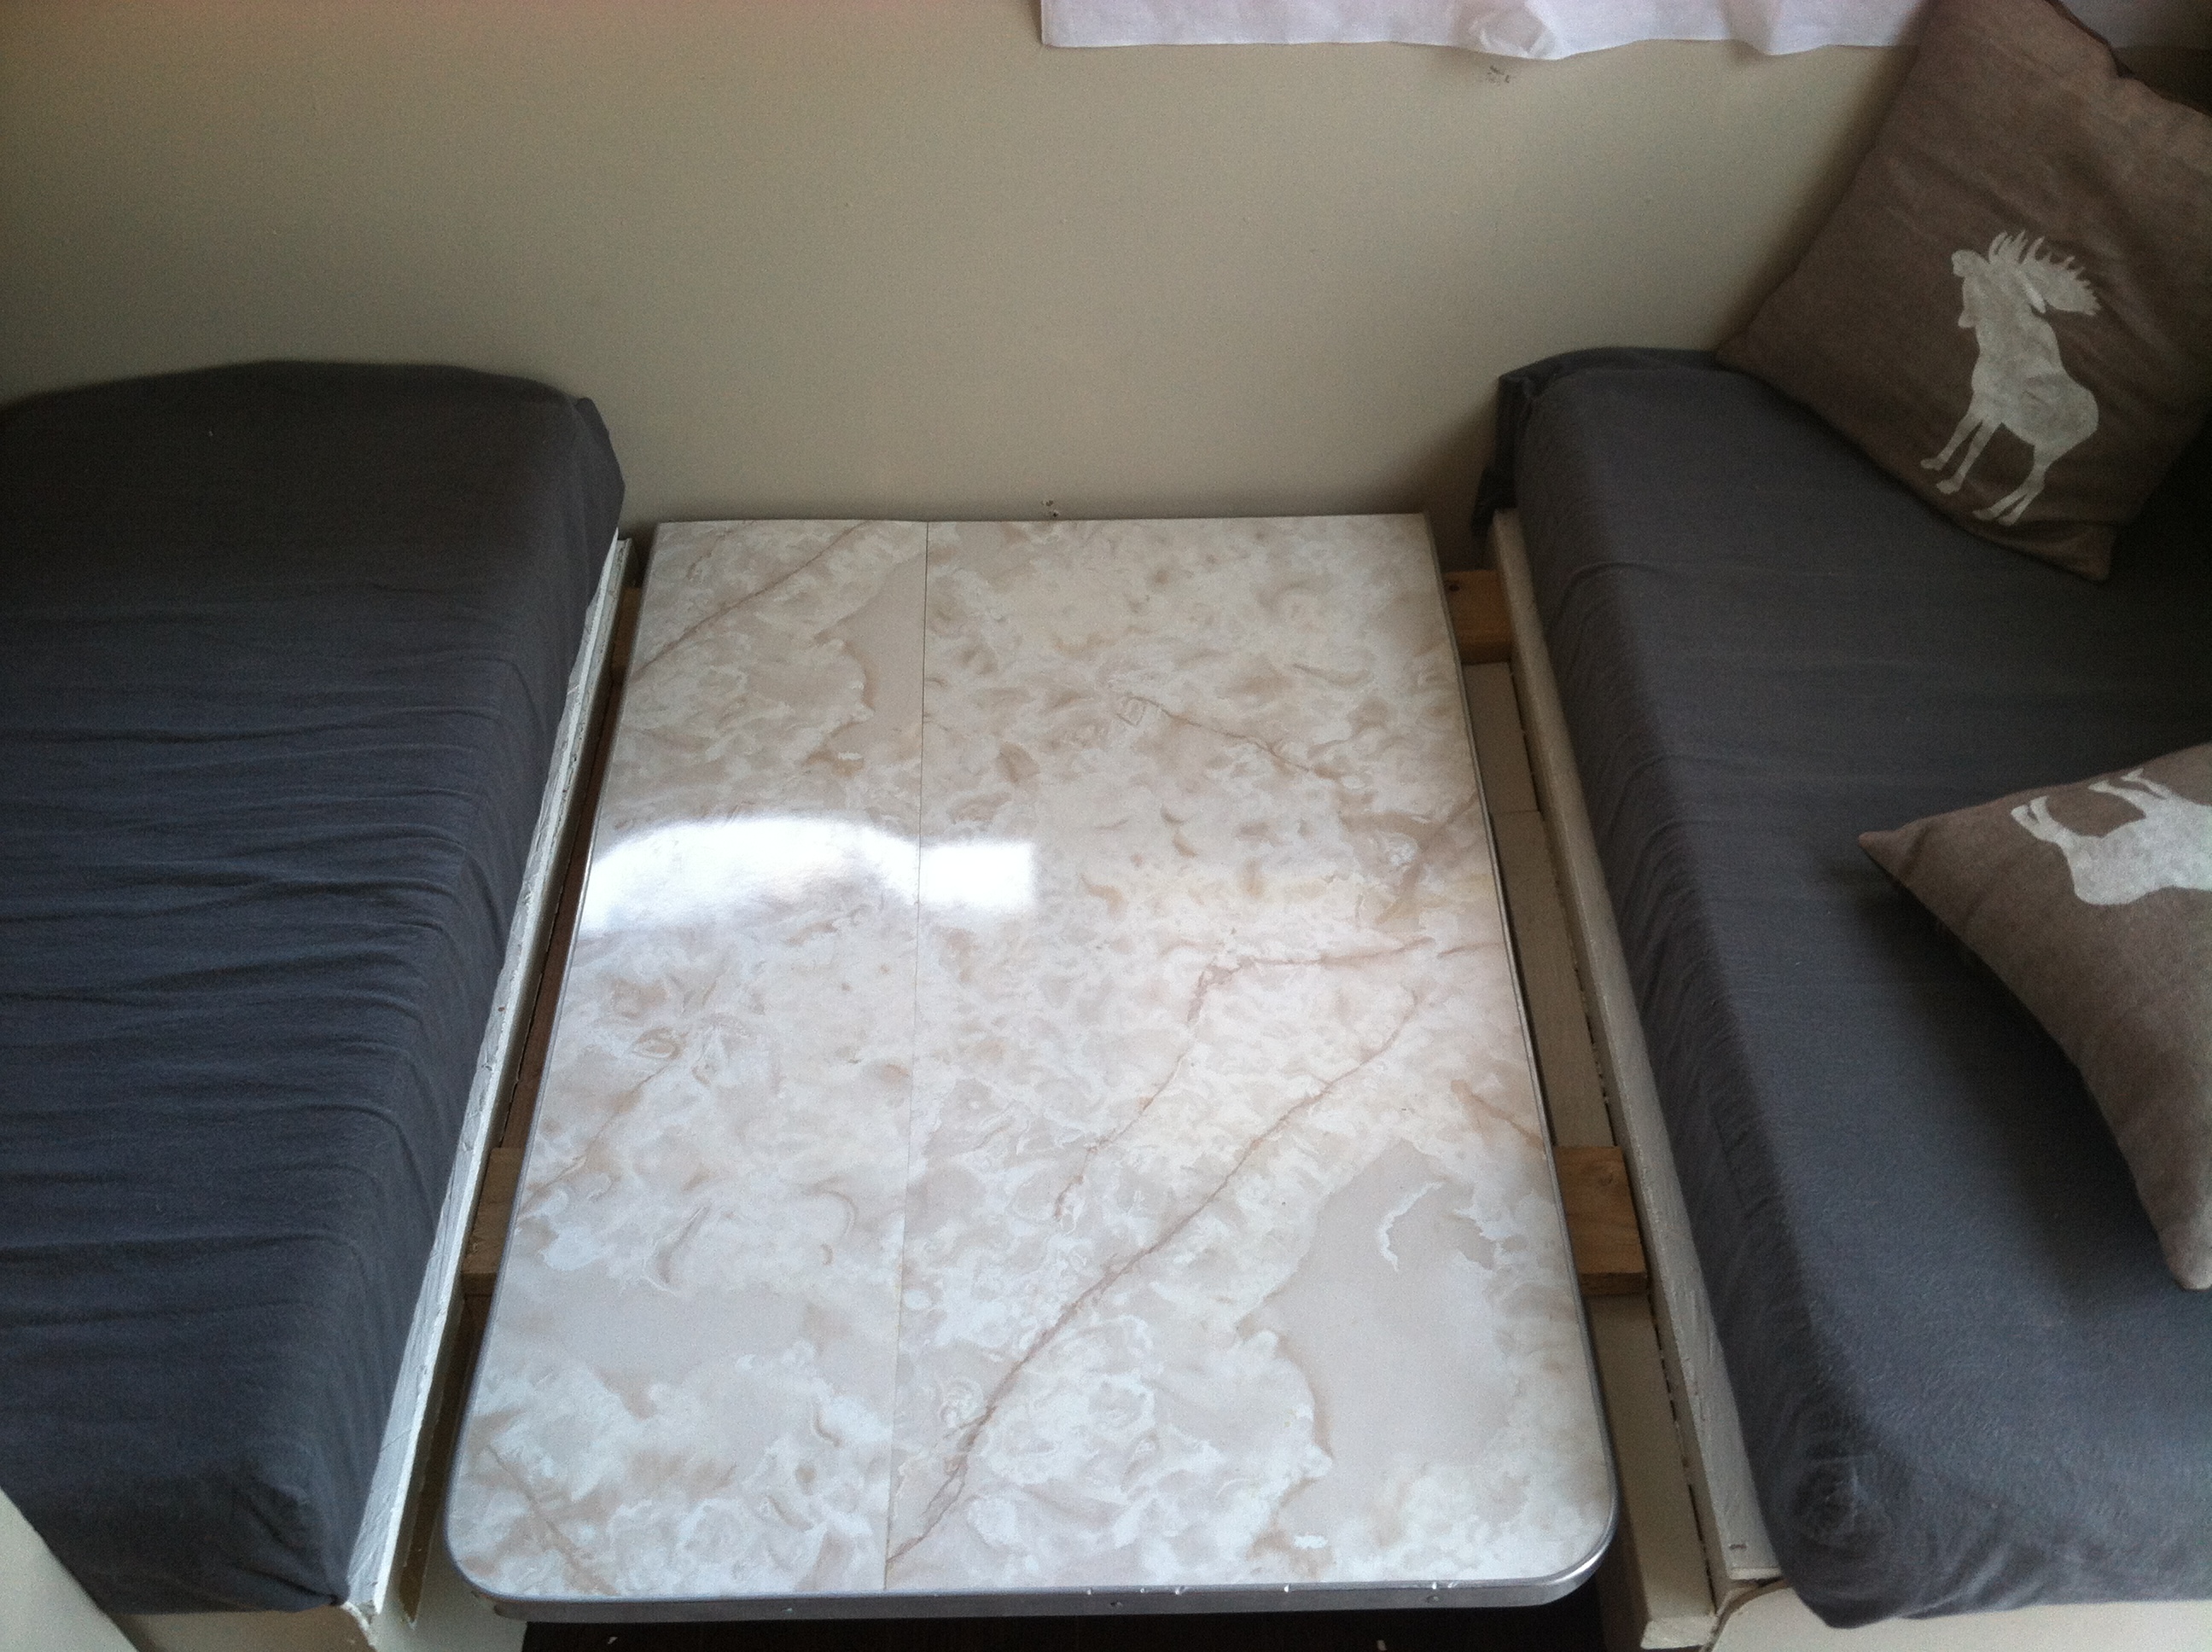
In the mean time, the hubby decided the table for the dinette needed to be altered. Because it was a rectangle shape, it made it somewhat difficult to squeeze into the bench seat closest to the stove( unless you are an ultra skinny super model). So, as you can see from the pics above, he removed the table and it was under construction…

IMG_2869 IMG_2870Ā  IMG_2868

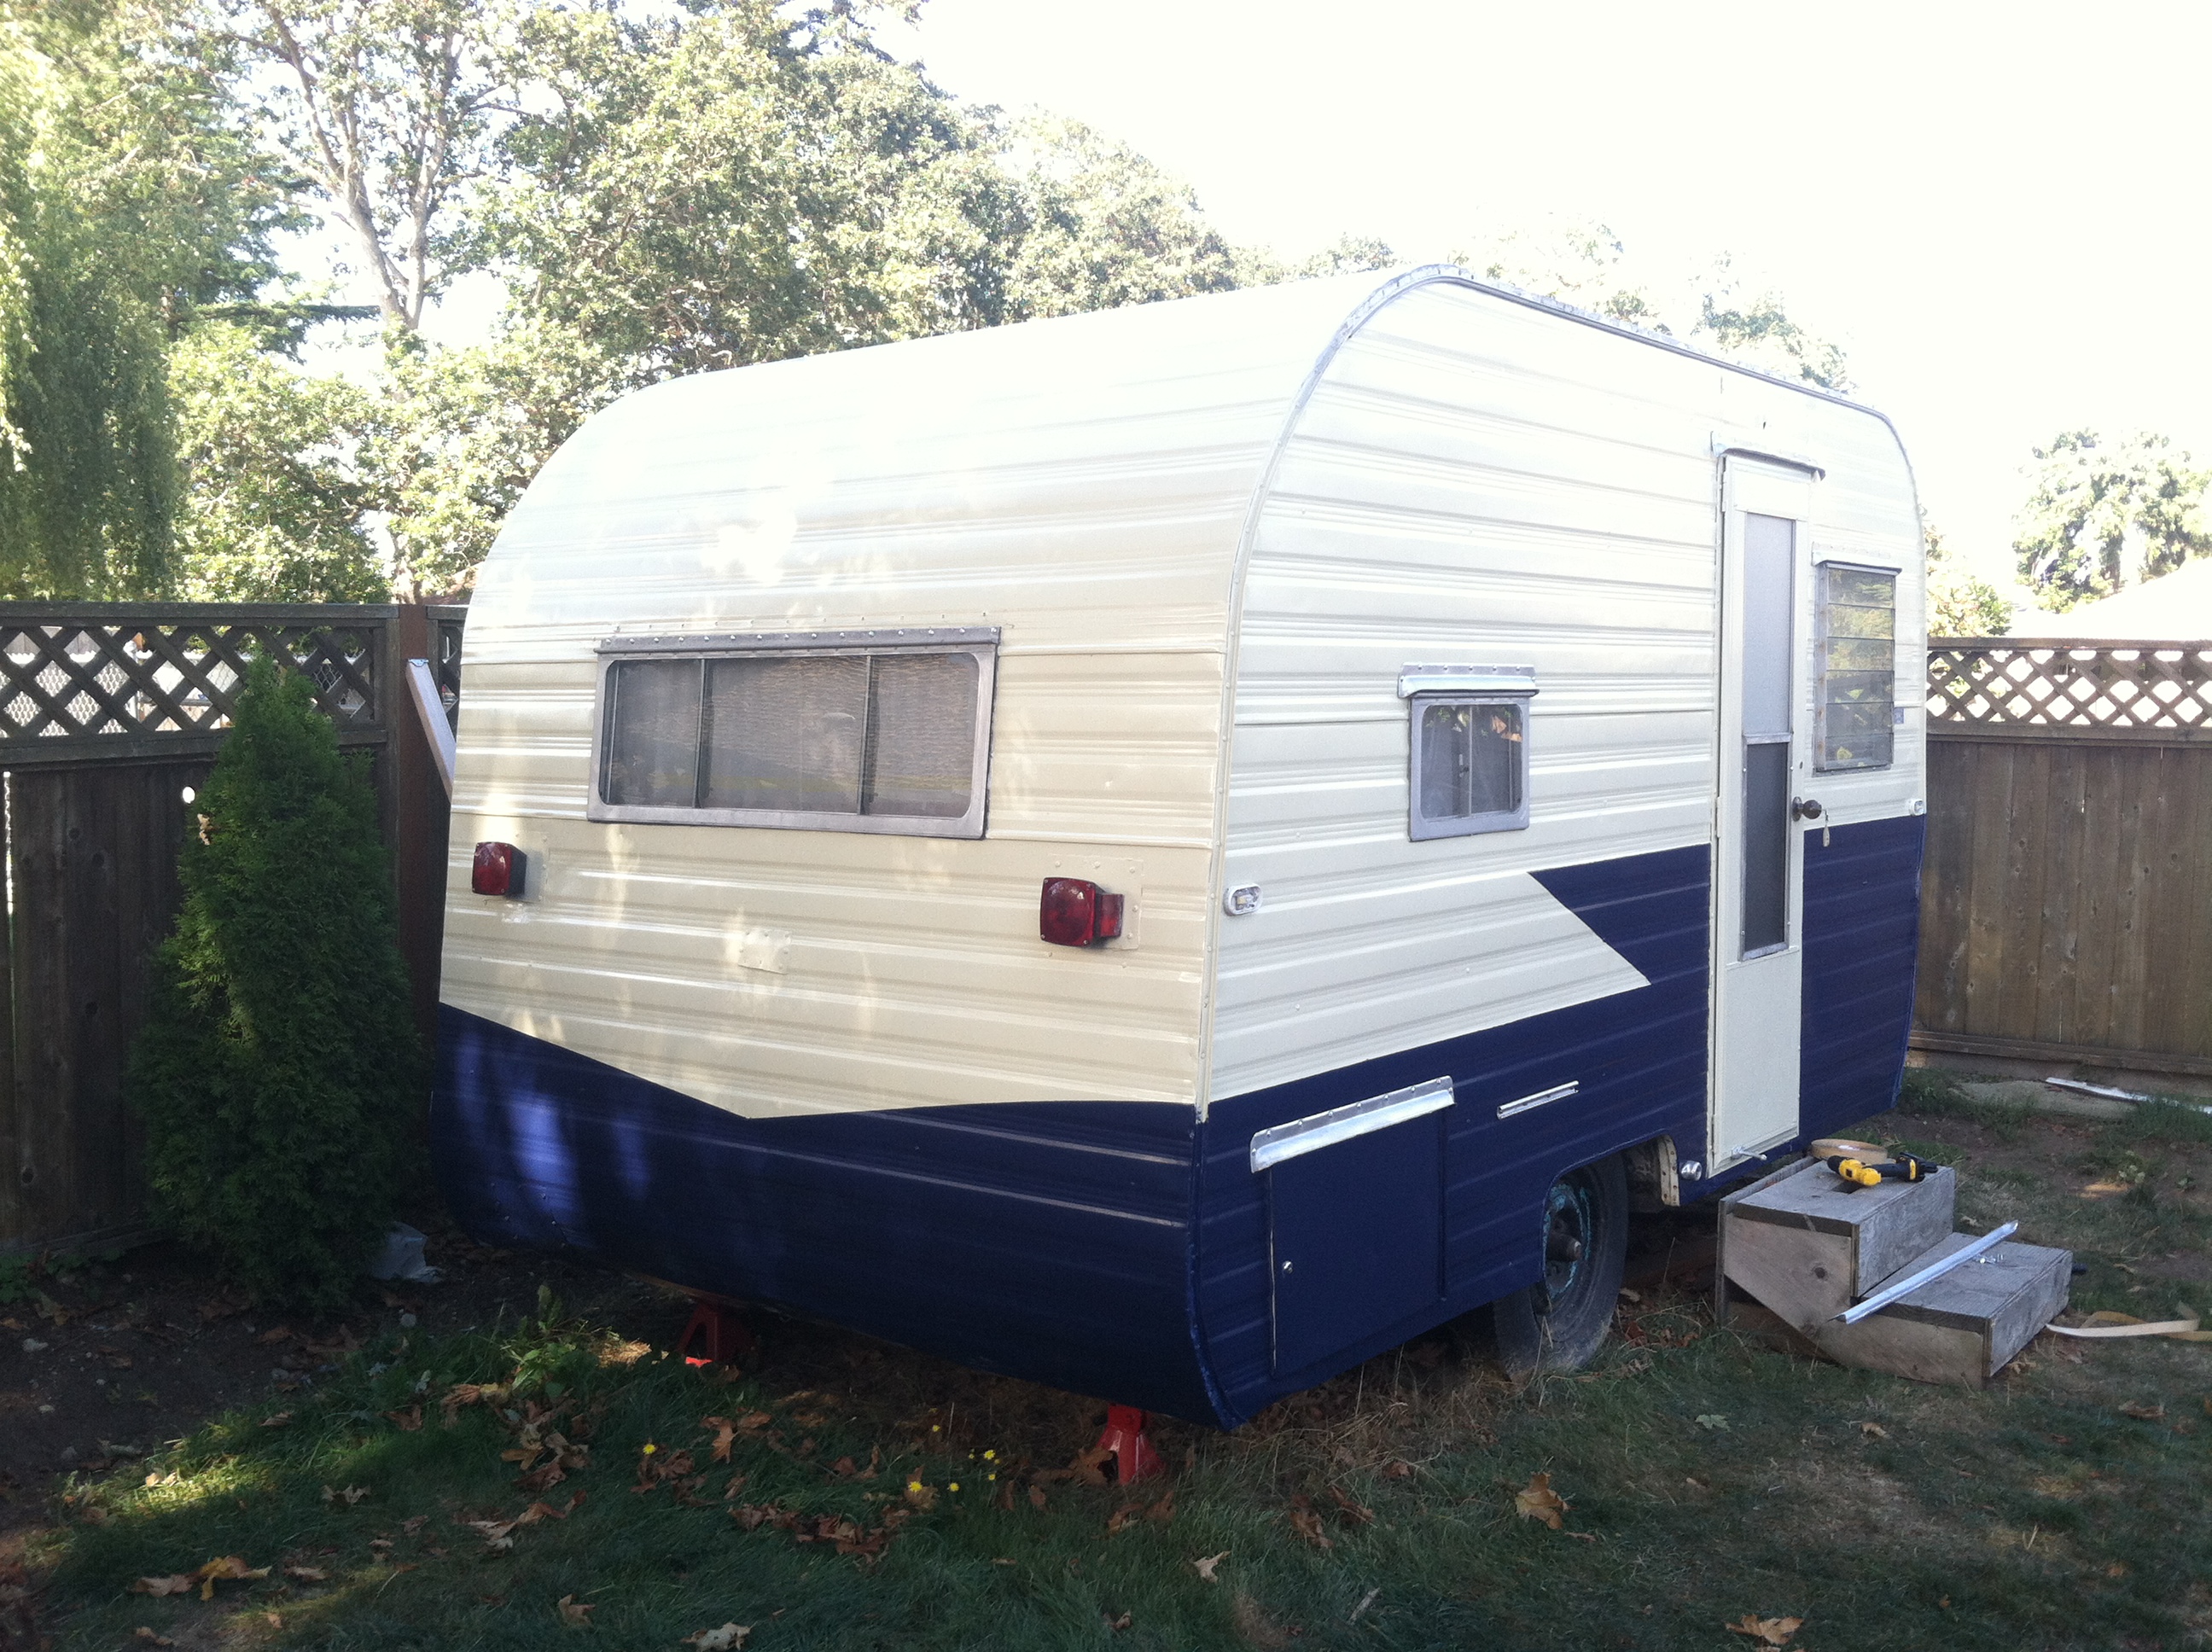
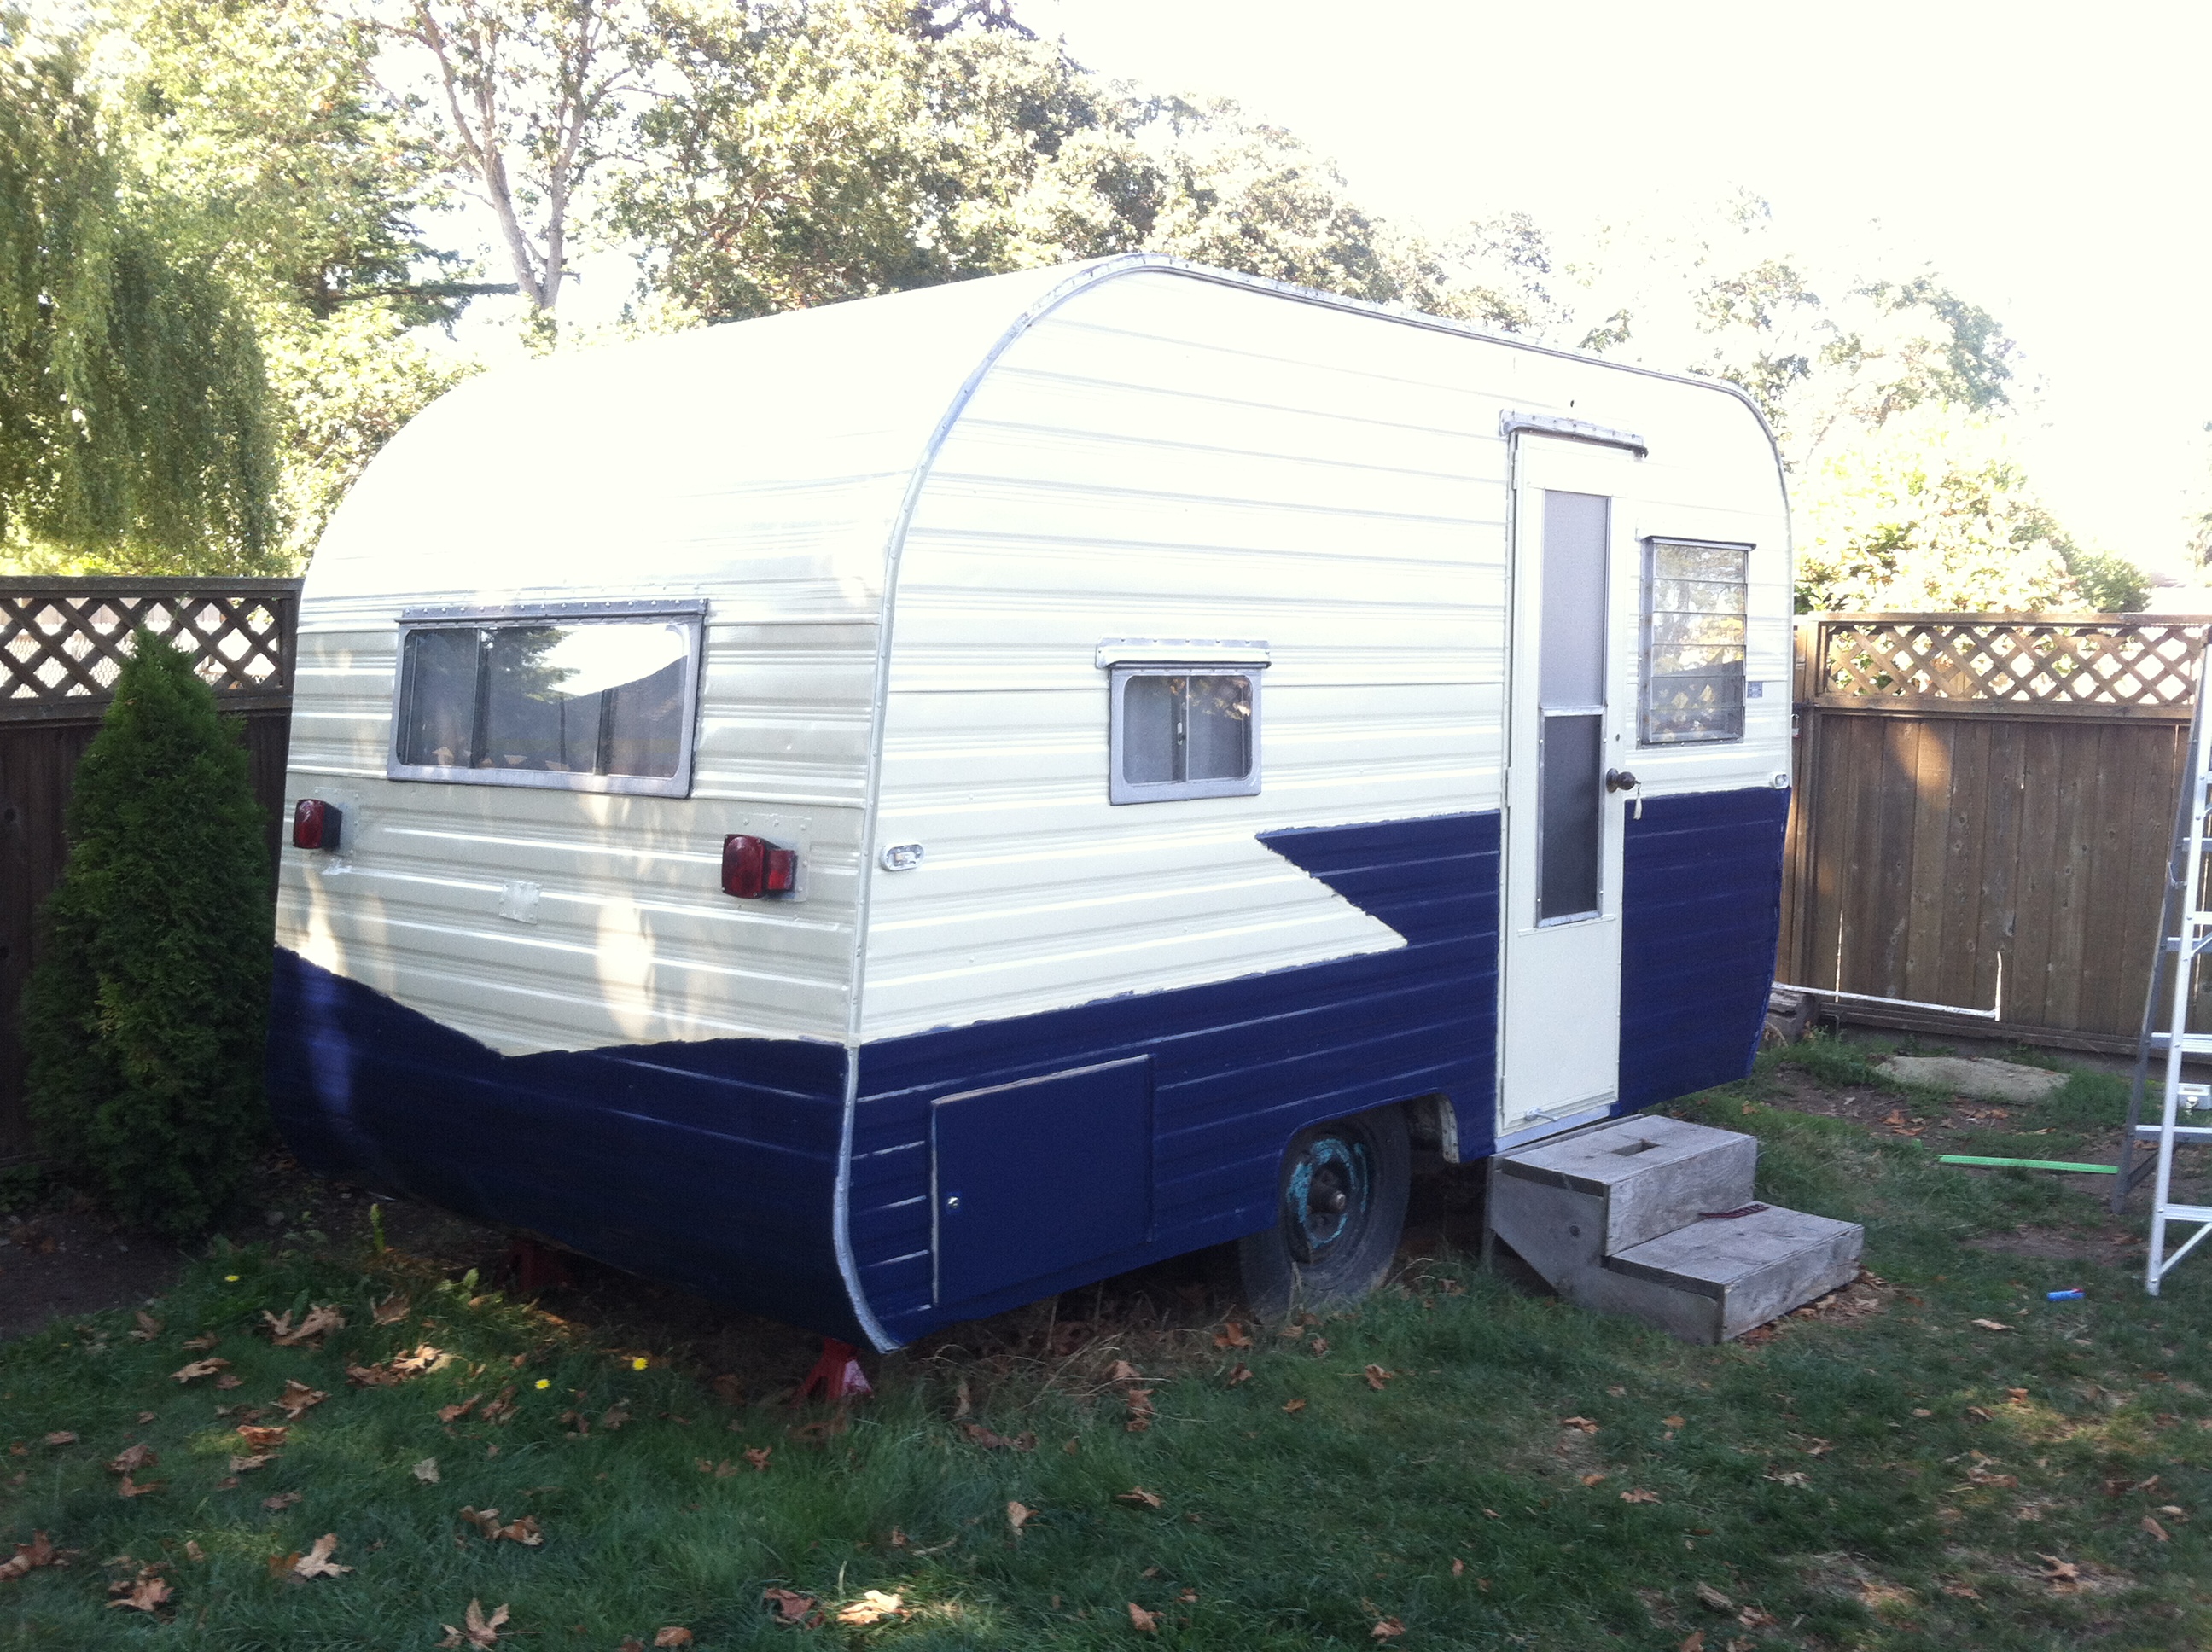
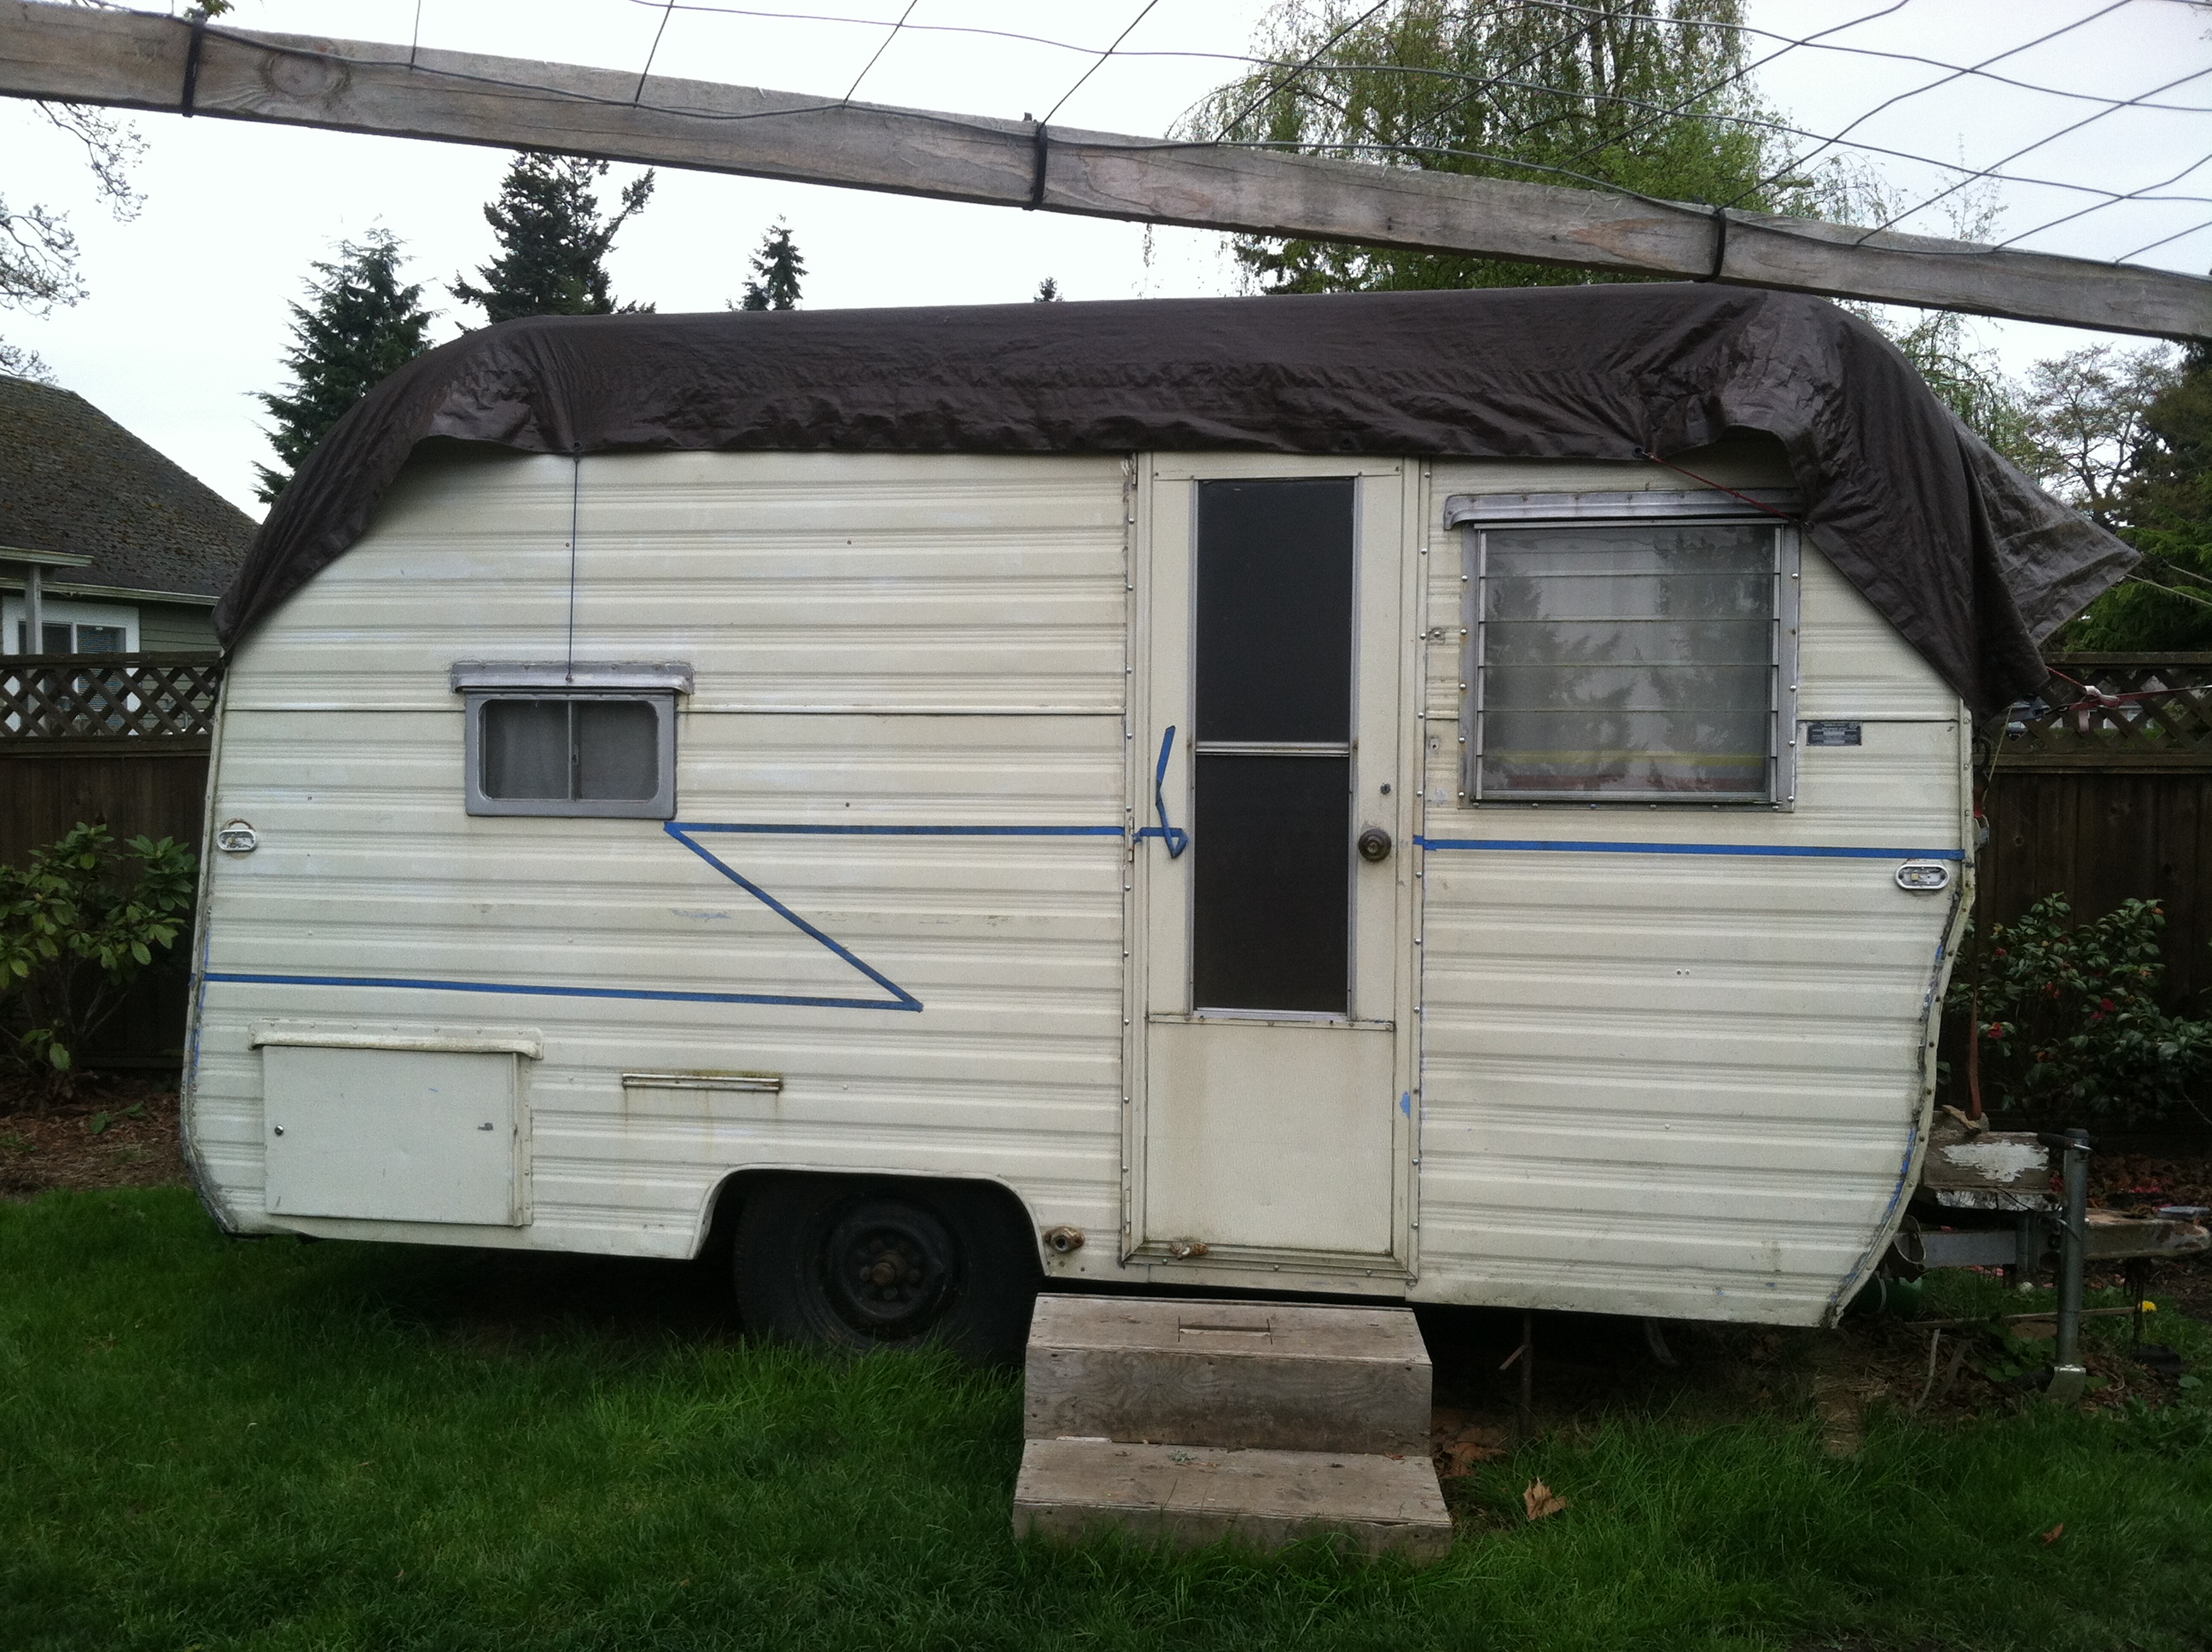
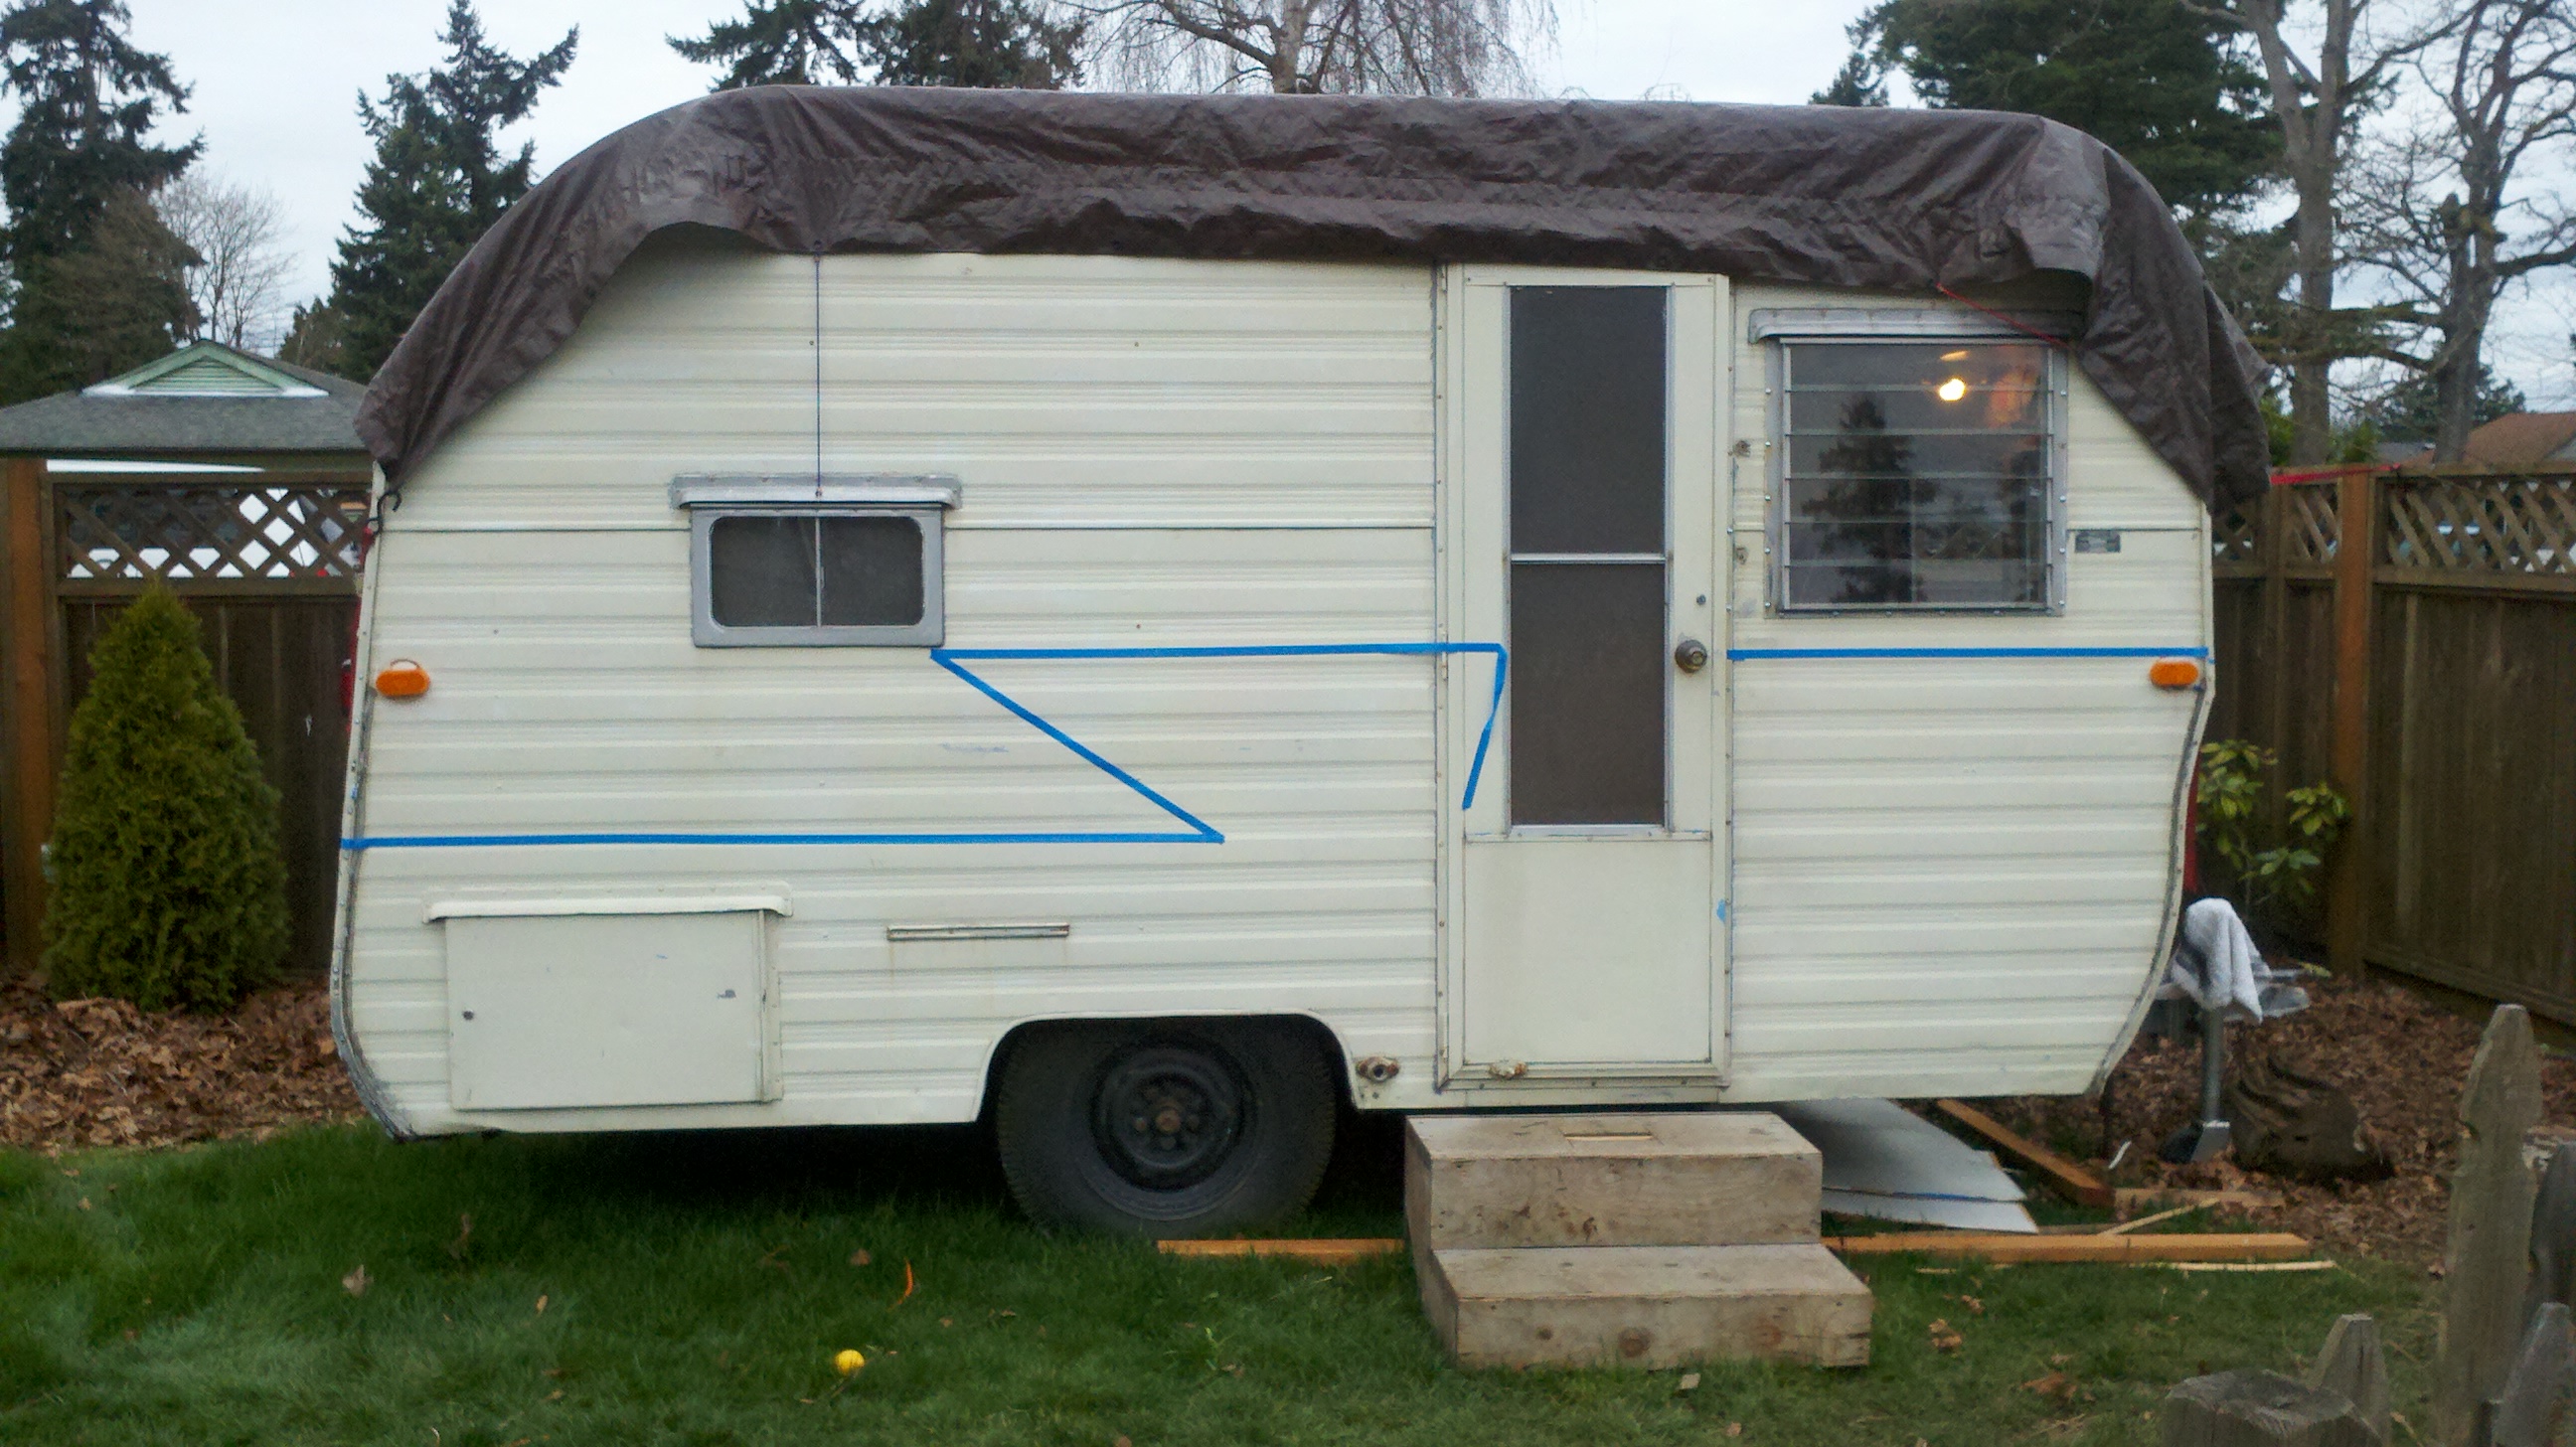
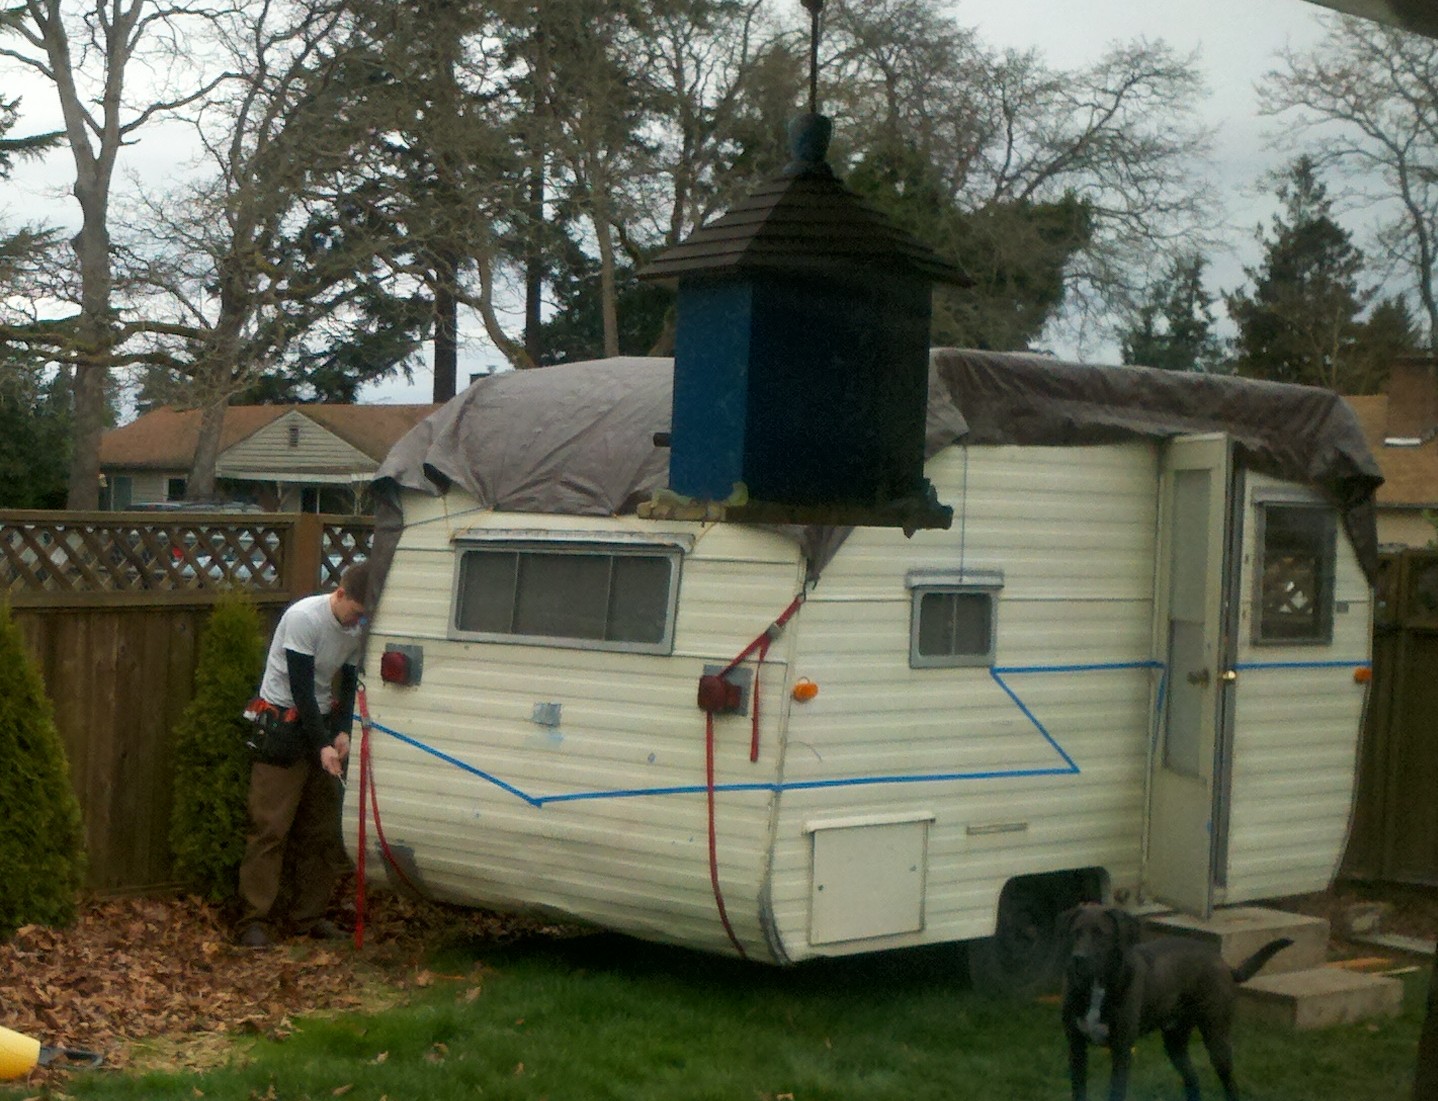
And….. here we go! the new paint job revealed! Now I must confess – at this point ( sometime in Sept. 2014) I only had three sides of the trailer painted. This early spring when the weather started getting nice, I thought, ” I really want to get on the road. We could TOTALLY drive it and go camping somewhere with only three sides painted, right?”

Then, I got ” the look” from the husband. He said we are not driving that thing down the road till all four sides are painted. Fast forward to April 2015. The weather was nice for a straight week. I went and bought some more paint and finished up the fourth side. šŸ™‚

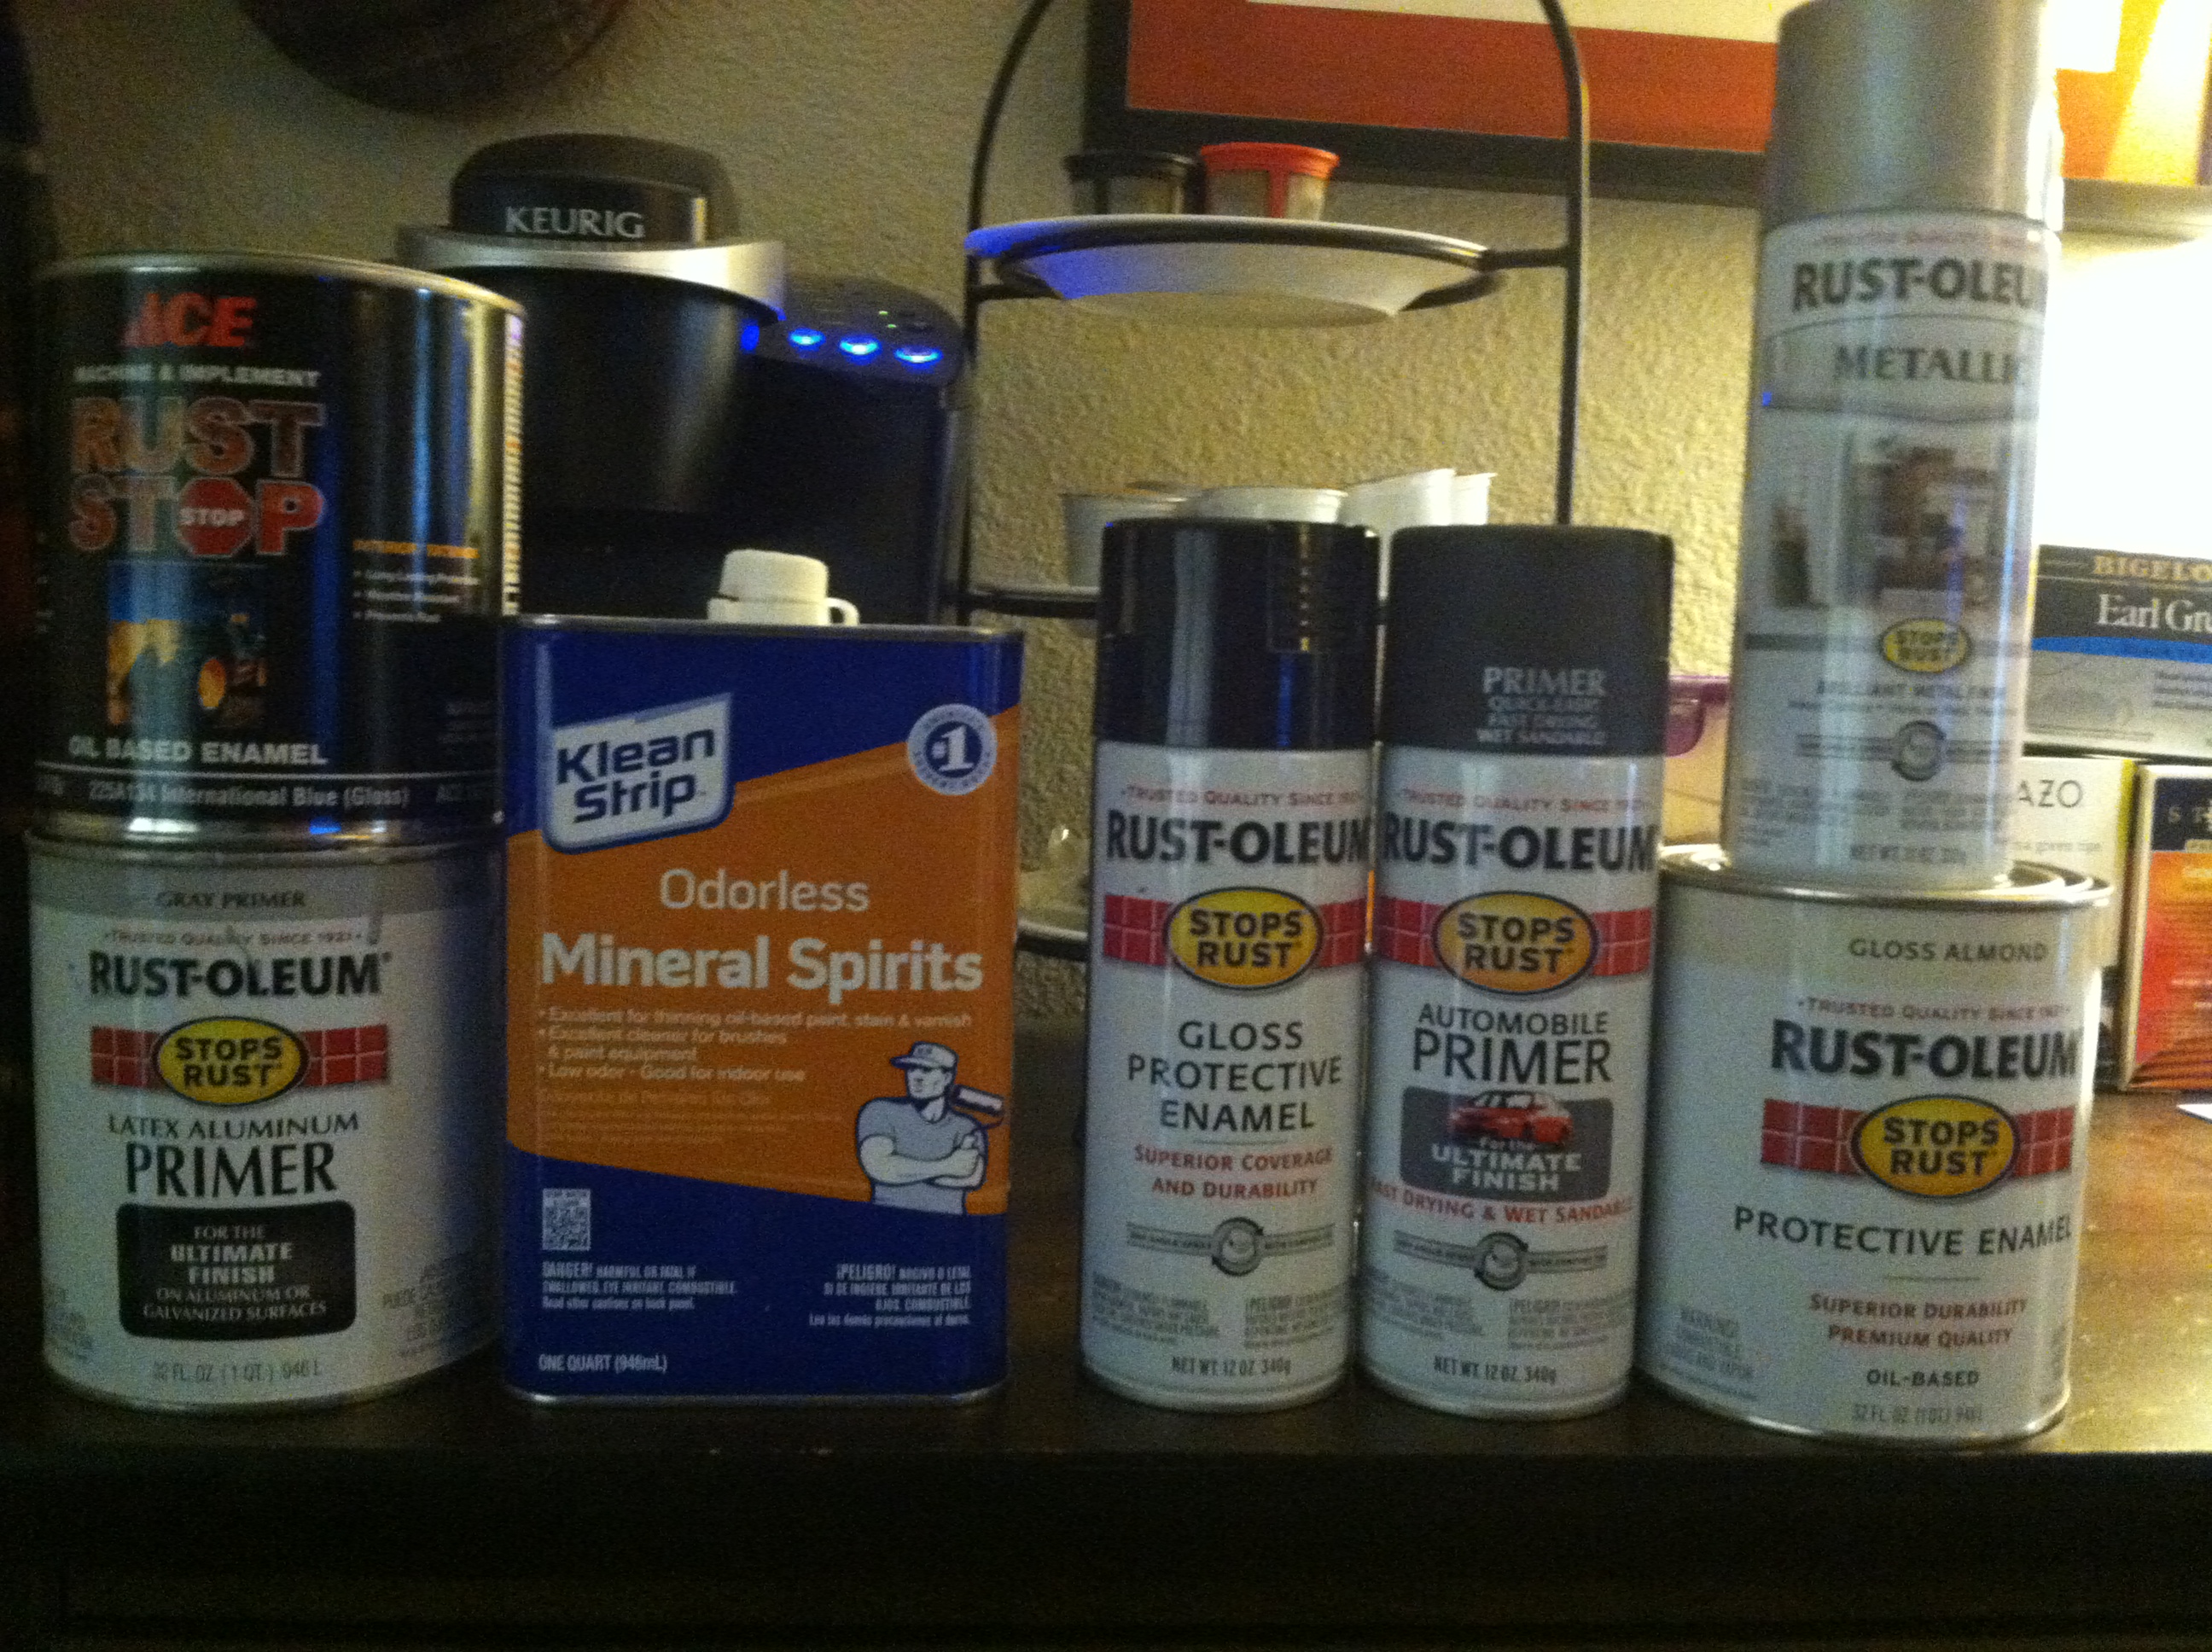
Oh! by the way. A list of the paint that was used on the camper:

*For the gutters and doorstop, I used rust-oleum metallic brilliant metal finish.

*For the trailer primer, Rust-oleum Gray Primer latex aluminum primer. For trailer color, rust-oleum protective enamel in gloss almond, thinned with mineral spirits. Along with, Ace machine & implement rust stop oil based enamel in gloss International Blue, again, thinned with mineral spirits.

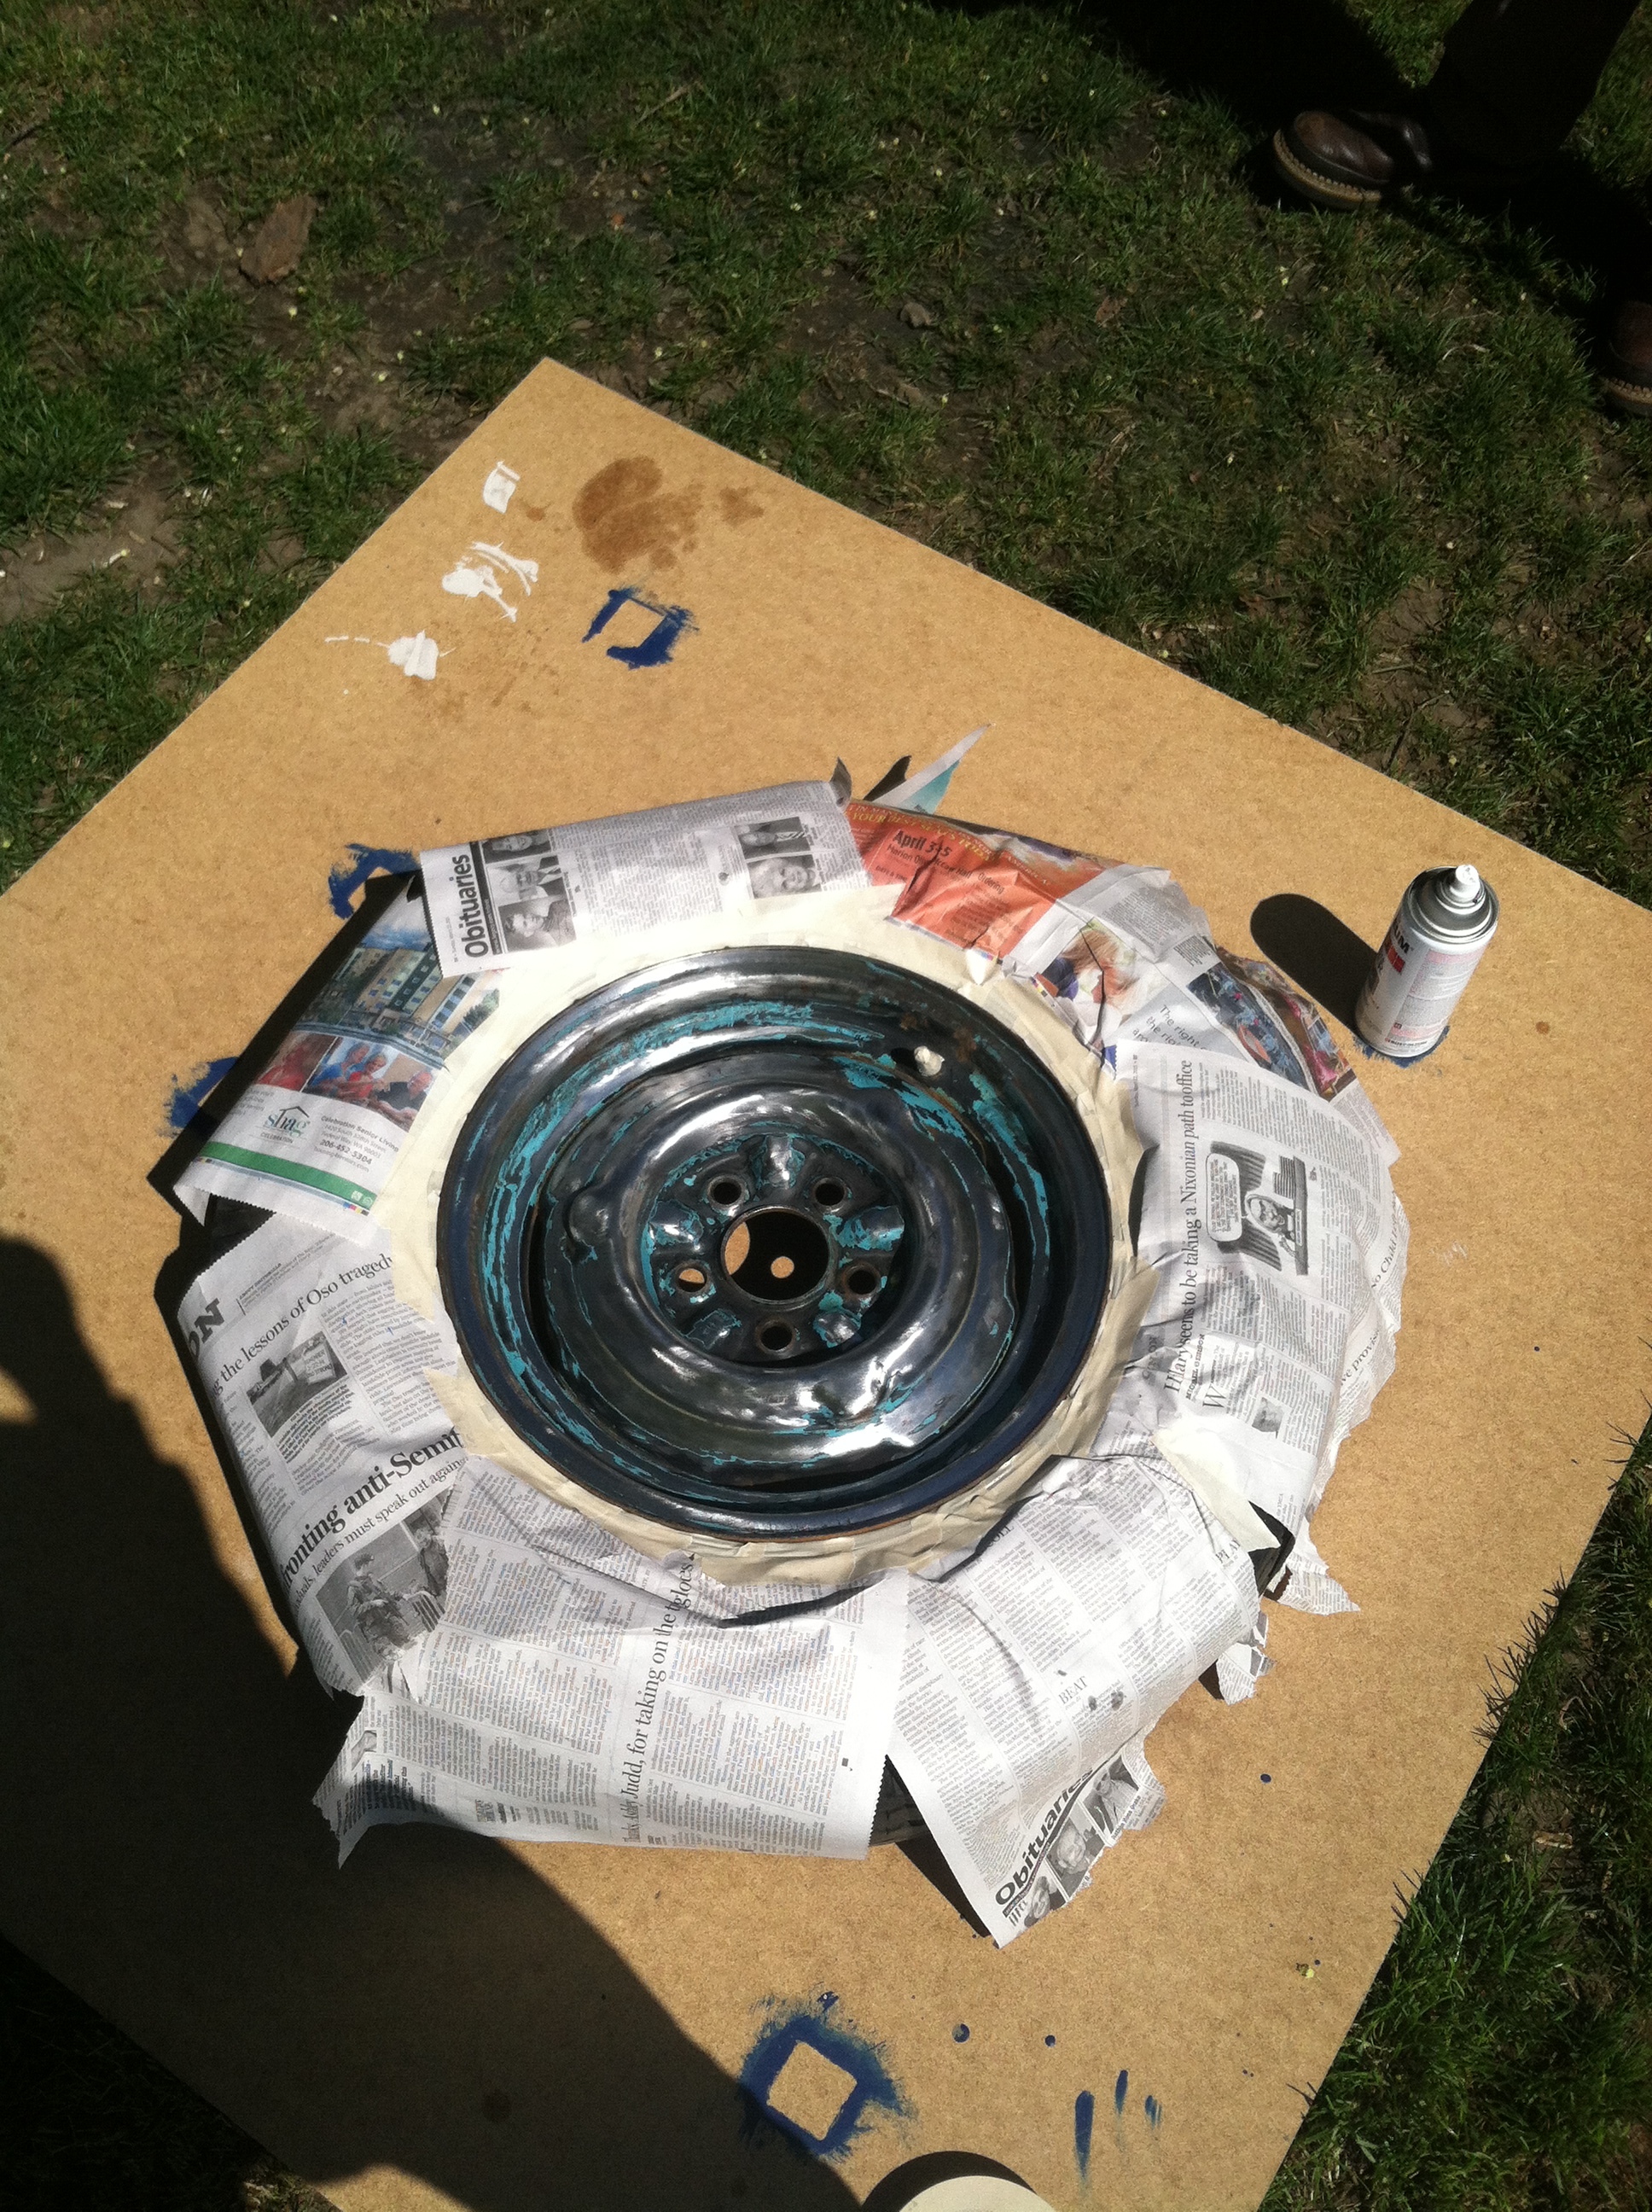
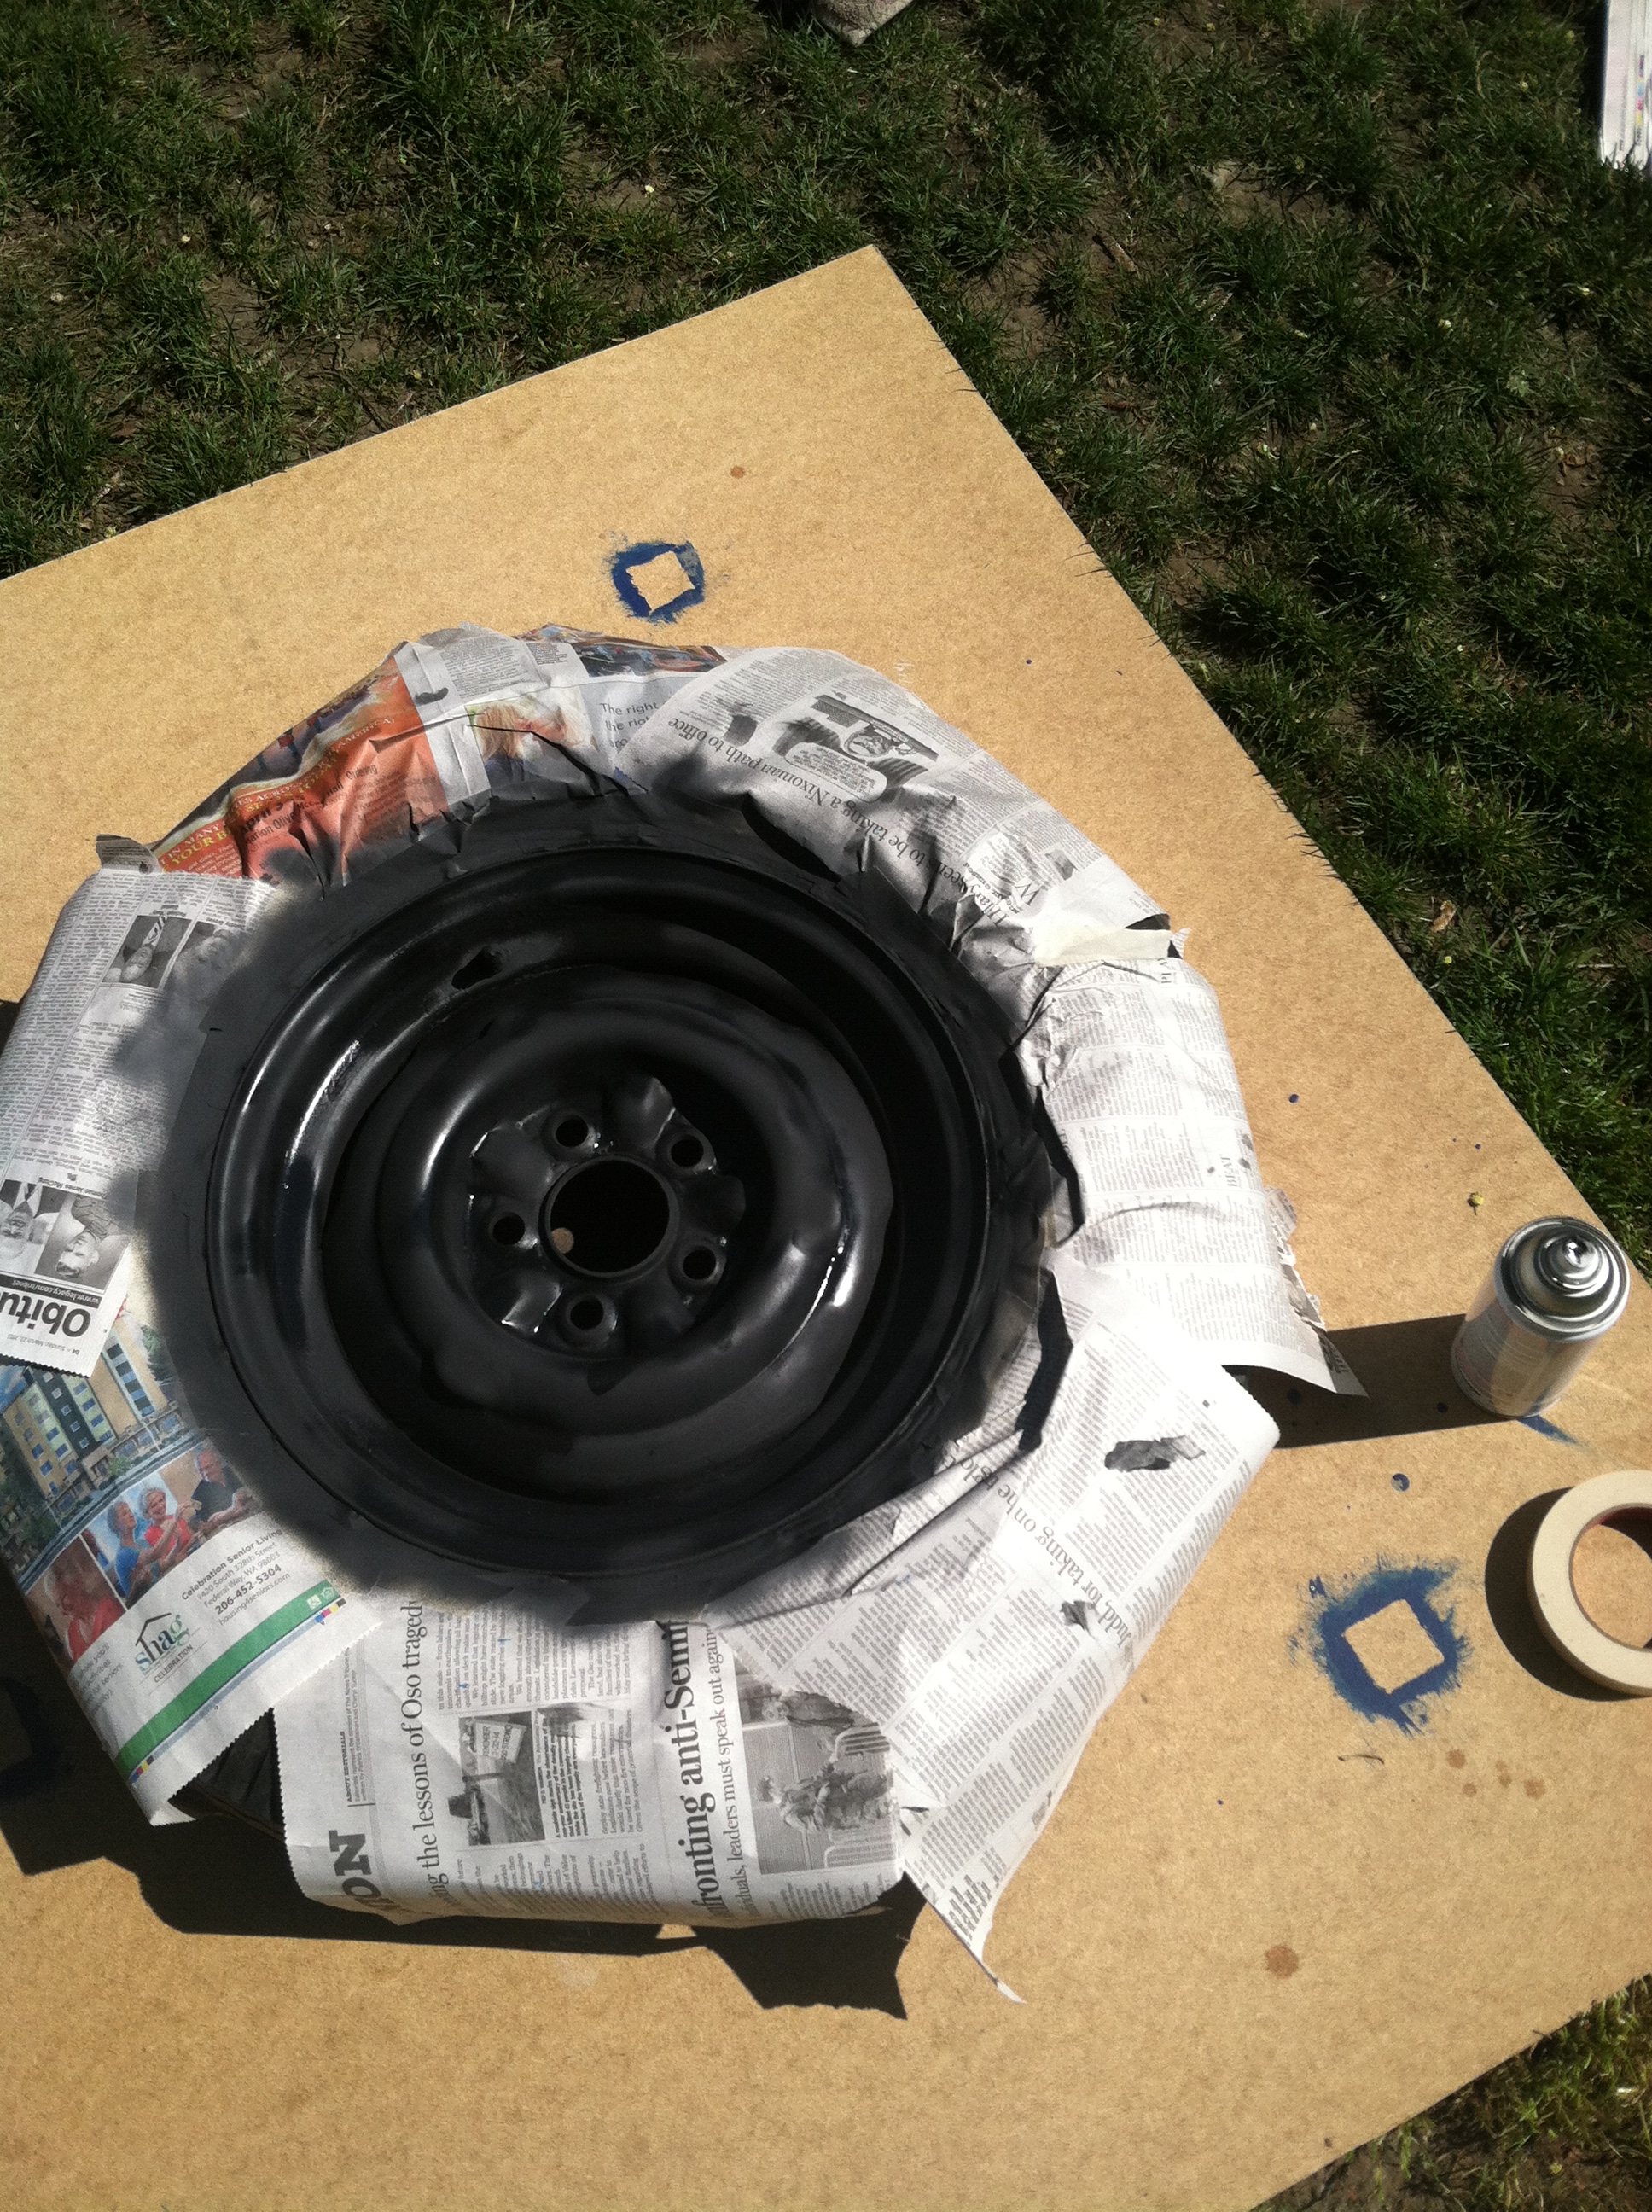
* For the tires-primed with rust-oleum automobile primer spray, and rust-oleum gloss protective enamel spray in black.

IMG_3620


IMG_2871 IMG_3487

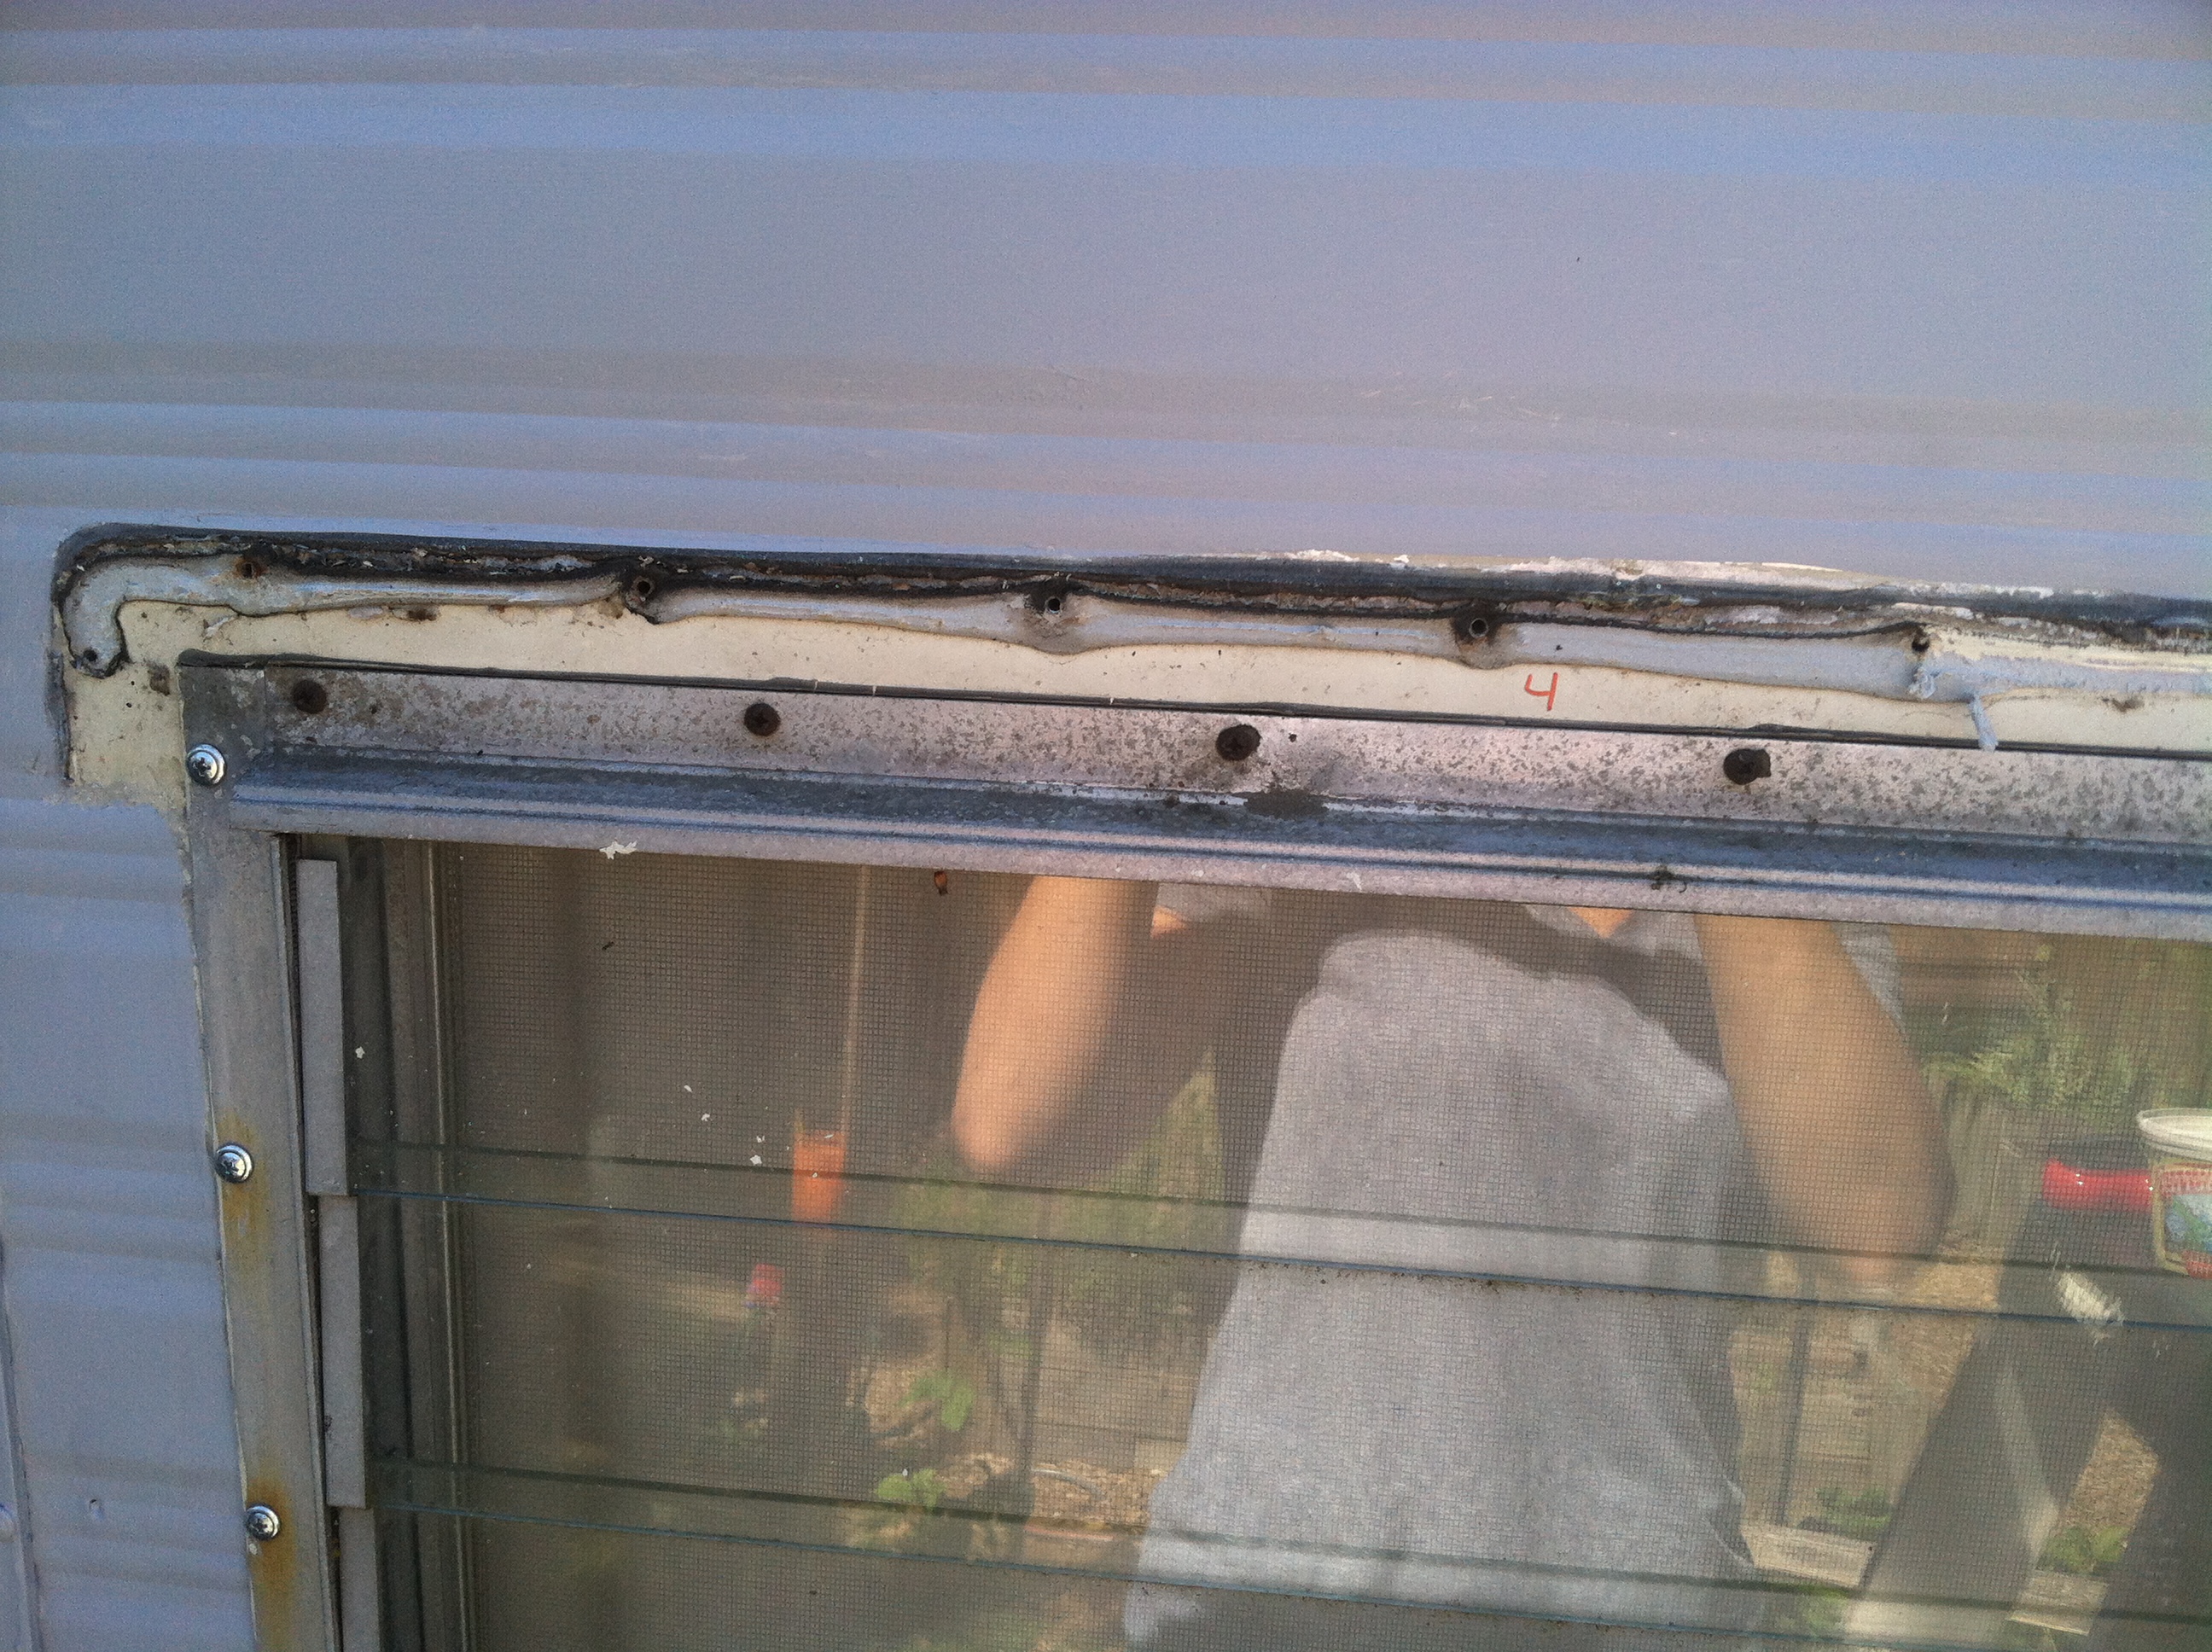
With the exterior paint done, I put the gutters back on the windows, and resealed them with a gray putty like substance(purchased at a camper supply store) so that the outside elements don’t find their way in and around my windows. Out of all the gutters, we only had to completely replace one on the front window.

Alright. On to the tires! At first, we thought we were going to have to get new tires for the camper, but after pulling them off and really looking them over, there is still some life inĀ them, so we just cleaned them up a bit. Sanded off as much old paint as we could, primed and painted. Mr Handy Man also cleaned and repacked the wheel bearings. What a great guy! šŸ™‚


IMG_3488 IMG_3489 IMG_3490 IMG_3493IMG_3494Ā  IMG_3495

IMG_3491 IMG_3492

With some left over paint, we put it to good use. TheĀ tongue in the front of the trailer didn’t look bad, but it didn’t look great either. Out came the sander and the rest of the spray primer and paint. Details matter, people!

IMG_3498 IMG_3572 IMG_3574

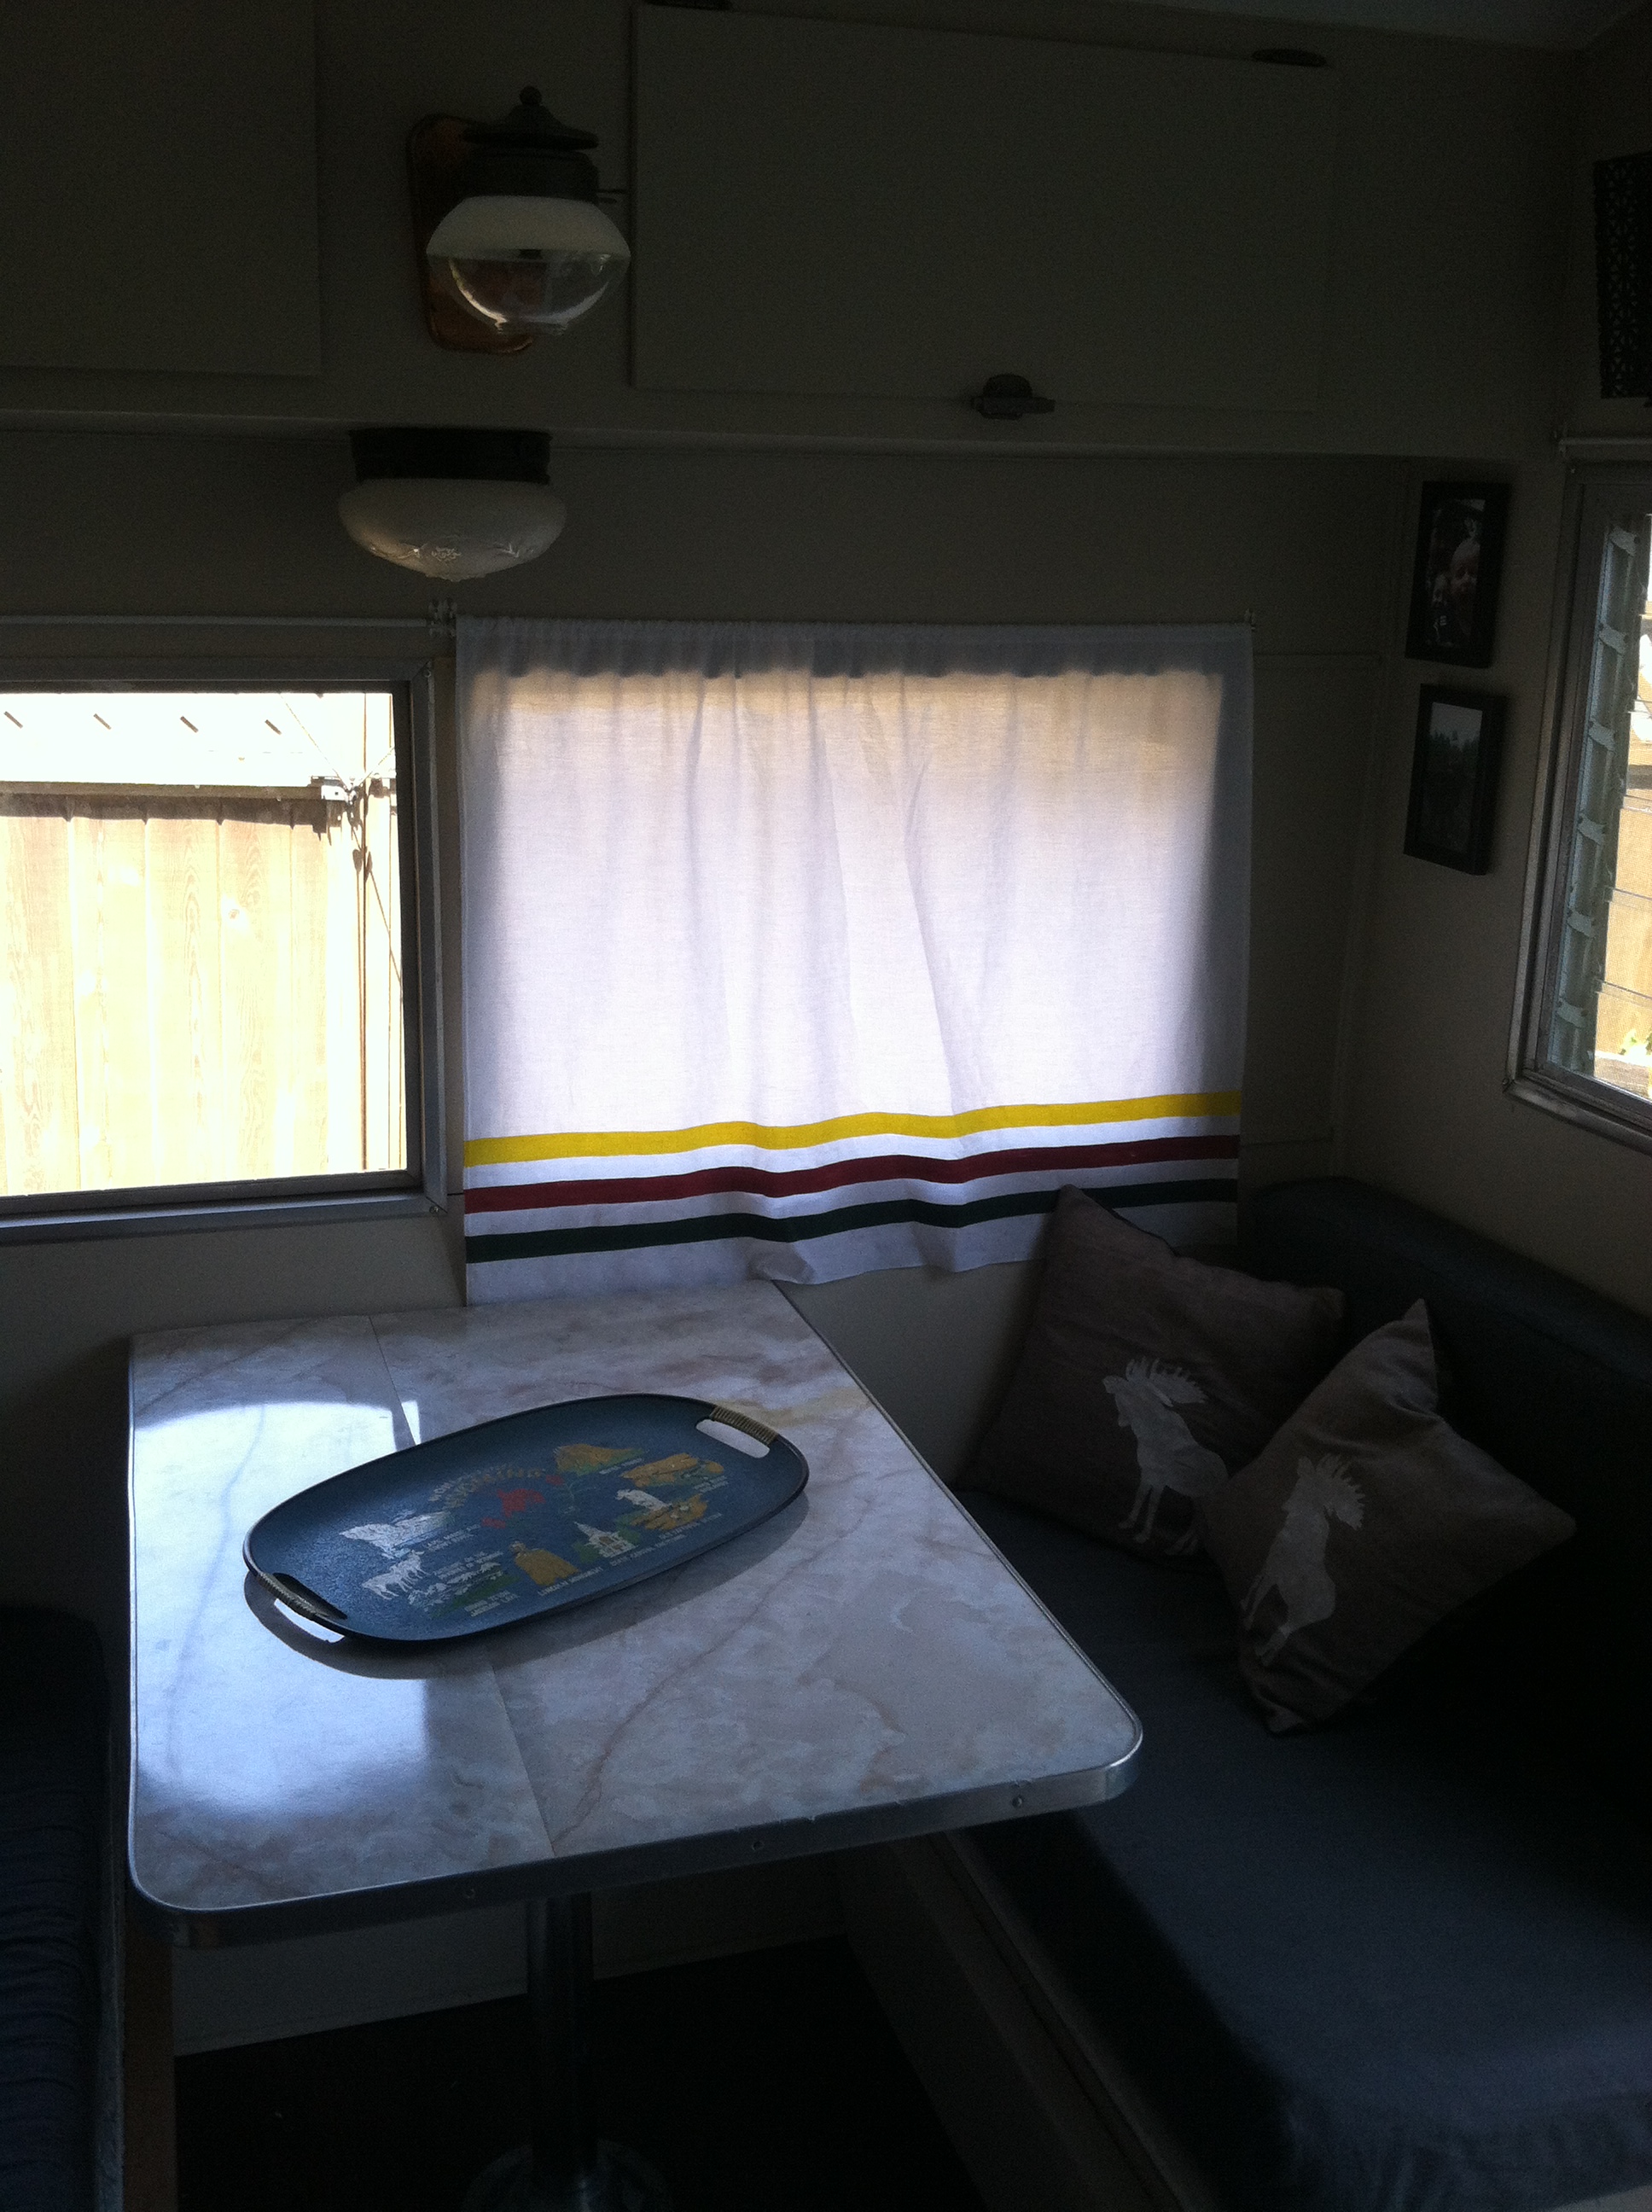
As we come to a close on updating everyone one on the progress of our camper, the new altered dinette table gets back in the with corner taken off and a new coat of paint across the top to match the kitchen cabinet doors. With all this painting going on, I just couldn’t stop myself, I repainted/updated my boys’ bedroom as well and took their stuffed ram’s head. I felt it would be more at home in the camper. What do you think?

In the last picture, I tried to show you one of my DIY projects I came up with. One of the curtains in the back over the bed – I took a plain white curtain, found an image on the internet that I felt fit the feel of our camper. It’s a vintage picture of an old cowboy sitting on hisĀ mule, overlooking the Grand Canyon. A sense of adventure!

And there you have it! Honestly, all that’s left to do to just get this sucker on the road is some current tabs and a little extra wiring so that the lights can be hooked up to the truck. We will get him on the road this summer ( fingers crossed)

Until next time… happy trailers…. I mean, trails. šŸ™‚

Grand Canyon National Park (3)

http://vintagetravelpostcards.blogspot.com/2012/07/grand-canyon-national-park-arizona.html


With the warm weather upon us, time to tackle the outside of Floyd. It was time to strip him down!

And give him a fresh coat of paint. šŸ™‚

2014-05-27 13.21.28

The Handy Husband made a trip to our local Home depot and picked up a jug of paint stripper.

Ok, I’m going to be honest with you…..I have never stripped anything before..:/ this was a first for me and not knowing the type of paint on the trailer, we started with test spots on the trailer to see how easy or hard the paint would come off.

2014-05-27 13.22.01

In the mean time, while we were waiting for the chemicals to do their dirty work. Handy Husband broke out the sander and got some paint and rust off the tongue.

2014-05-27 13.33.49

Lucky for us the paint stripper is doing its job and at this point andĀ coming off easily. Most of the parts are coming off in big chunks. YAY ( for now)

2014-05-28 09.42.06Then……I spoke too soon…. We started to realize the bottom half of the trailer had at least three different colors/coats on it, whereas the top half had just the single layer of white. When the paint was scrapped off, the top white layer came off with the greatest of ease ( for the most part). The bottom half was a different story. Because of the layer upon layer, and one of the layers being red, it wanted to smear. Well…Ā  that’s not what we wanted. I was expecting it to come off in one giant piece, like peeling the skin back. HA! who was I kidding?!

floyd the camper3

Day two: That’s right, I said, “day two” of scrapping and pulling off paint, we discovered that on the bottom half ( remember the layers of paint), if we let the paint stripper sit and dry the thicker layer of paint could be pulled off in BIG OLE chunks. YAY! VICTORY!

Unfortunately, that method did not work on the top half ( thinner single layer), so……. back to scrapping. (sigh)

floyd the camper2

floyd the camper

By the end of day three, and the last day my handy man had off to help me, we have gotten most of the paint off. In the last hour, I experimented some more and found a hair dryer also works well to heat up the paint and peel it off.

So this is where we are at, and honestly, I think to myself, ” not too shabby.”

camper2

BEFORE

floyd the camper2

AFTER


1962-aloha-15ft-trailer-800

FUTURE (sort of) šŸ™‚

__ATA.cmd.push(function() { __ATA.initVideoSlot('atatags-370373-66383cdaac564', { sectionId: '370373', format: 'inread' }); });

…And So Work On Floyd The Camper Resumes.


camper2

Oh Floyd, how I haveĀ missed you!

Ā 

camper1

Its been awhile, but the weather is starting to warm up in our little corner of the world. Good Ole Washington!

Time to get back to working on Floyd and HOPEFULLY ( fingers crossed) get to take him some where….ANYWHERE this summer.

As you can see from the pic above, the back window could use some work. It came with a crack running from top to bottom and electrical tape was used over the winter to keep as much moisture out as possible. More on that in a minute.


Ā 

While most of the of the inside is done, there is still is the matter of the backsplash……(sigh)This has been the GREAT DEBATE lately.Ā Ok, so originally, we had wanted to do the quilted diamond pattern in copper for the kitchenette backsplash. When I ordered the sample I noticed a copper hammered look, liked it and thought, ” What the heck, we’ll see what that looks likes too.”

Both samples were ordered and came in. I feverishly ripped open the cardboard box and ran out to the trailer


camper5

camper4

Once out in the trailer, the Handy Hubby, who was totally on board with the diamond pattern, instantly loved the hammered look. And while I liked both, the diamond look, seemed cleaner looking to me…

Then I got to thinking, the hammered look might be easier to install ( no seams) Thus, my problemĀ was born.

Alright, back to the windows….

camper6 camper7

Taking a break from backsplash…. I need time to mull it over, we turned our attentions to the two busted windows. On the first ” warm” day, we got to work pulling out the two windows with my youngest supervising. šŸ™‚

Ā 

camper8


camper9 camper10

WINDOWS OUT: SUCCESS!


camper11

Complete side note: I am still trying to figure where my little guy came from, cause when we bought him, he didn’t have many identifying marks. We found this logo of a fish on the front and back with the word “RAINBOW” underneath and something about California….. any vintage trailer buffs out there that want to take a stab at it, I would love any info. šŸ™‚


camper12

Back to the task at hand…. While waiting on our windows, it got warm. It got REAL warm and the boys favorite hangout out was, you guessed it…. the trailer. We opened all the windows. Well, the ones we still had. The Handy Hubby kicked back on the pull out bed and took a siesta while the other two read books and played UNO under the table. My kinda way to spend a lazy afternoon. šŸ™‚


camper13

SOOO….. The windows are back and look GREAT! A big THANK YOU to Meridian Glass in Puyallup WA for taking on the challenge. Now time to get these bad boys back in the trailer.

Until next time. ;0)

Floyd the Camper: getting back to work

2013-03-05 13.50.23Ā Ok, so for about half of July, I soaked up some California sun 1200 milesĀ away from my little camper.I missed it so much.Ā The break was much enjoyed, but now I am back home and readyĀ to get crack’n on the trailer again.

IMG_0614

Now, I need some professional help out there in the cyber world…. I put up a few shelves in the trailer and think they should be painted. The problem lies in the color they should be painted, so I would like to know what you all think. šŸ™‚ The first color is hunter green, which I am digging at the moment. The second is a gold/mustard yellow? The third is hard to see, but it’s just a dark brown. And last, is the same color that is on the cabinet doors in the kitchenette.Not sure the name of the last color…..coppery tan?

So which color should make the cut?

IMG_0617

Had to show off my art project. šŸ™‚ My paper mache antlers are now mounted in my trailer.


IMG_0616

The handy husband installedĀ the old propane lamp back into the trailer. I think its pretty cool looking, givesĀ it that oleĀ rustic charm. As you can see in the background, we have a few frames “stuck” to the wall. I sawĀ  “stuck” because we used Velcro to attach them. Using the Velcro helps keeps holes out of my walls, which make me a happy camper. Get it? Happy. Camper.

…anyways, I thought it was funny.


IMG_0621

Don’t think I have shown you yet, but the benches and table are in. YAY!


IMG_0619

This is the way we chose to deal with the table-into-bed situation. Oh yes, there is a table to bed situation…Ā We decided to use slats that reach across the bench and place the table top across the slats.


IMG_0620Because as you can see from the picture, the table top does not reach all the way across like it should. Eventually, we will build a better table top that fits better, but until that day…. this seems to work.


IMG_0618

The bed all set up and ready to go. This will more than likely be the boys bed when we go camping. Hopefully here soon, work will move to the outside while the weather is in our favor.

until next time….happy camping. šŸ™‚


Floyd the Camper: starting to look like a camper!

2013-03-05 13.50.23

Holy mashed potatoes, Batman!

The trailer is coming back together and starting to look usable again. Well, at least from the inside it is. šŸ™‚

IMG_0231

Just hanging out with my power tools getting some work done.

The funny thing is…before I started this process, I had limited knowledge and use of power tools, short of the cordless drill. I’ll admit, I was a little intimidated at first. Though shortly after, I got more comfortable, and now my power tool resume includes the cordless drill, two different saws, and the nail gun. YAY.

IMG_0235

The boys supervised while the dinetteĀ benches were put back in.

IMG_0236

“Hey, Tanner, why don’t you offer up some of that water? ” šŸ™‚

IMG_0238

The benches are finally back into the trailer. Now a place to sit.

IMG_0241

Forgot to mention, the handy husband got the floors finished, and look pretty nice, if I do say so myself. We did the click together lament flooring, which is durable and pretty, but not AS easy to install when your trailer is not perfectly straight front to back and side to side. Pretty sure, linoleum would have been easier.

Lesson learned.

IMG_0242 IMG_0243

Now the walls and floors are all in, I got back to work on the trim and paint. Exciting stuff, I know. :/

IMG_0237

Then one day whileĀ the handy husband was at work, I decidedĀ I was going to tackle putting in the couch/bed…..myself.

The frame wasn’t so bad, but the board that goes on top of the frame to hold the mattress up has to go in a certain way…. After about, taking the board in and out of the trailer three or four times (exhausting, by the way), I set it correctly. VICTORY!

IMG_0245 IMG_0246

After all that work getting the mattress, blanket, and pillows in the trailer, I took a nap. šŸ˜‰

IMG_0212Ā  IMG_0213Ā Ā  IMG_0220

IMG_0221

Later, I took a break to do some arts and crafts inside. I absolutely LOVE Ansel Adams and one of my most favorite photographs of his, is a picture of Mt Rainier.

There aren’t too many picturesĀ taken by him of Mt Rainier Nt’l Park and when we are out on the road, itll remind me of home.

The picture I am using above is from last years calendar and I would have framed as is, but the white border around it was uneven and would have look weird framed that way. So, I simply cut out some white poster boardĀ the same size as the frame and cut out the picture itself without the white border. Next, I centered the cut photograph on the poster board, glued it down and framed it. Ready to go!


Floyd the Camper: taking a break.

2013-03-05 13.50.23 Ā  Ok, progress has slowed a little, and I could say the weather has been nice, maybe, a little too nice… to get any work done. šŸ™‚ We have gotten the overhead cabinets back in, and I startedĀ to giveĀ the ceiling a fresh coat of white paint. 2013-04-18 11.15.33Ā Ā 2013-04-18 11.16.38 And as you can see, some more curtains need to be made and an extra cabinet door hung.

2013-04-18 11.17.16

The real problem came, when we got to the door of the trailer. We took all the metal trim and the door itself out, to put in the rest of the walls and to replace some rotted wood in the frame. All was ready to put the door back on, and when we did, the trim would not line up….. needless to say, we had issues with Floyd, got frustrated and took a break. While the handy husband was taking a step back from the trailer for a bit, I started in on some of the trim work to hide the seams of wall that we putĀ up.

2013-04-18 11.16.07Ā 2013-05-19 17.01.50 2013-05-19 17.02.00

Then weĀ went shopping, and found our flooring ( for when we get motived again to install).

2013-05-20 10.56.32 Tony made a stop by the local thrift store and found these little treasures to go in the trailer. I know, the tray is, what some might call, a little ugly, but, it will TOTALLY go with the theme and trailer when done. trust me. šŸ˜‰

Then, the other day, the motivation came upon us! It was nice out, so IĀ decided to try and tackle the door once more. Handy husband joined in shortly after.

IMG_0041Ā Ā  IMG_0038

We took EVERYTHING off to try and figure out why our door frame was not lining up. Long story short….. it was never really even to begin with and, well, we got it figured out. šŸ™‚

IMG_0039

IMG_0040

After the door was fixed (to the best of our abilities), we tackled the back half of the trailer. There was a gap between the floor and the wall. Tony got to work and bolted it together.

IMG_0042

Since he was on a roll, Tony got started on laying some floor. YAY! The floor is going in! Now I feel like we areĀ  moving along…

IMG_0074Ā Ā  IMG_0075

2013-03-11 13.27.03

Saw this fan at an antique store. Thought it would make a great addition to Floyd. šŸ™‚

Until next time. šŸ™‚ happy trails.

Floyd the Camper: the walls are up and the paint going on…

2013-03-05 13.50.23

The excitement of having the new trailer is starting to wear thin. Did we bite off more than we can chew? I hope not, but we are powering through.

2013-04-04 12.59.29

2013-04-04 12.59.48Ā Ā 2013-04-04 13.43.26

We are in the home stretch with putting up walls. YAY! I thought theĀ end would never come! well. at least with putting up walls….

So much cutting….

2013-04-04 20.10.46Ā  Ā 2013-04-04 20.11.10

So here we are with the back wall FINALLY done and ready for some primer and paint. I feel like we are moving forward again, because the walls took so much time. I never realized how many curvesĀ  and angles we were going to have to cut.

2013-04-05 14.58.42Ā Ā Ā  2013-04-05 14.58.54

This is where I come in. I LOVE to paint, and its a good thing, because there is a lot of it. šŸ™‚

2013-04-05 14.58.10Ā  2013-04-05 14.57.55

These are some of the benches from the dinette,Ā I primed and started to paint. Like, I said earlier, the color we are using for the main walls, benches and couch/bed is called creamy mushroom ( handy husband is not fond of this color). If interested, it was found at the Home Depot by Behr. I think it’s a great neutral for all the pops of color coming later on, you’ll see. šŸ™‚

2013-04-06 14.40.58Ā 2013-04-06 14.41.21

Oh yeah. I almost forgot. I wanted to show how we managed all those curves when cutting out walls….

Well, I got ahold of our some printer paper, but really any paper I am sure would work, and creased them down into the corner curves. Adding and taping paper together as I went. OnceĀ I got the whole length, I took a pen and traced the crease in the paper and cut it out, thus, giving us a stencil to use when cutting out pieces of wall. It’s notĀ an exact science, but it helped out a lot with moving the process along and cut down on a little of the frustration. šŸ˜‰

2013-04-08 14.30.20 2013-04-08 14.30.45

While out in the trailer working along, our little “helpers” are keeping entertained on the couch cushion we moved back inside for now ( not yet recovered, of course. )

“Floyd ” the Camper

2013-03-05 13.50.23

Progress is slowly taking shape. Yay! We are at a point when things are starting to go BACK into the trailer, instead of taking things out. The tricky part now, is putting theĀ walls back in. Why can’t our little Floyd be a prefect square? It would make it so much easier cutting the board for the walls. šŸ™‚ oh well, such is life…. things that are worth it, never come easy.

2013-03-24 14.40.02

There were a few small sections around the door that had some rotten wood, so….. the Handy Husband had to take the door out, put new wood in the frame and put the door back on.

2013-03-24 14.40.24

While he was busy doing that and he gave me the “ok”, I started putting cabinet doors back in. I know it’s really, kinda hard to see but some painting got done as well. For those familiar with my house, it’s theĀ brown gray color that covers a majority of my walls. For those not familiar with my house, the color is creamy mushroom from behrĀ ultra. Go to Home Depot and find it. šŸ˜‰ I will try to get some more pics to show the color better.

Things are looking up. šŸ˜€ Oh! If you can see the floor in the picture above, notice we don’tĀ have a “floor” anymore either. HH ripped up the floor too.Ā  It was an off white tile, reminisce of the old tile found in the elementary schools that have been around FOREVER.Ā  So, after the walls are all in, time to go floor shopping.Ā Still undecided on what type and style of floor we will go with….. ideas?

2013-03-28 16.49.01Ā  Ā 2013-03-28 16.48.33

All the benches and bed/couch are currently being stored in the garage, so please excuse the mess. šŸ™‚ A few had some well wornĀ weight baring bars, so we replaced those and the dinetteĀ benches got new sides. The couch/bed as well, received a new facing on the bottom of the frame where there is a cabinet door for storage.

2013-03-21 15.30.46Ā Ā Ā 2013-03-28 11.25.48 Ā 2013-03-28 19.38.45

Now, this little cabinet door is right above the kitchenĀ sink, and from the looks of it, used to hold a speaker and radio? At least, that’s my guess…

We thought we would do something a little different with it, because the piece of wood we got to cover the odd holes in the front is a little different from the rest of the cabinets. We wanted to put ourĀ little campers name somewhere on the trailer and thought this would be a good spot.

I needed to come up with a design for the name, cause how silly would it be, to just have a name painted on a cabinet door? šŸ˜€ Since, we are going in the direction of a retro hunter/summer camp theme in the trailer, I thought what about a “stick” frame?

First, I drew up the stick frame the way I wanted it to look and when it was ready to be transferred to the cabinet door, I found some carbon paper and traced it ontoĀ  the door. If you look at the second picture above, you might be able to see the transfer of the carbon, its pretty light and hard to see in the picture. Once the frame was painted on, we decided on the font style we wanted, andĀ I just printed out “Floyd” in the chosen font from Windows Word and repeated the process. šŸ™‚

I am just SO excited things are starting to take shape!

Until next time, peace out girl scout. šŸ˜‰

Update: “Floyd” the Camper

2013-03-05 13.50.23

ok, so this is how the conversation went the other day…..

I went in the trailer to observe the progress made, when I noticed something. The wall that was still in the trailer is wood, and although it is painted white, you can still see the wood grain through the paint. The “wall” material the Handy Husband boughtĀ to replace the parts we had to rip out was something smooth, like a particle board material ( IĀ don’tĀ know what it’s really called)…..

“Um… Did you realise we have two different wall materials, and although its going to be painted, it is noticeable they are different. ”

“CRAP!”

This did not make Handy Husband happy, but he understood and knew what had to be done.

So we began ripping out pretty much ALL the walls. šŸ˜¦ Blessing in disguise though, because then we could see if there were any more “trouble” spots and we could put in new insulation. It’s theĀ pinks stuff used in houses, the originalĀ insulation was paper-thin. After reinsulating this little camper, it should be like a warm little sauna in there. šŸ™‚

no wallsĀ Ā  Ā nowall5

BeforeĀ Ā Ā Ā Ā Ā Ā Ā Ā Ā Ā Ā Ā Ā Ā Ā Ā Ā Ā Ā Ā Ā Ā Ā Ā Ā Ā Ā Ā Ā Ā Ā Ā Ā Ā Ā Ā Ā Ā Ā Ā Ā Ā Ā Ā Ā Ā Ā Ā Ā Ā Ā Ā Ā Ā Ā Ā Ā Ā Ā Ā Ā Ā Ā Ā Ā Ā Ā Ā Ā Ā Ā Ā Ā Ā Ā Ā Ā Ā Ā Ā Ā Ā Ā Ā Ā Ā Ā Ā  After

nowall2Ā Ā Ā Ā Ā  nowall4

BeforeĀ Ā Ā Ā Ā Ā Ā Ā Ā Ā Ā Ā Ā Ā Ā Ā Ā Ā Ā Ā Ā Ā Ā Ā Ā Ā Ā Ā Ā Ā Ā Ā Ā Ā Ā Ā Ā Ā Ā Ā Ā Ā Ā Ā Ā Ā Ā Ā Ā Ā Ā Ā Ā Ā Ā Ā Ā Ā Ā Ā Ā Ā Ā Ā Ā Ā Ā  After

nowall3

I am really itching to get in the trailer and get the molding up and start on some painting. If it means I get in and help get the insulationĀ done, so the walls will go up faster, then IĀ will do it! Check out my cute cowgirl boots! šŸ˜‰

2013-03-10 22.32.24Ā Ā Ā  Ā 2013-03-10 22.43.02

Remember the wallpaperedĀ cabinets with the white fence and flowers ALL over? Well, that had to go! So, the other night, I sat on the living room floor, turned on my tv shows and got to work on those cabinet doors. Come to find out, it was pretty easy ( for the most part) to get the wallpaper off. Just, boiled up some water and got my scrubby and rubber gloves out. Used the scrubby to moisten the paper with the boiling water and began peeling it away in large chunks. I have also heard if you use boiling water and fabric softener, that works wellĀ also for stubborn wallpaper.

After those were done, got to work painting the rest of the cabinet doors and putting the hardware back on. OOOOoooooo I am so excited to start putting things back IN the trailer, instead of taking things OUT. šŸ™‚

2013-03-14 21.17.09Ā Ā  Ā 2013-03-14 21.19.59

2013-03-16 15.09.33-1

Found some frames at target the other day…. they were on sale and IĀ had coupons for them. They came out to be .50 ea. A bargainĀ right?! I want to put a few frames up in the trailer and change out pictures of us as we start visiting national parks, state parks, and camping trips. Don’t think I will keep them the bright green color though, not sure how well it will go with everything else in the trailer. We will just see, I guess. I thought about spraying them a darker green….. Thoughts?

flagsĀ Ā flags2 flags3

While, I am anxiously waiting to get in the trailer and start decorating, I am trying to findĀ things to make and do. Started noticing on some of the vintage trailers, people would have these pendant banners hanging inside or outside of the trailer. Thought it was cute, had some left over quiltingĀ fabric. Decided to sewĀ some up andĀ hey, if in the end it just doesn’t work, oh well, it was just a quick, easy little project. šŸ™‚

2013-03-16 17.23.42Ā Ā  Ā 2013-03-16 18.01.53Ā Ā Ā 

I have my triangles cut and sewn right now, but need to get some rope like material to piece it all together. I’ll be sure to post the finished product when I am done. šŸ˜‰

2013-03-16 16.10.06

So we justĀ celebrated St Paddy’s day a few days ago, and the Handy Husband wore a cable knit sweater ( found at goodwill for a dollar! can you believe it!) out to a St Paddy’s day breakfast after work( he didn’tĀ really want me to show this). After, the sweater served its purpose, I thought it would make a nice pillow for the camper, so I got right to work cutting it up.

2013-03-18 13.58.24

The sweater was pretty large and I wanted to get 2 pillows out of the front side, but it just wasn’t big enough for the size of pillows that I wanted, so I am making 2 pillows using the knit from the front of the sweater and the other from the back of the sweater. The pillow sizes when done will be 24 x 16. Oh, and the back of the pillows is just a plain cream cotton material that over laps ( kinda like some pillow cases)

2013-03-18 14.09.14 2013-03-18 14.23.44

what ya think of that ingenuity? šŸ™‚

Progress on Our Little Trailer

2013-03-05 13.50.23

So, we did not get much time to work on the camper this weekend. The Handy Husband had his weekend warrior duties and between rain showers, did not leave much time. For the one day we did get to work on it,Ā quite a bit got done.Ā I finally took a picture of the trailer as it sits in our backyard. The picture I used in the other posts was from the previous owner. When Tony starts working more and more on the outside he will be wishing we had a big indoor garage, or at least a covered parking area. well…. what do you do? make do with what you got. šŸ™‚

2013-03-05 15.06.55 2013-03-05 15.06.29

This is the back half of the trailer, where the couch was sitting. We found some more rotted wood, so Handy Husband took out what was bad and replaced with new. It’s not the prettiest to look at, but itĀ sure isĀ sturdy.

When we brought the trailer home, we noticed the signal lights were not working correctly, so this is also the time we tackle that problem, while we have the walls open to figure out the wiring and put in newĀ  ( if need be).

2013-03-05 12.30.36

And yes, new wiring was needed…

2013-03-05 13.49.31Ā Ā  2013-03-05 13.51.26

Some old wiring was on the outside of the trailer and held with some type of putty “junk”. Wire got rerouted to inside the trailer, and surprisingly, no major electrical shocks to the Handy Husband(yet).

2013-03-05 12.03.15

This old felt pendant was one of the other cool and nifty things IĀ found in the trailer. It will definitelyĀ go back in the trailer, hanging up somewhere for all to see. IĀ will keep my eyes peeledĀ to try to find a few more to go with it.

2013-02-26 16.49.20Ā  2013-02-26 16.47.54

Ok, so here it is, the paper mache antlers. I finally used craft paint to keep the purple tissue paper from bleeding through and I cant wait to put them up in the trailer and see how they look.

IMG_1029

We were up close to Seattle yesterday, and decided to stop by IKEA and grab a fewĀ things. I had a list….. so we could get in and get out.” You let me down IKEA, you let me down.”

The frame sizes I had written down were not the sizes they had in stock at the store. šŸ˜¦Ā I really wanted to grab a few sheepskin rugs to throw on the back of the seats (yeah, they were out of those!), and we couldn’tĀ find these little spice racks! ARRGH.Ā Had to FINALLY ask for help, andĀ customer serviceĀ found the racks in a tiny little corner of the store( Thank You.). On theĀ flip side, we found some pillow forms for next to nothing, that will fit my moose covers, and a nice comforter in the AS-IS for half off(woot woot). Also found a cool pillow ( I think) that hasĀ a geometric pattern (see below) that kind of reminded me of a native american design. Tony had differing ideas…. šŸ˜€ guess who will win that argument. šŸ˜‰

lappljung-ruta-cushion-cover__0149803_PE307967_S4tejn-faux-sheepskin__0146820_PE305815_S4